基于 VSCode 使用 Tabby 插件搭建免费的 GitHub Copilot
使用的模型
- 代码生成
Tabby使用的是Deepseek Coder 6.7B模型。
部署服务器端
Tabby 安装
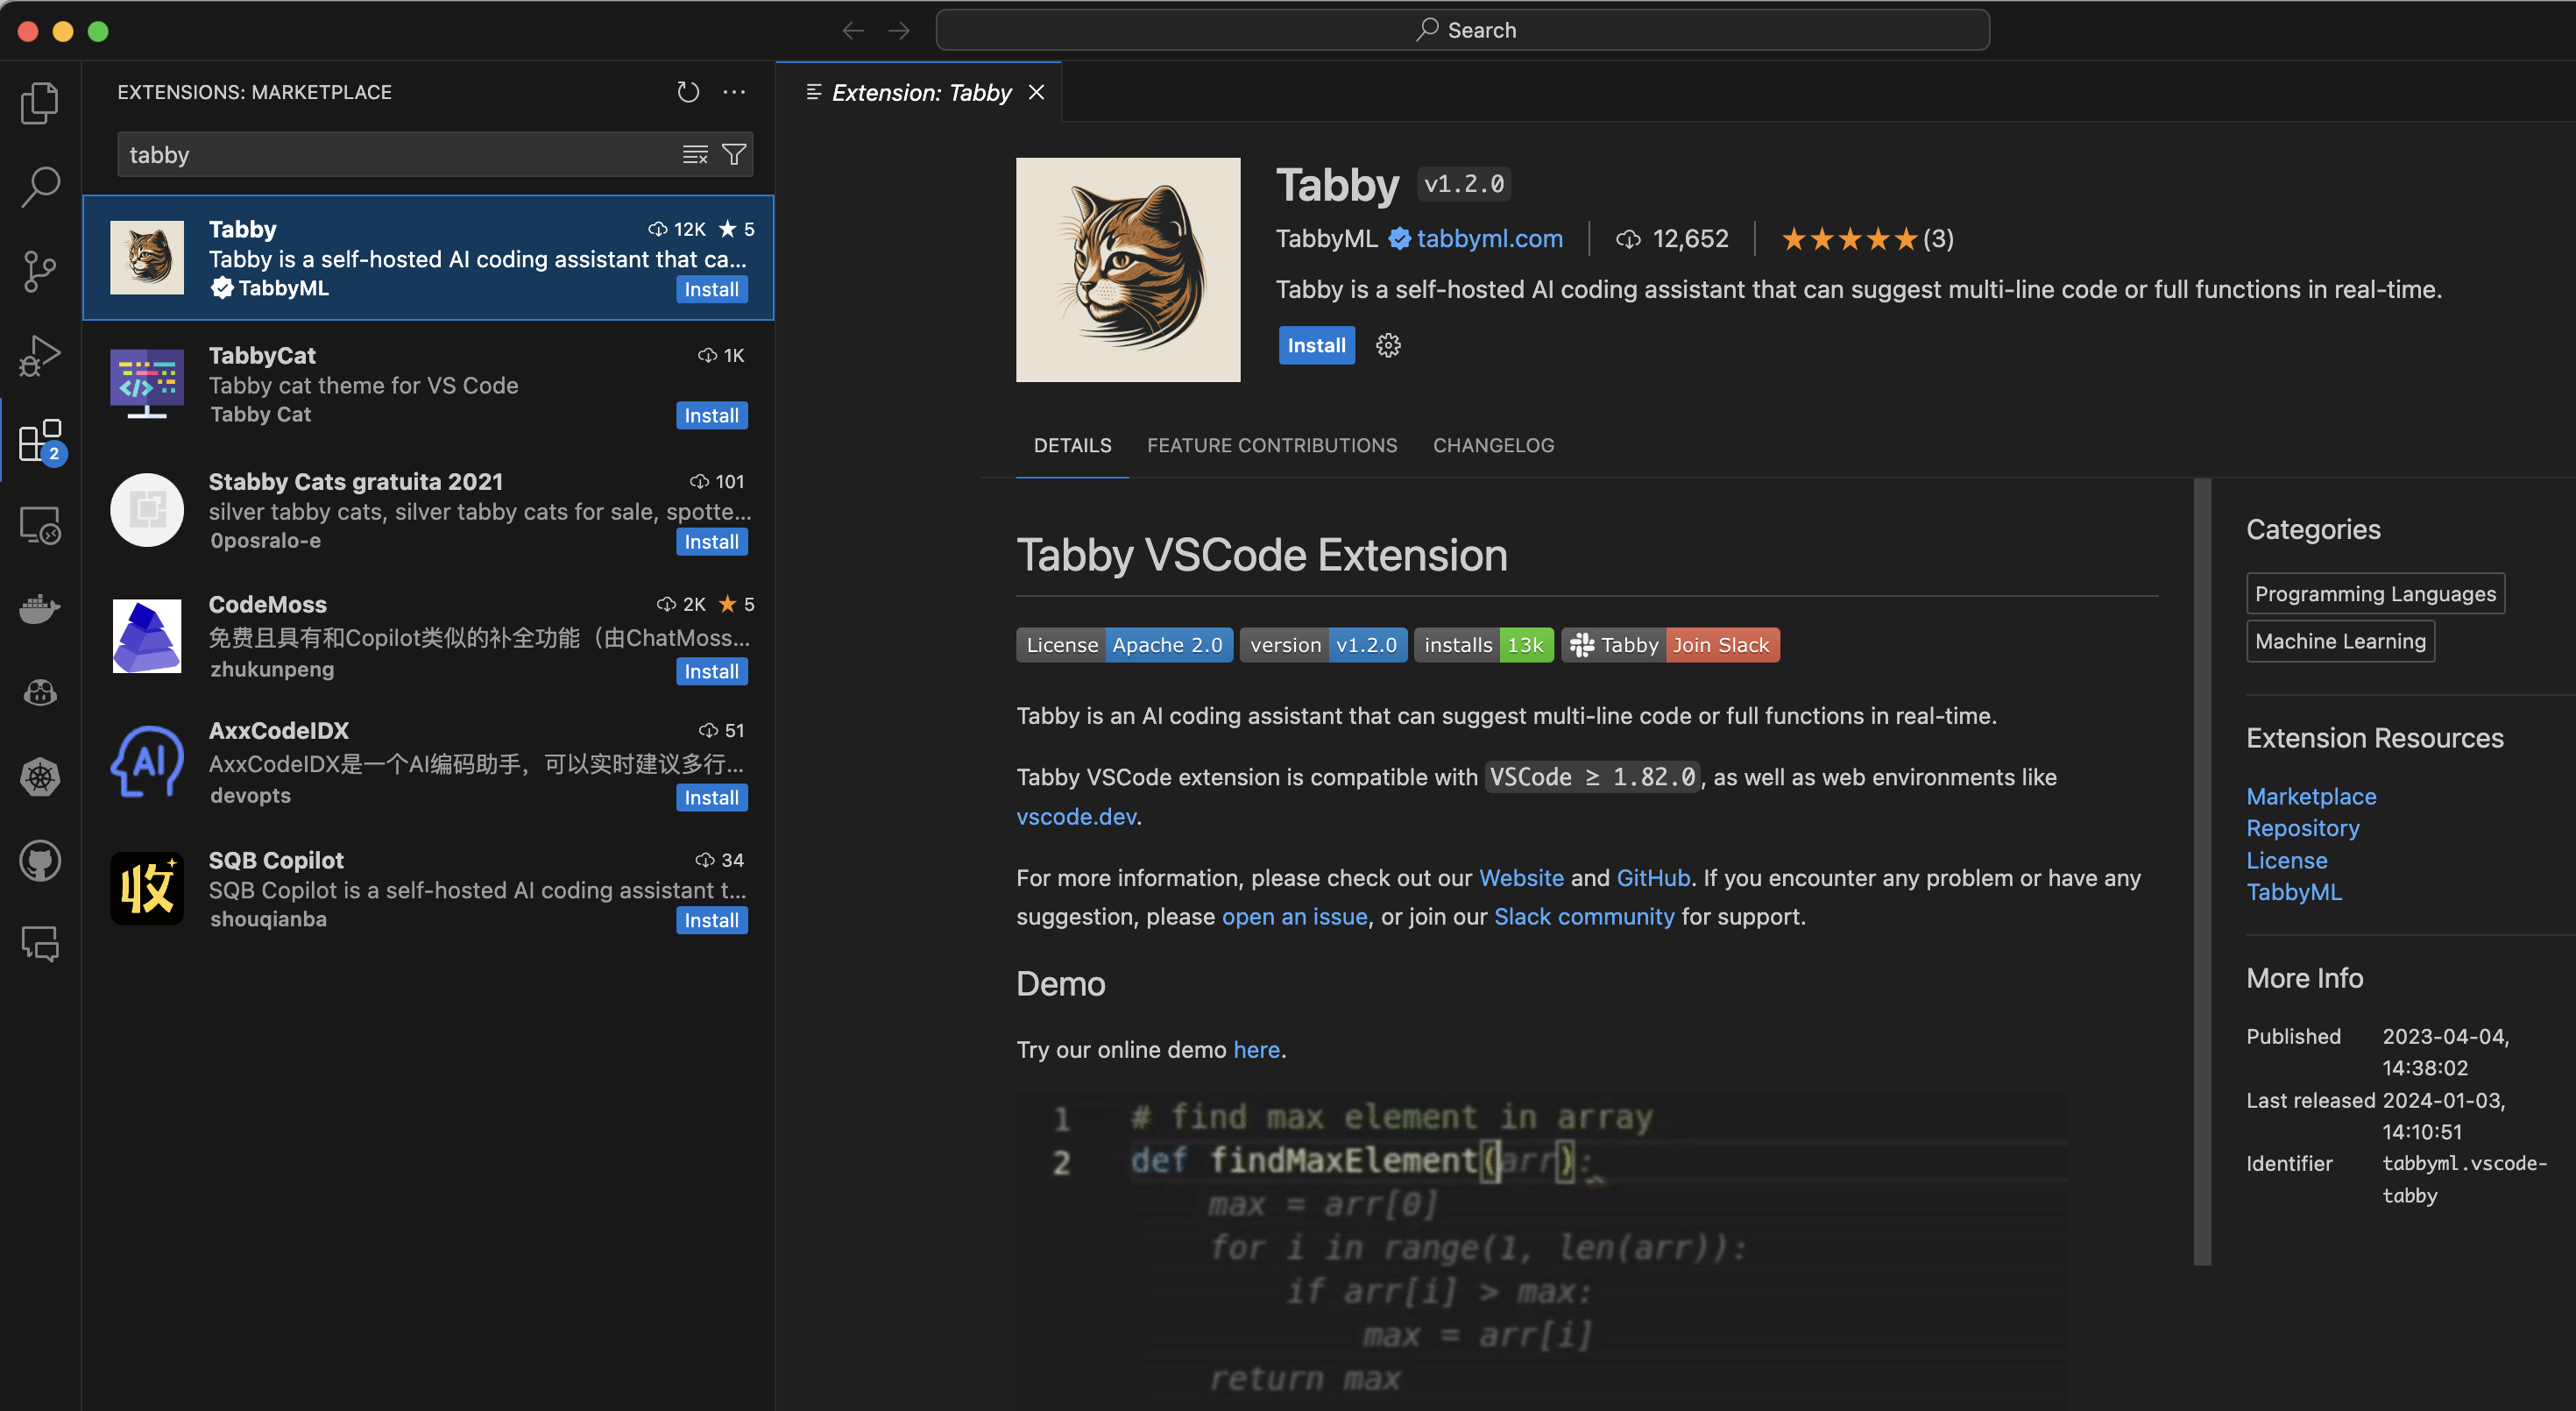
Tabby 配置
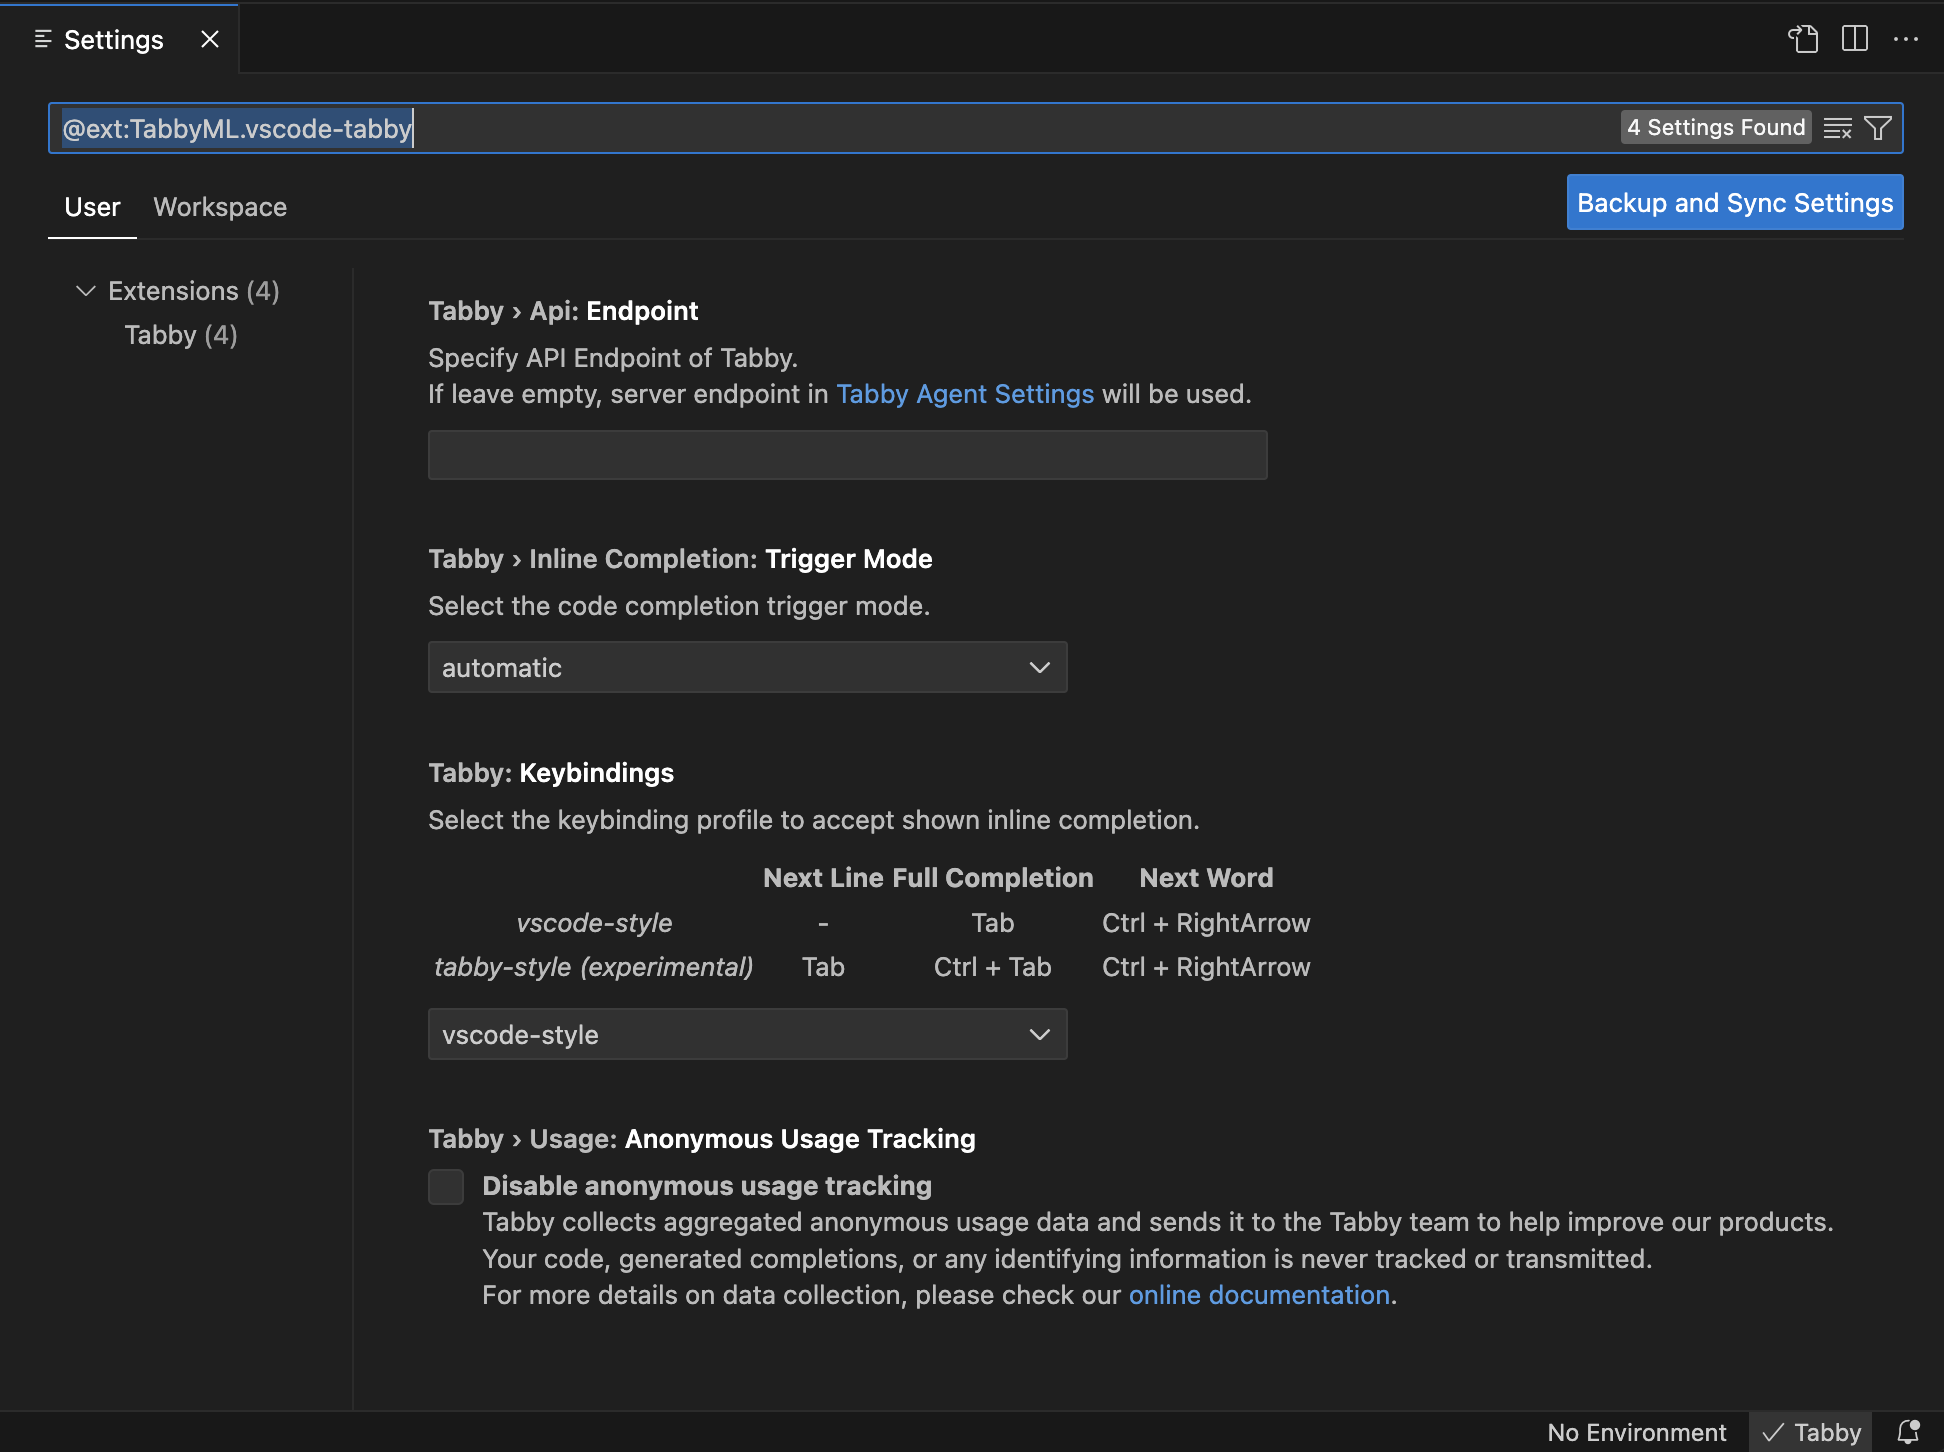
单击状态栏中的 Tabby 图标,打开 Tabby 配置页面。
参数
- EndPoint:
http://172.16.33.66:8080
使用 Tabby
代码生成

使用的模型
Tabby 使用的是 Deepseek Coder 6.7B 模型。部署服务器端
Tabby 安装
Tabby 配置
单击状态栏中的 Tabby 图标,打开 Tabby 配置页面。
参数
http://172.16.33.66:8080
使用 Tabby
代码生成
使用的模型
Tabby 使用的是 Deepseek Coder 6.7B 模型。CodeGPT 使用的是 ChatGLM3-6B 模型。这个后面考虑使用 Deepseek Coder 6.7B 来替换。部署服务器端
安装 InteliJ IDEA
安装插件
插件
安装
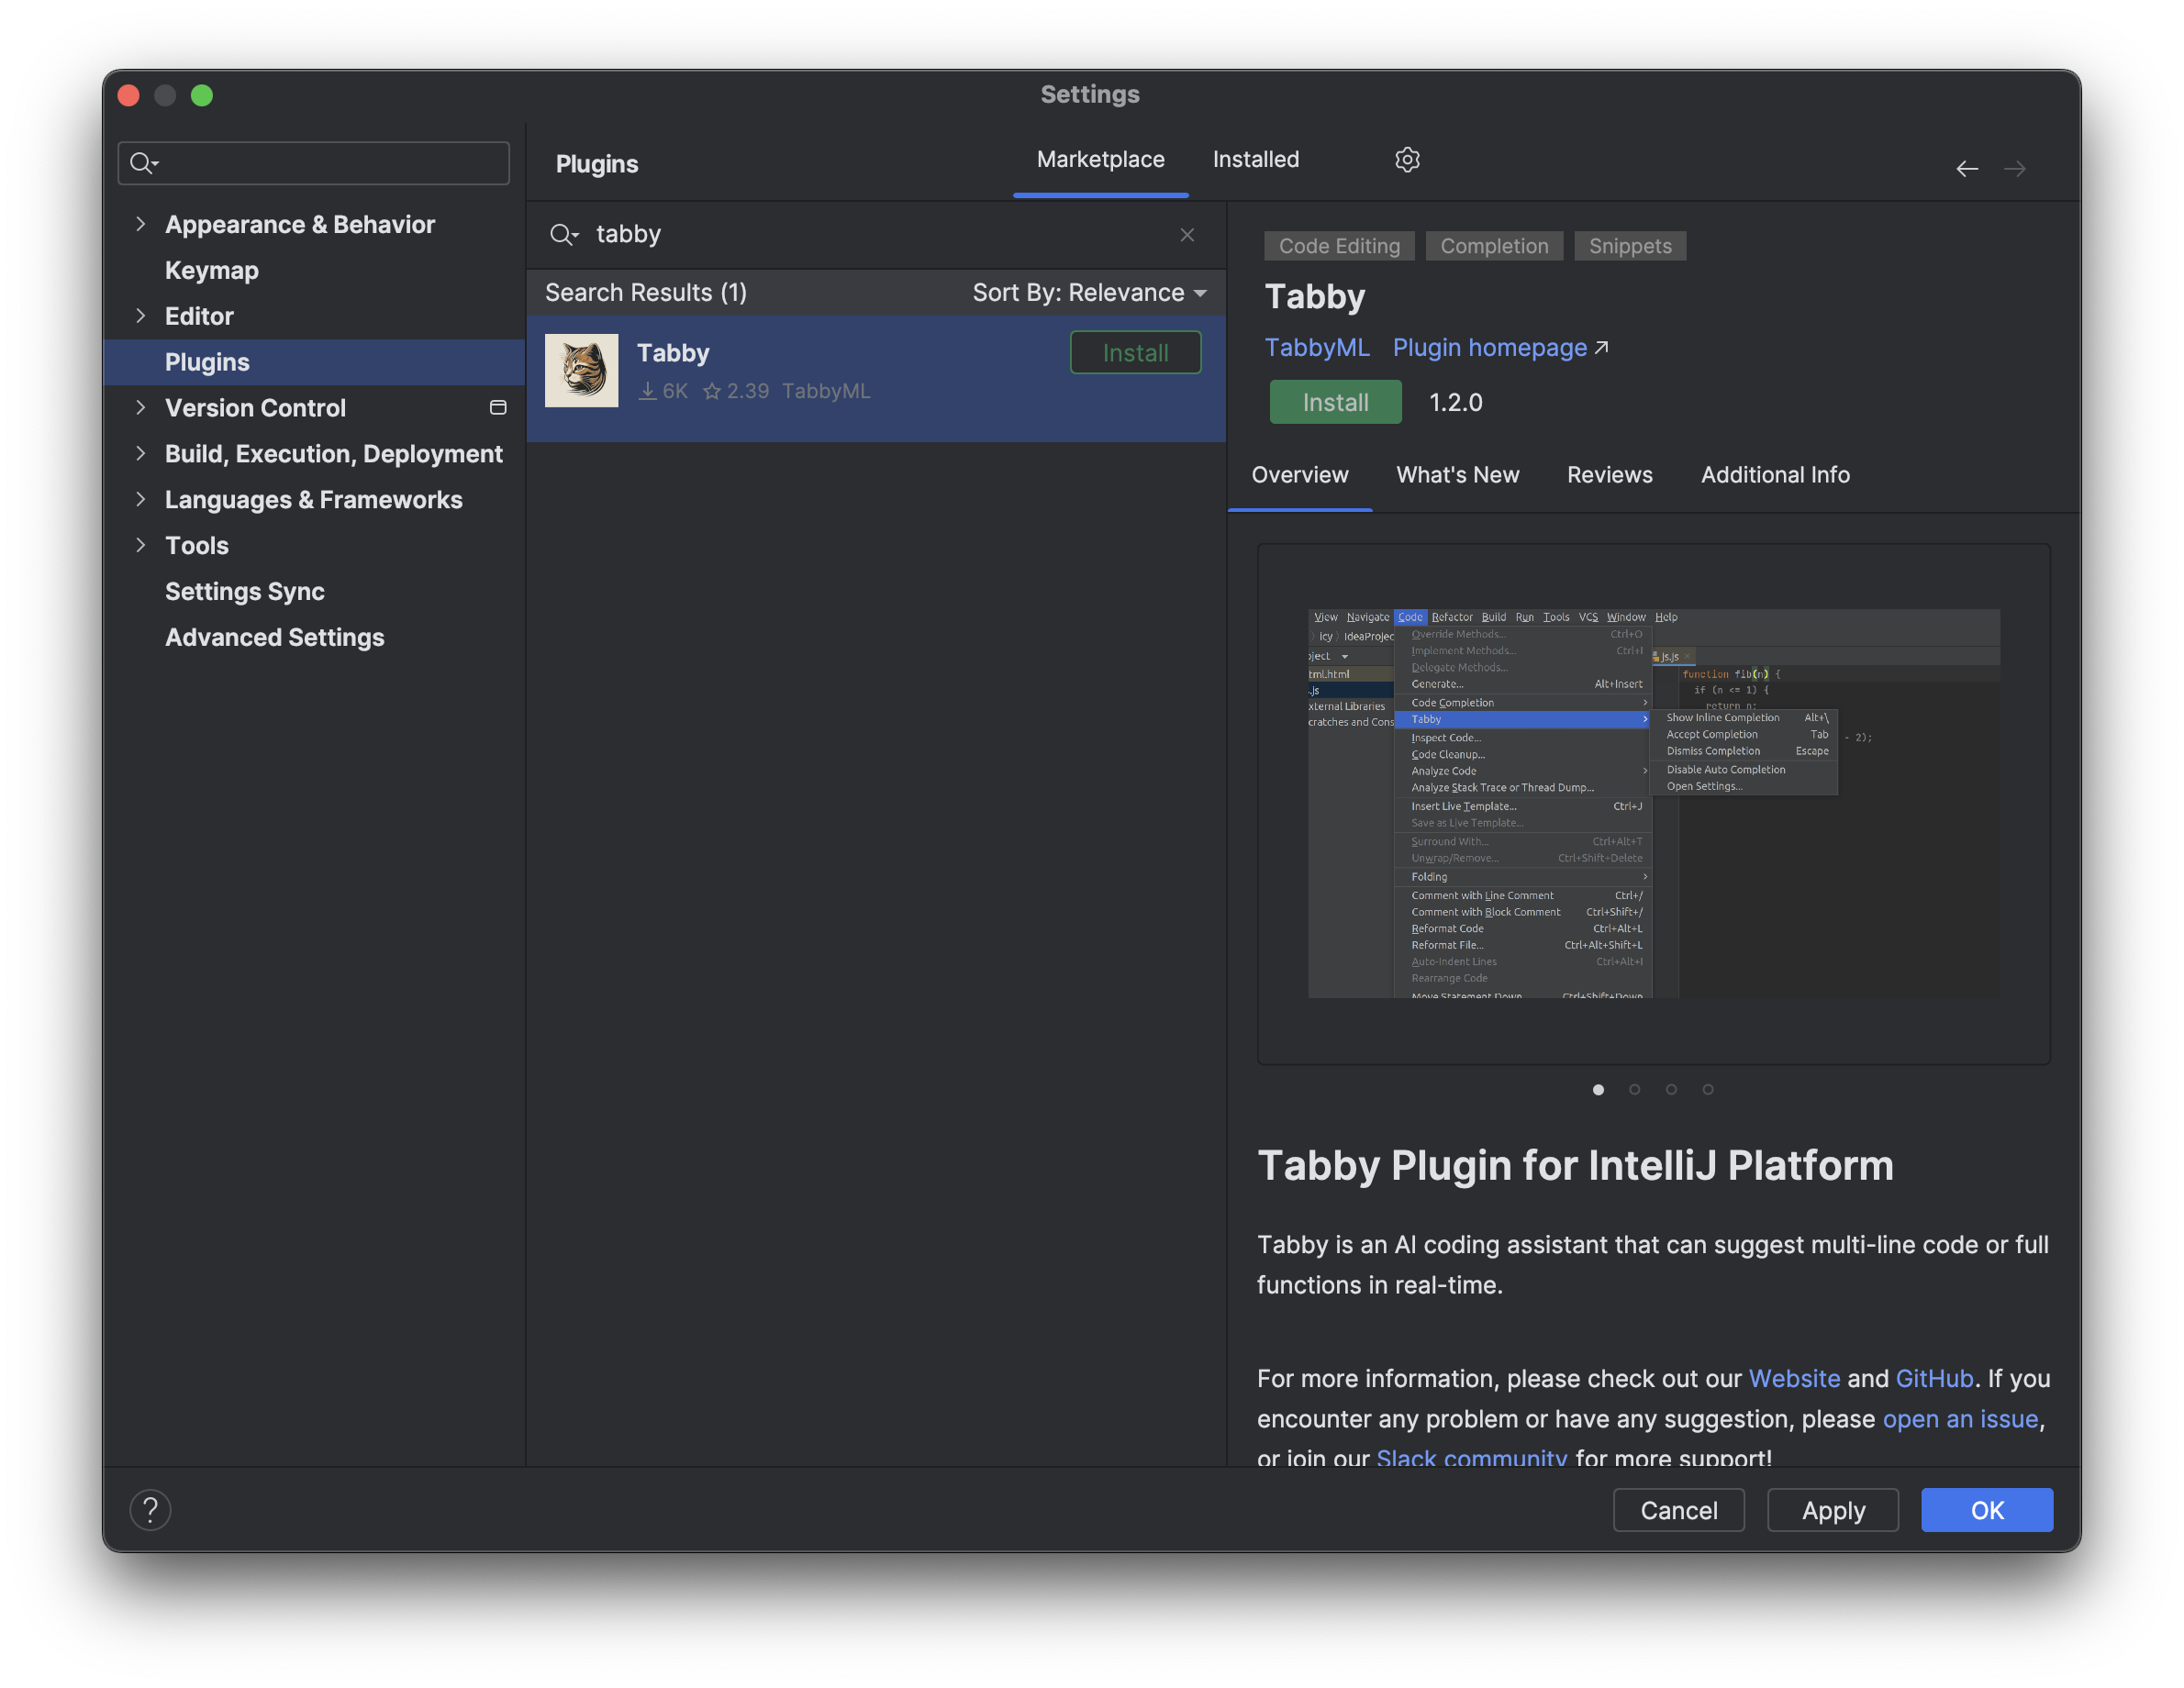
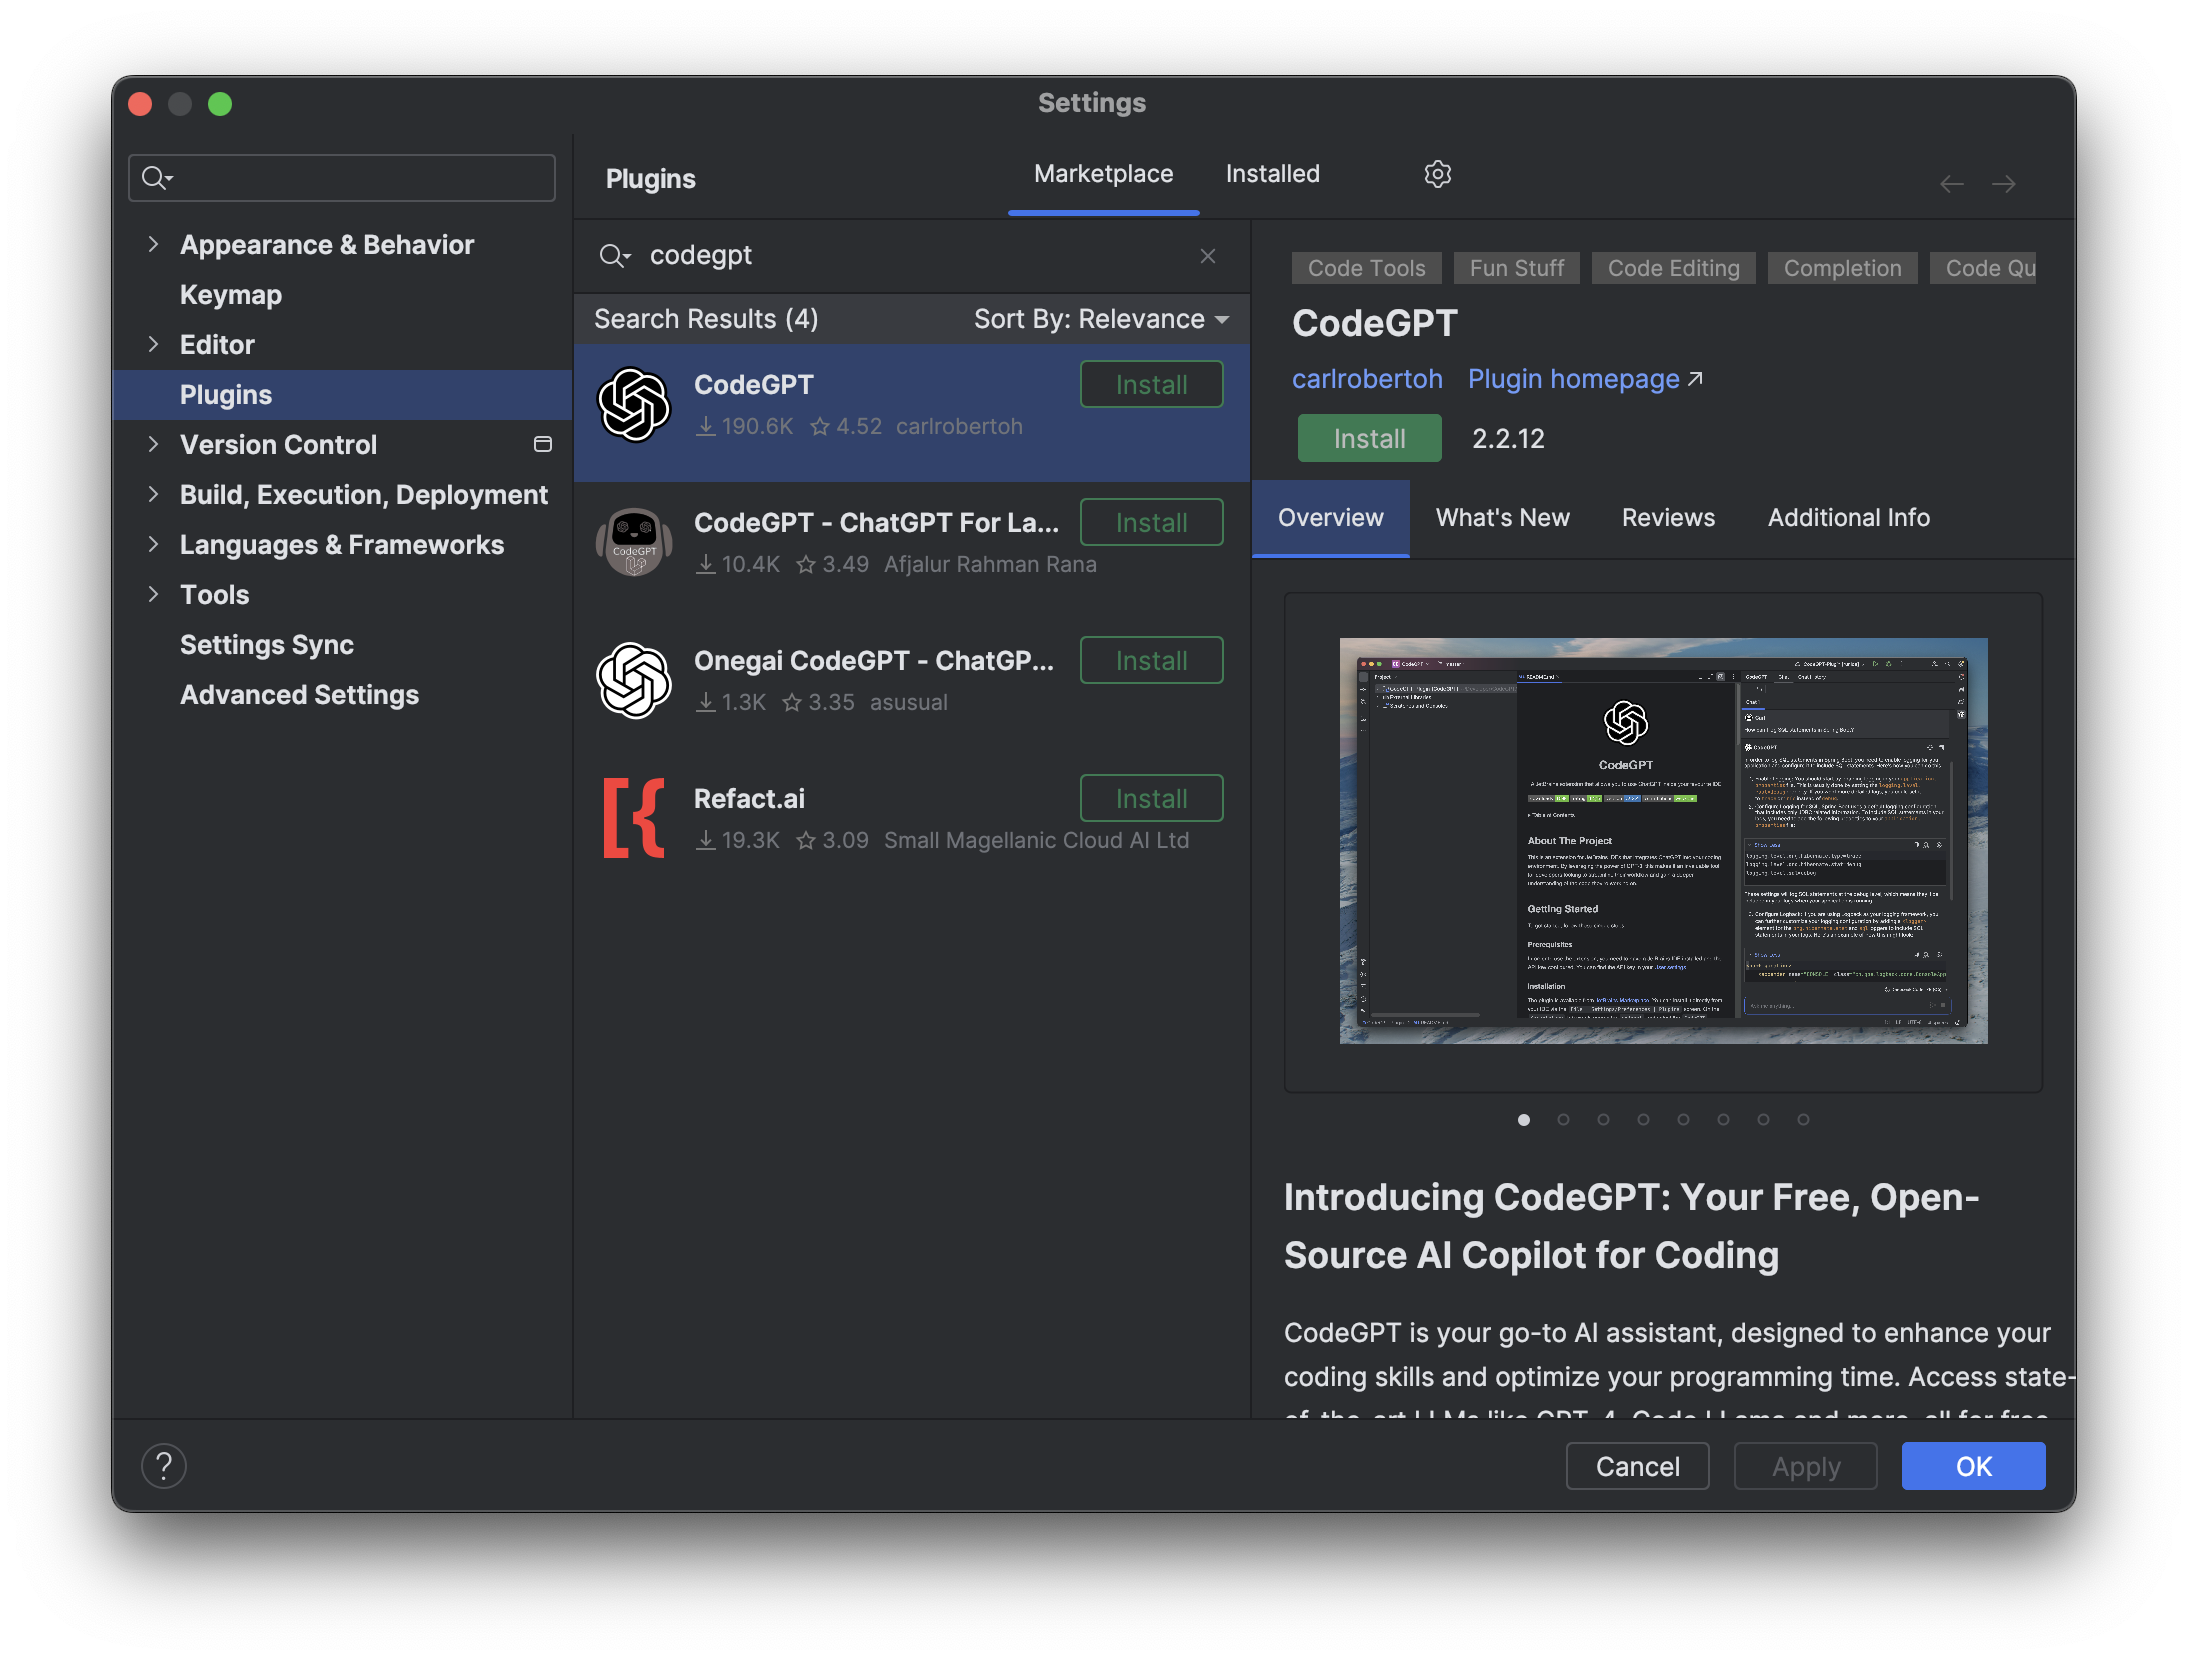
打开 IntelliJ IDEA,选择 Settings 菜单,选择 Plugins,搜索 Tabby 和 CodeGPT,点击 Install 安装。
配置插件
Tabby
参数
http://172.16.33.66:8080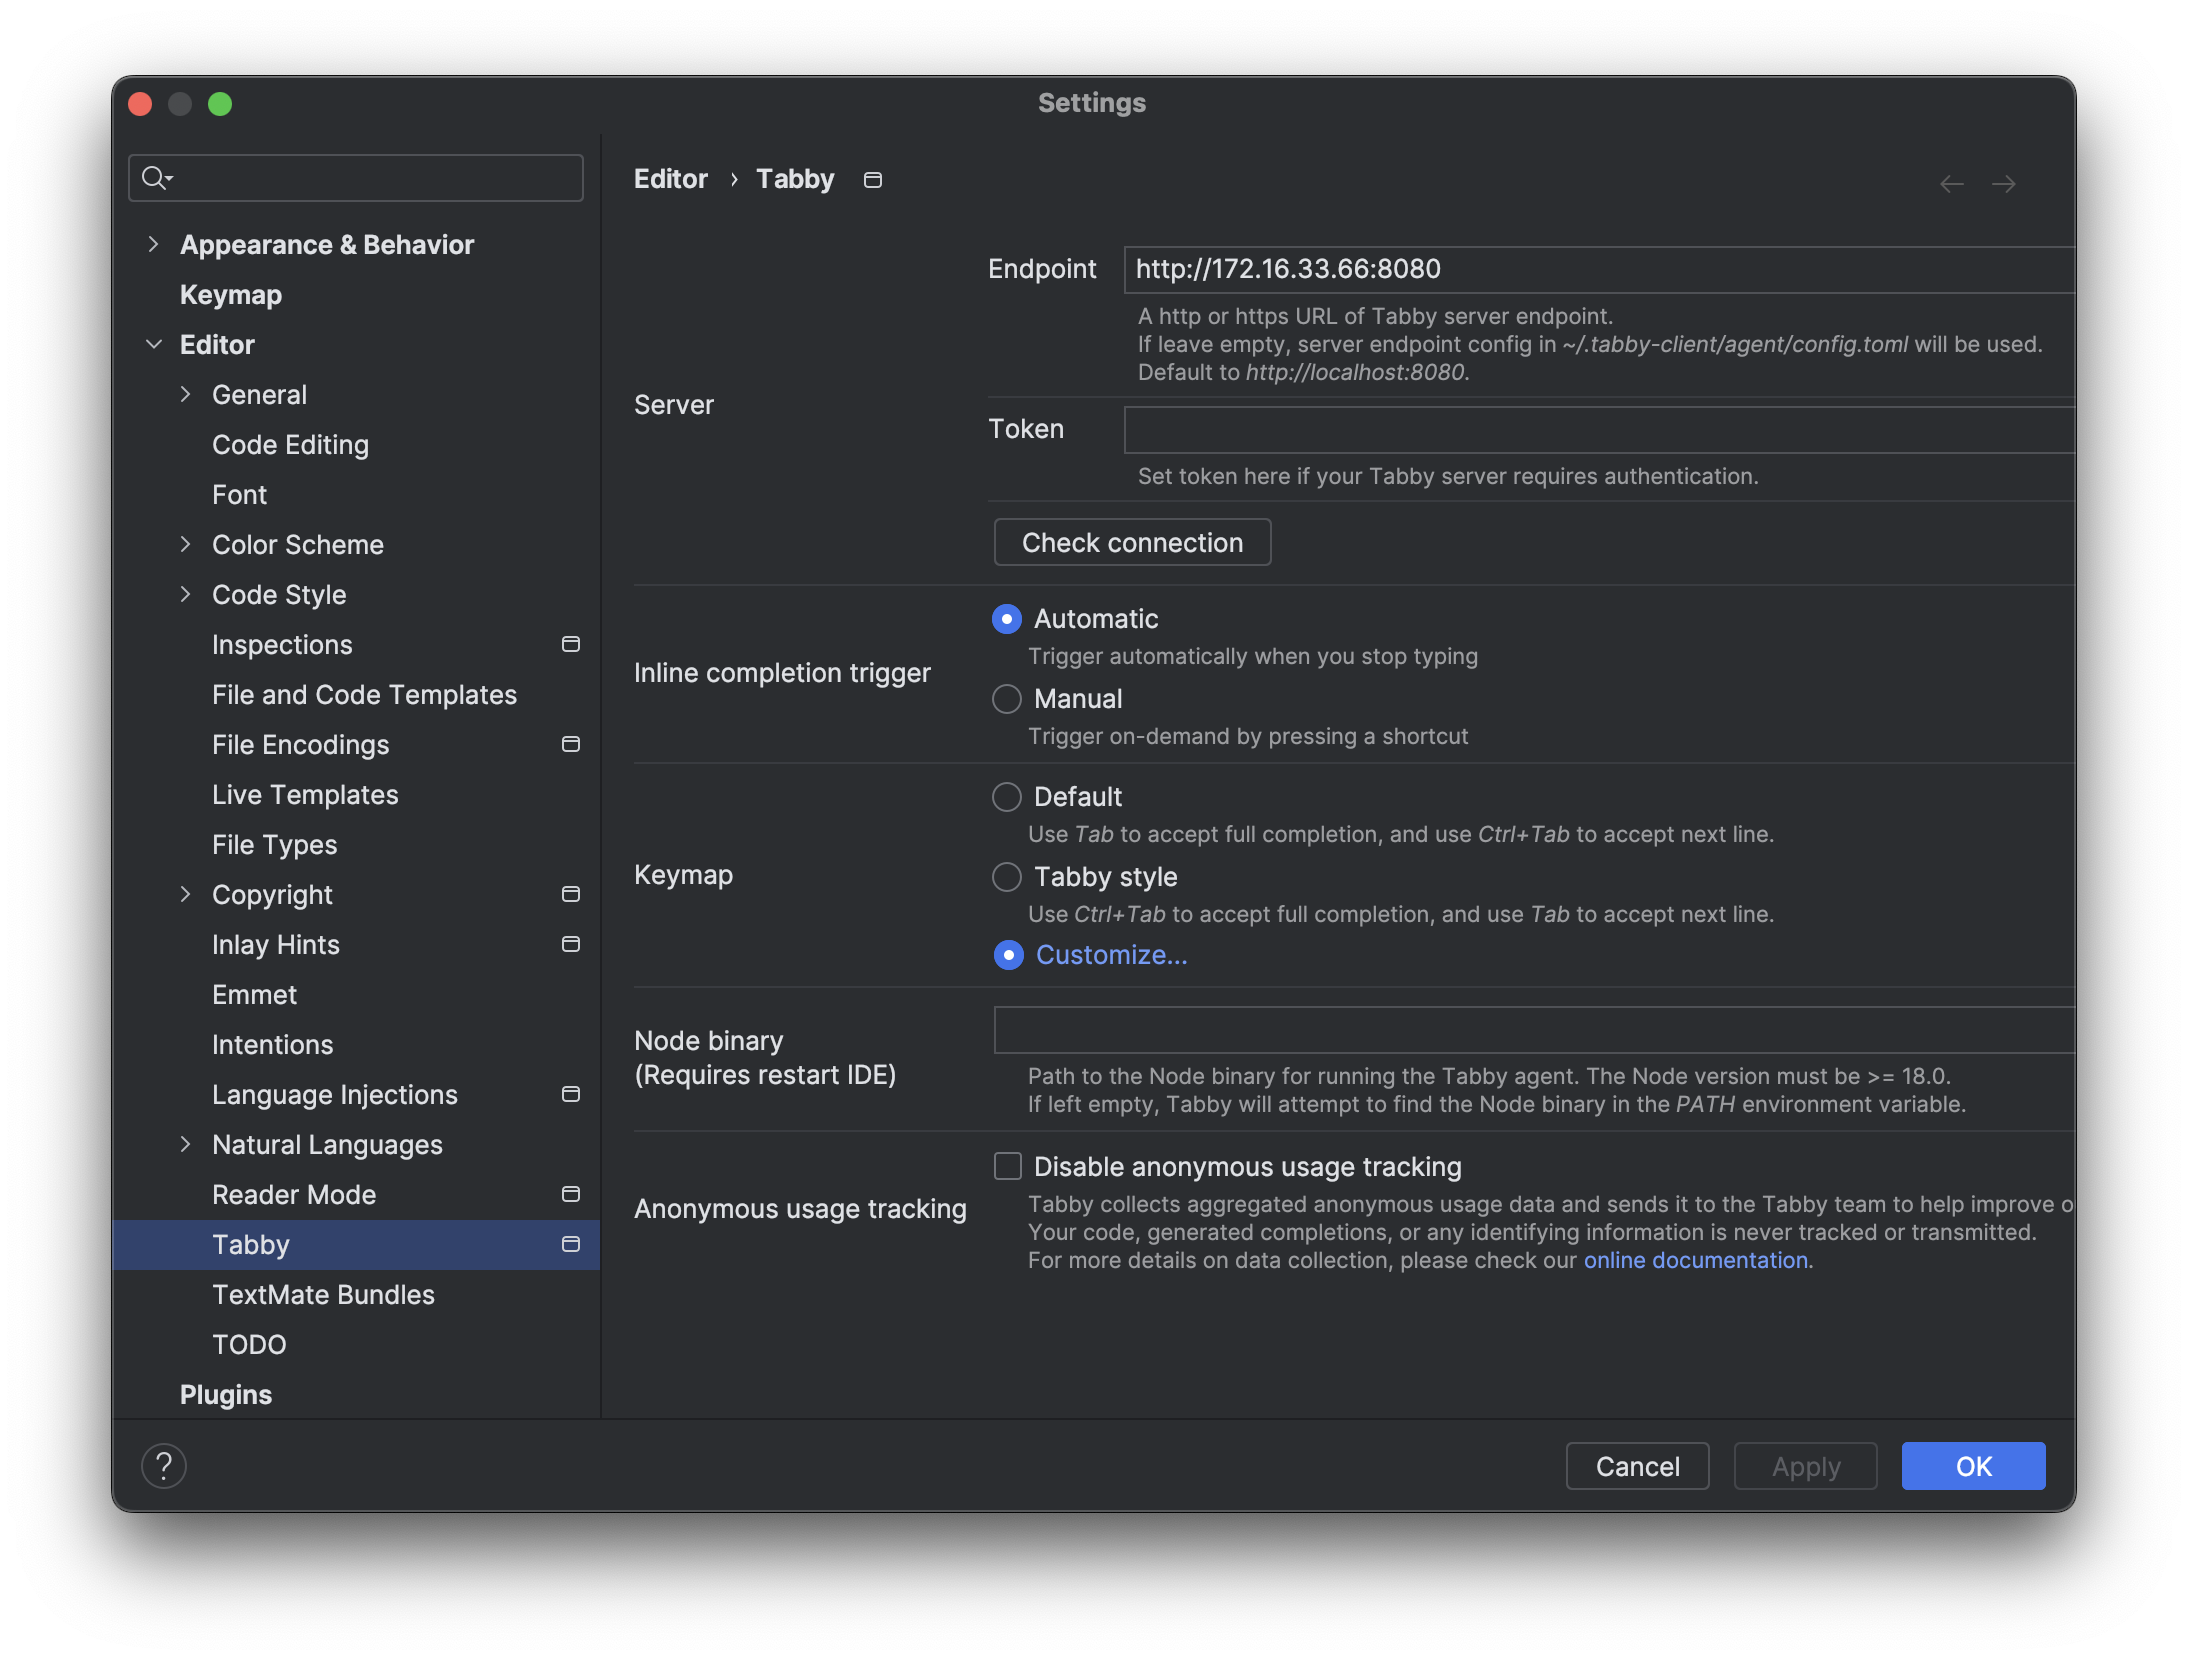
CodeGPT
参数
OpenAI ServiceNULLGPT-3.5(4k)http://172.16.33.66:8000
使用插件
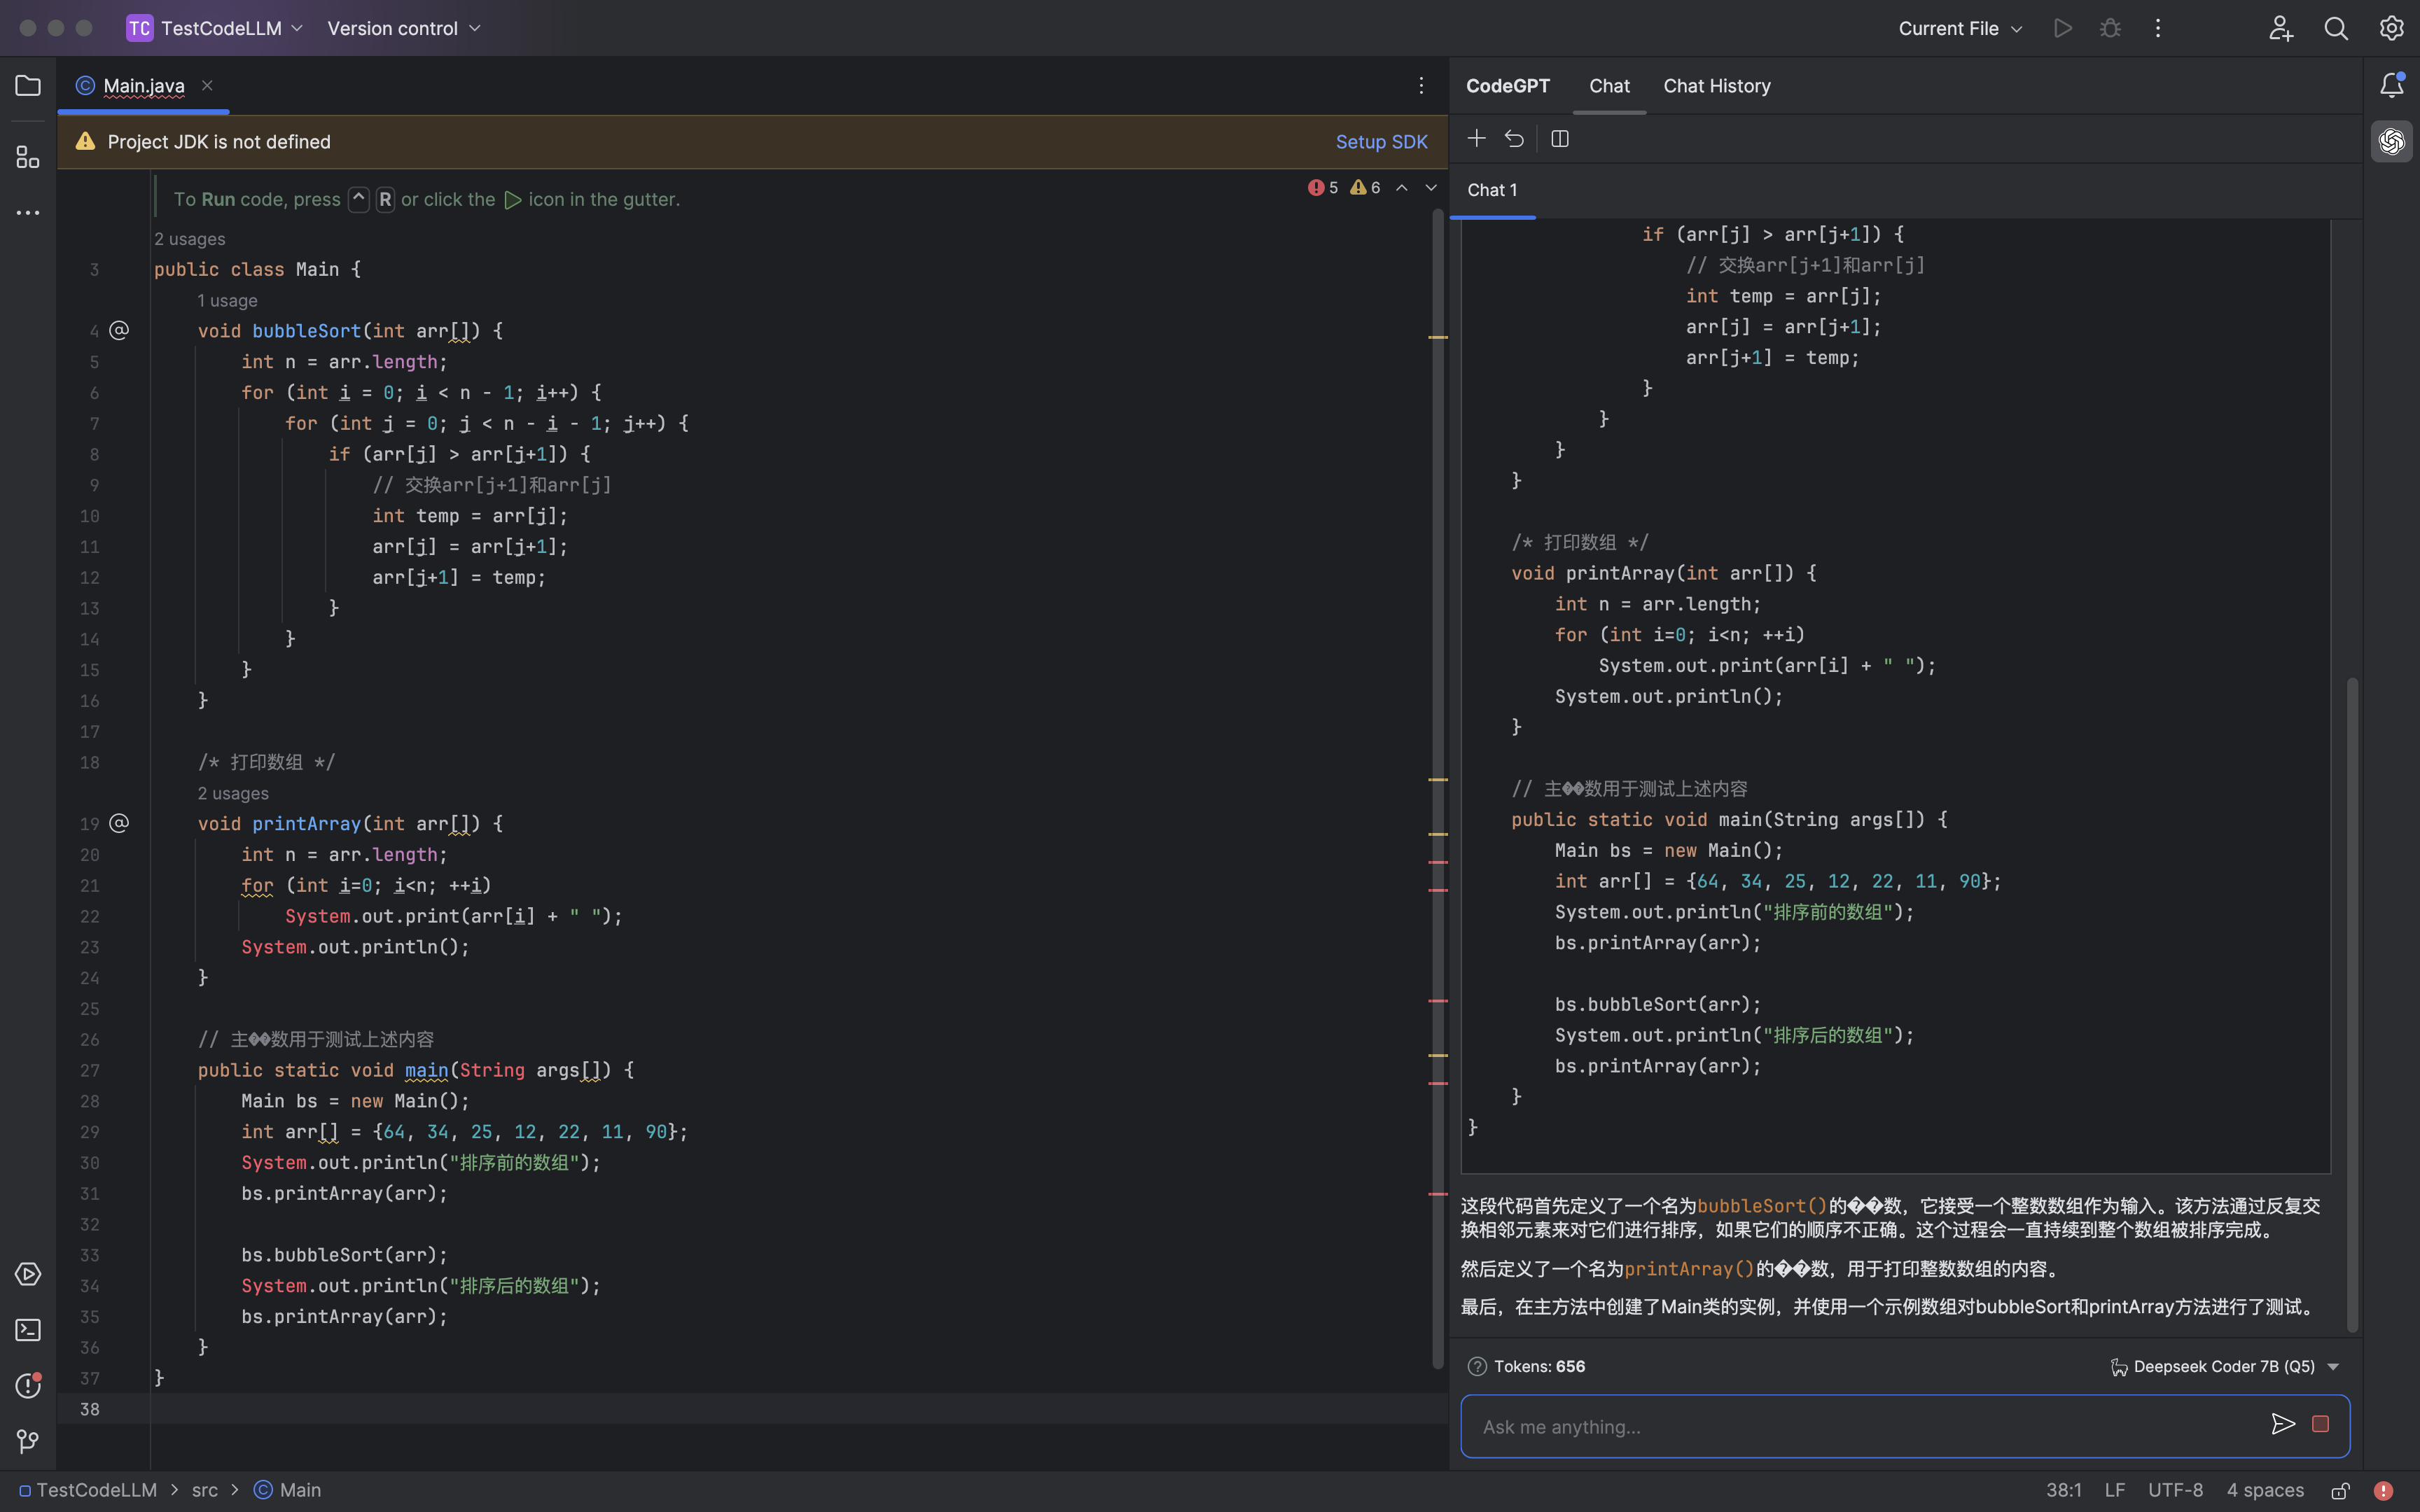
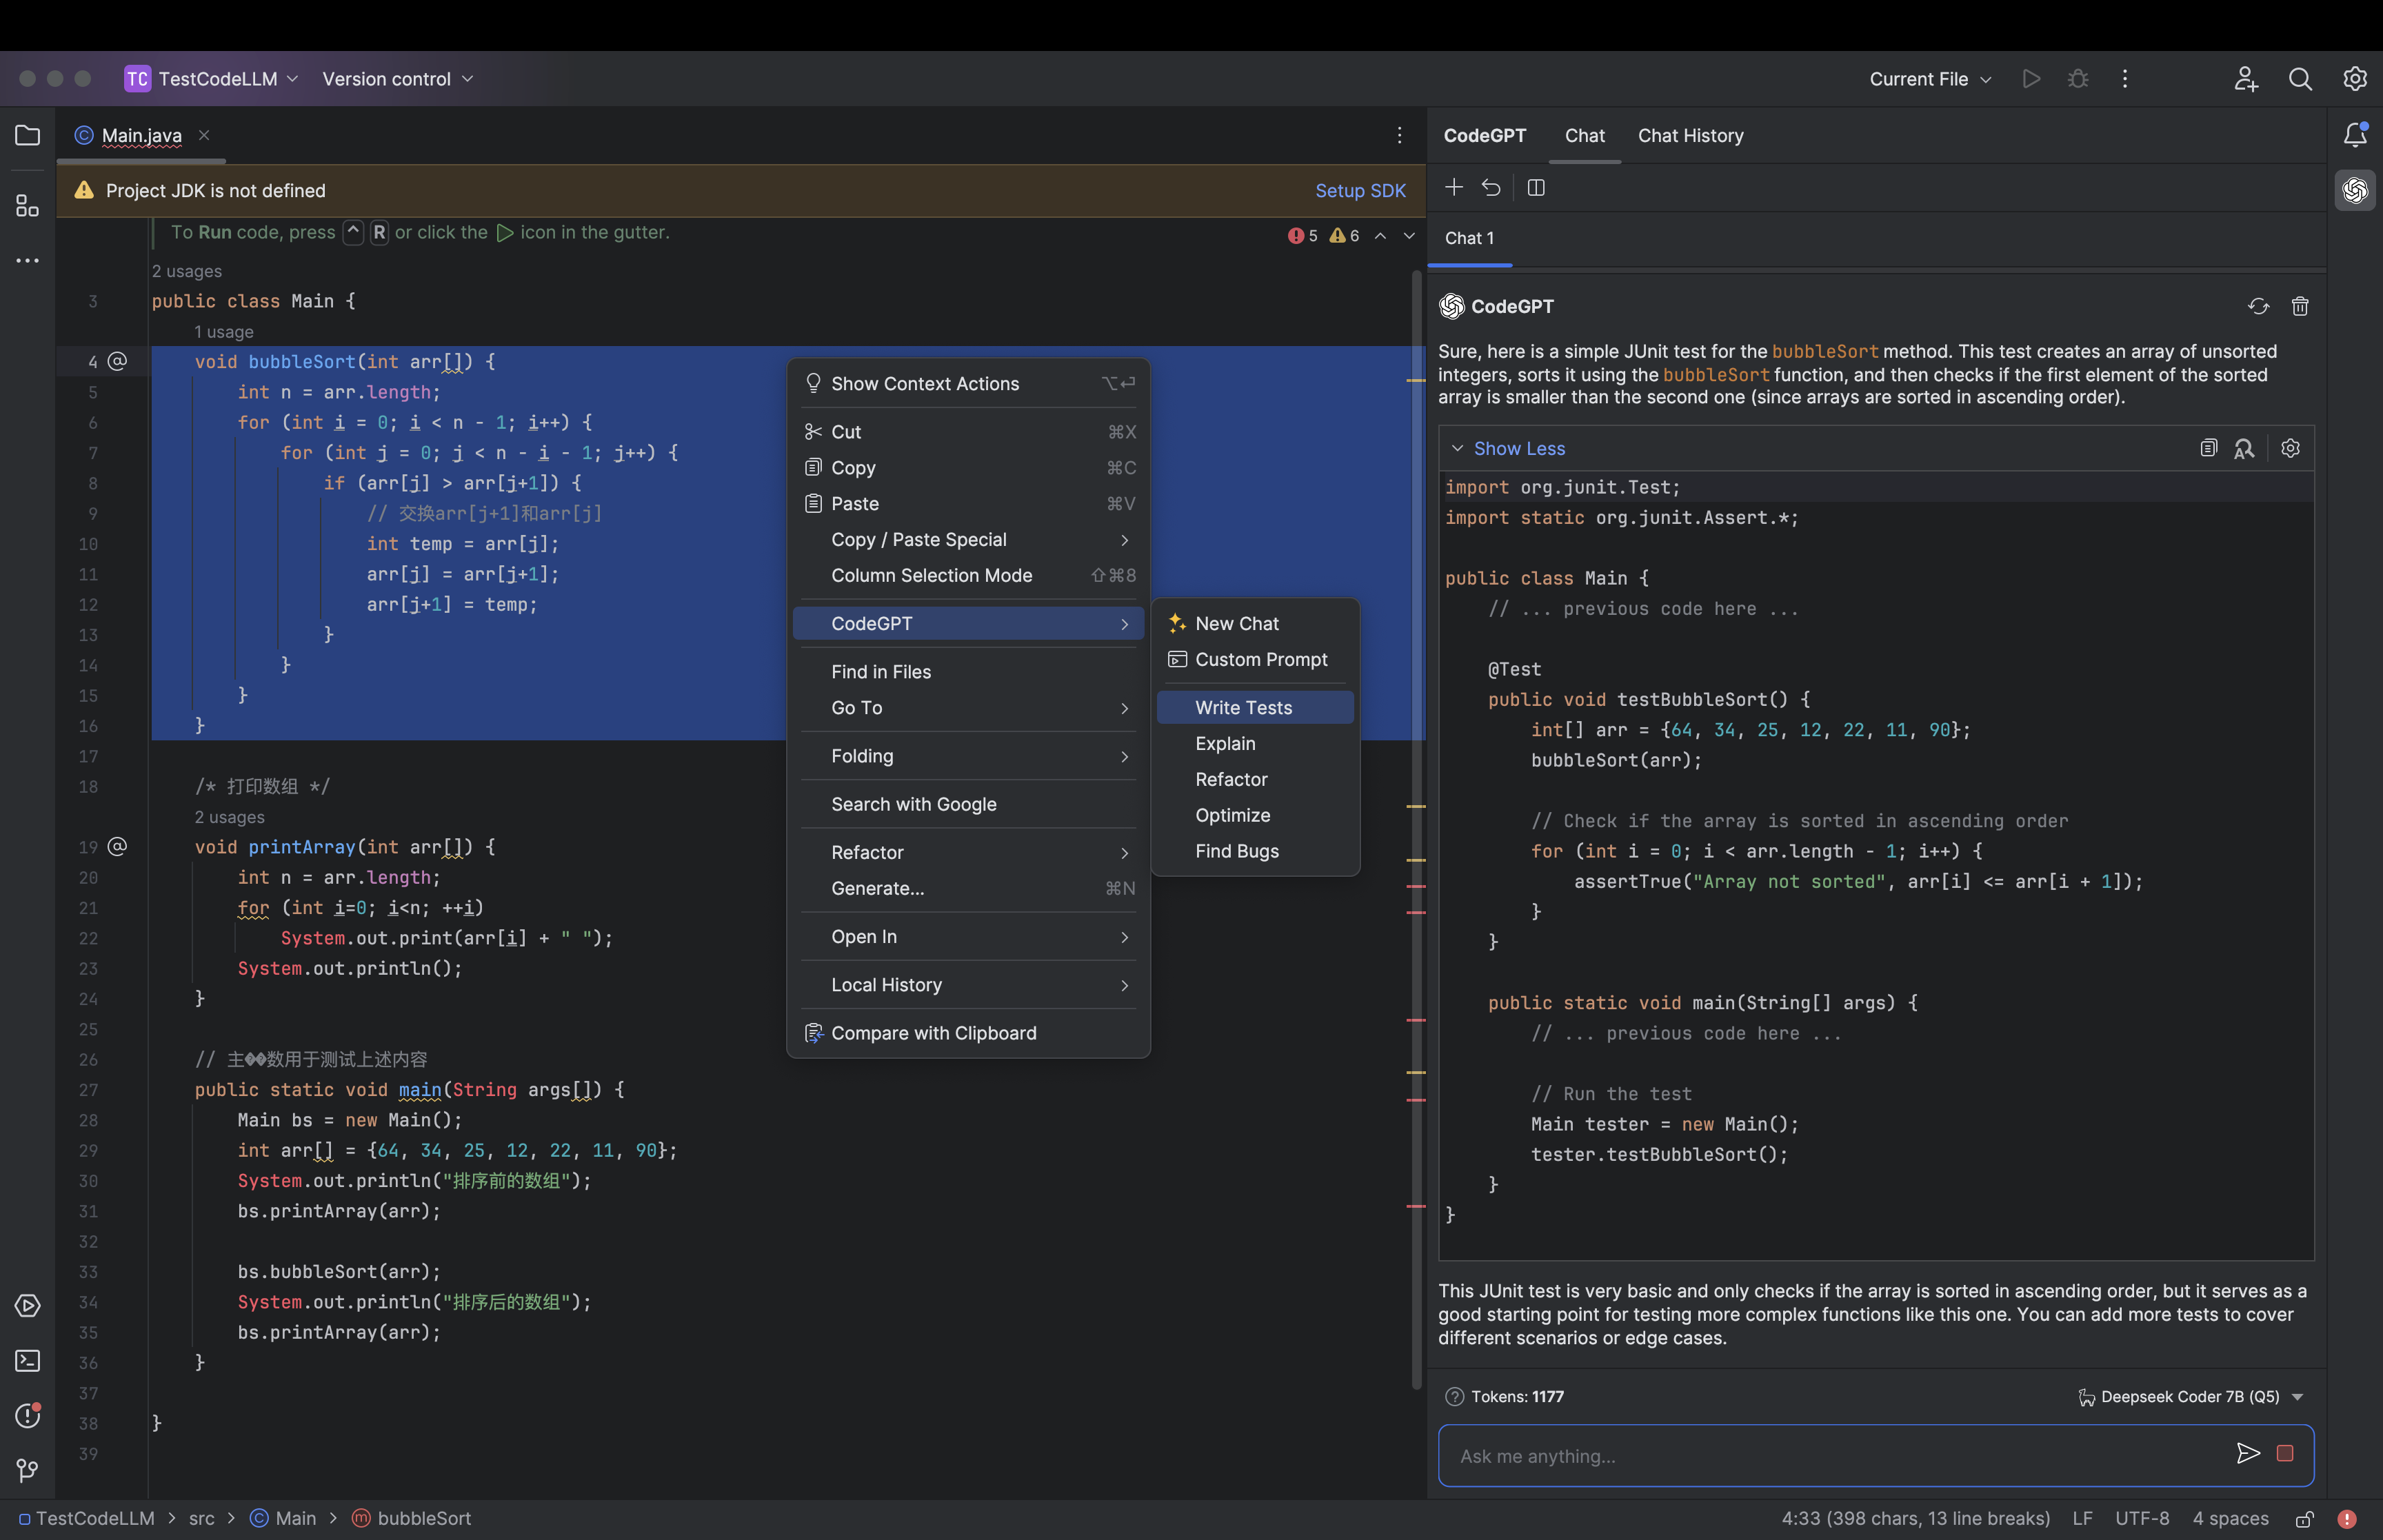
AI 聊天
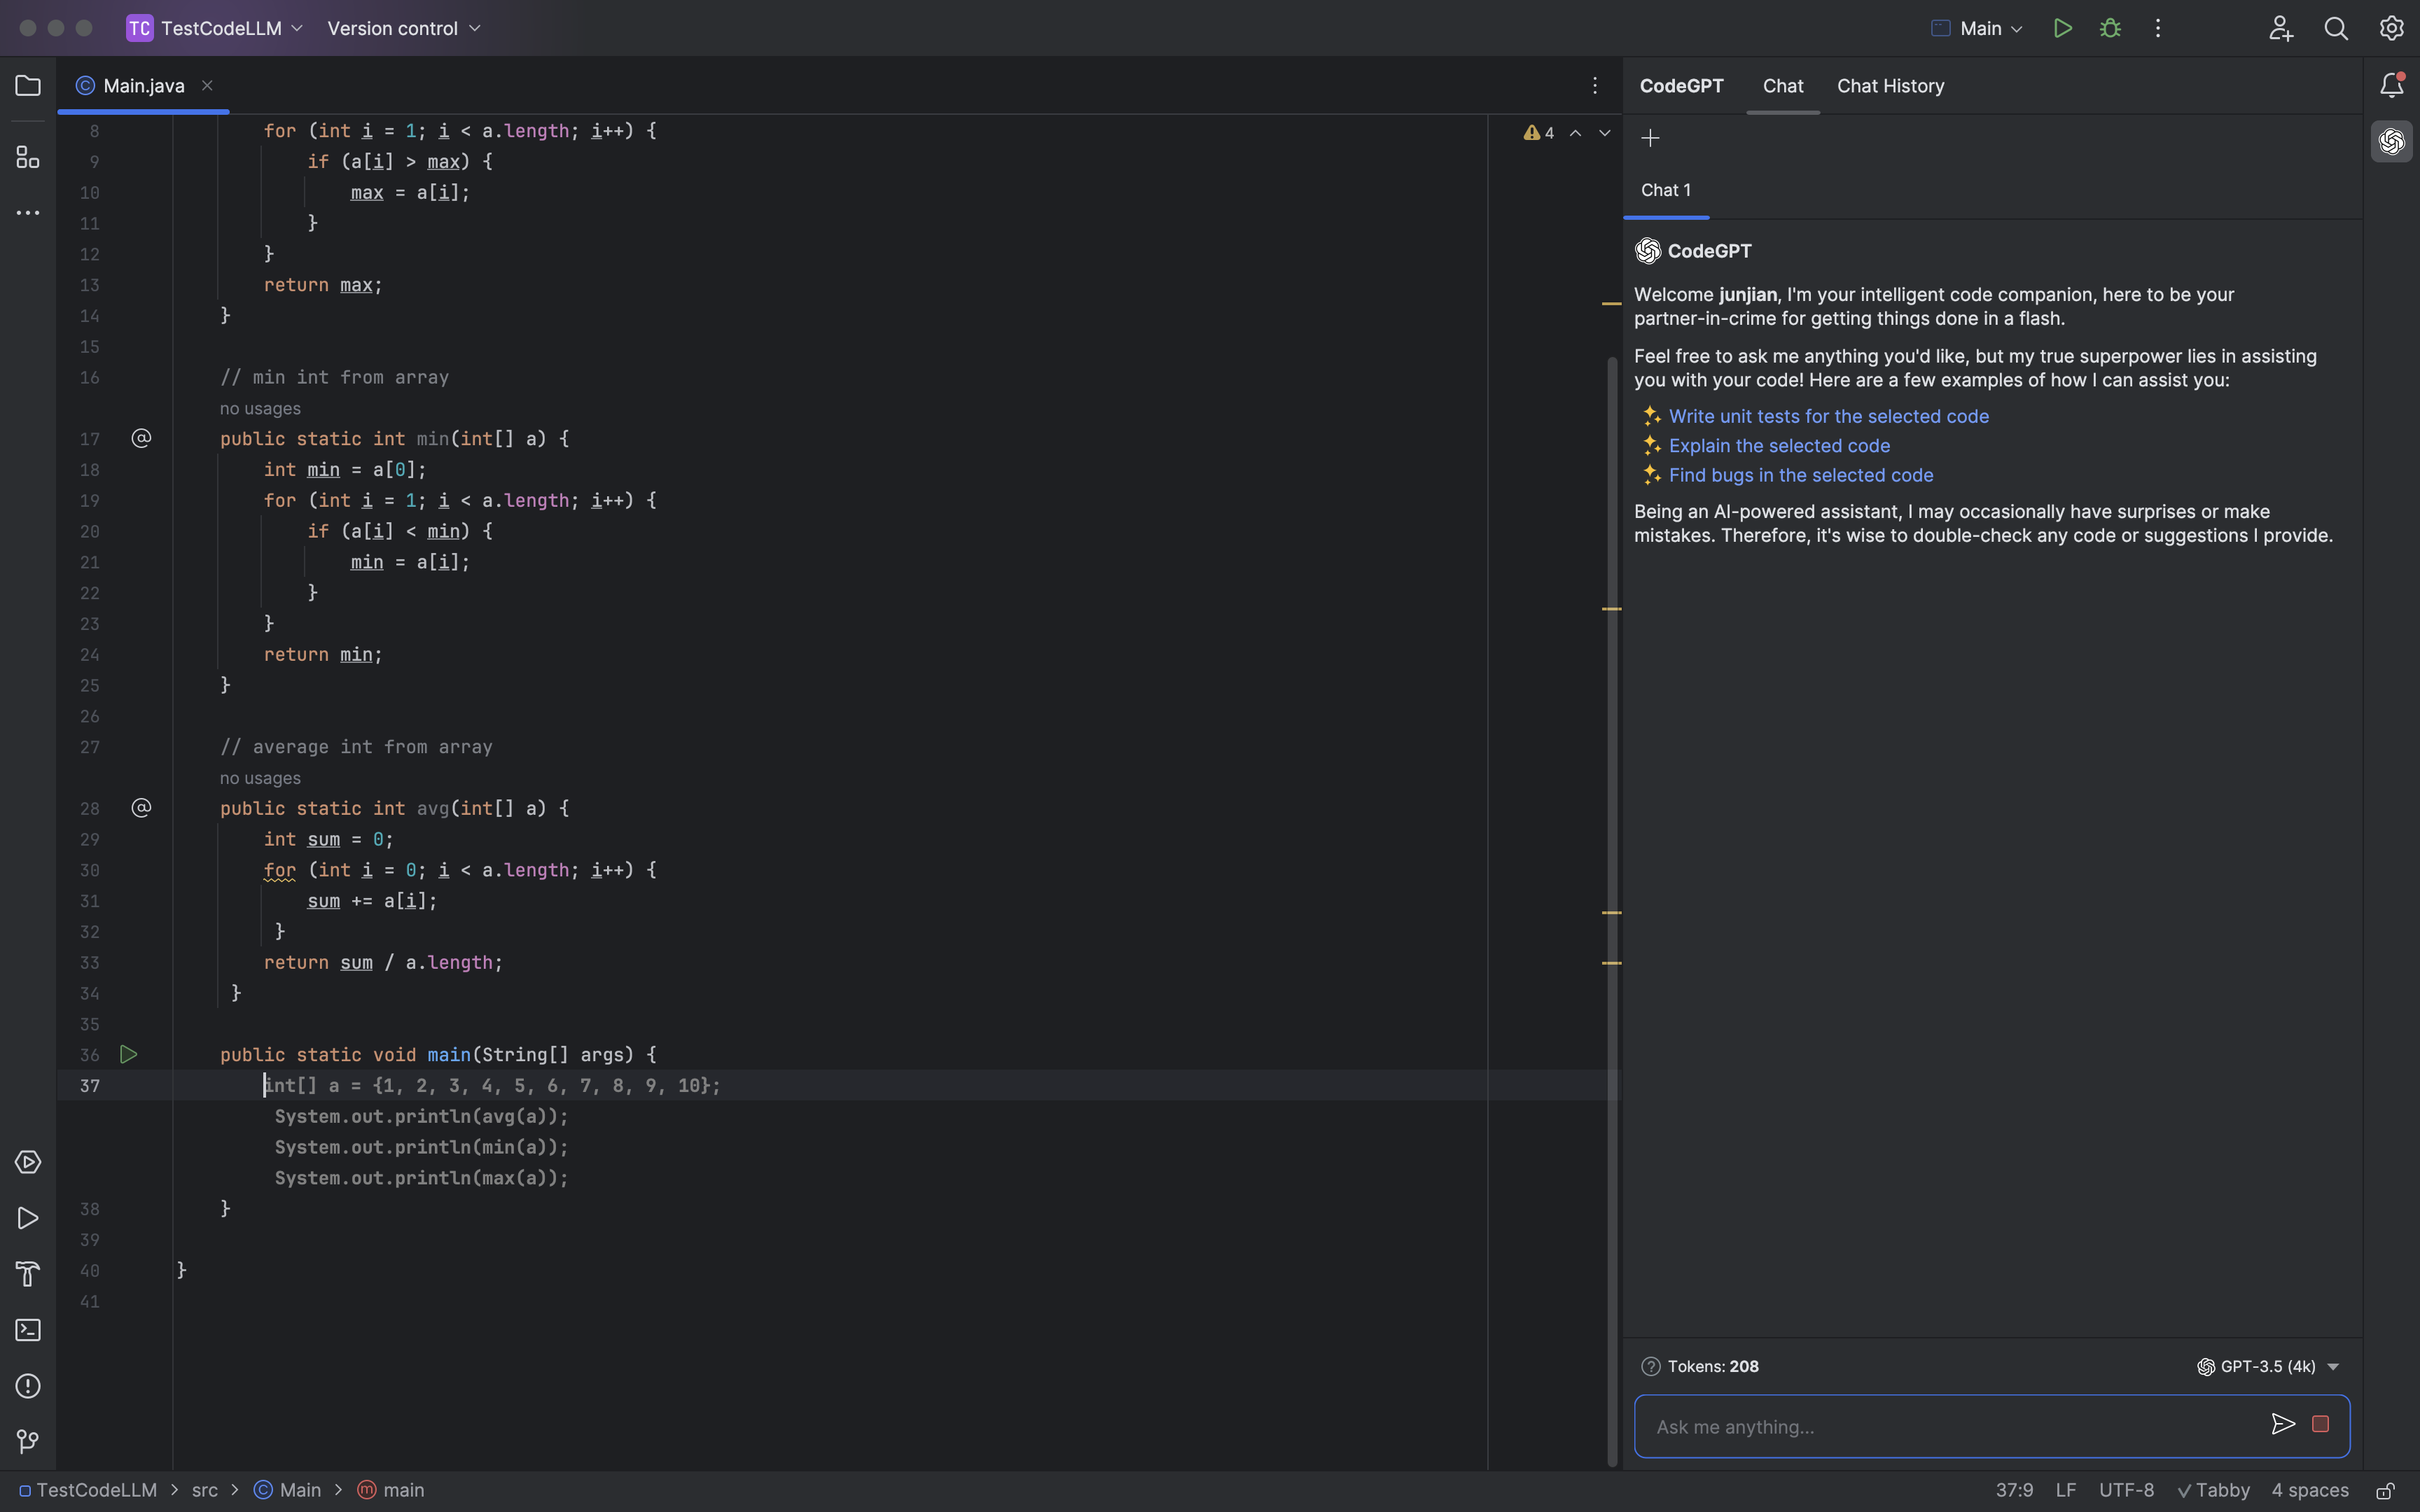
代码生成
使用的模型
Tabby 使用的是 Deepseek Coder 6.7B 模型。CodeGPT 使用的是 ChatGLM3-6B 模型。这个后面考虑使用 Deepseek Coder 6.7B 来替换。部署服务器端
Tabby 服务
docker run -d --runtime nvidia --name tabby -p 8080:8080 \
  -e TABBY_DOWNLOAD_HOST=modelscope.cn \
  -e NVIDIA_VISIBLE_DEVICES=3 \
  -e RUST_BACKTRACE=1 \
  -v `pwd`/.tabby:/data tabbyml/tabby \
  serve --model TabbyML/DeepseekCoder-6.7B  --device cuda
OpaneAI 服务
Controllerpython -m fastchat.serve.controller
Model Workerpython -m fastchat.serve.model_worker \
--model-path THUDM/chatglm3-6b --port 21002 \
--worker-address http://localhost:21002 \
--model-names chatglm3-6b,gpt-3.5-turbo
困难重重 😭
服务器是 NVIDIA Tesla T4,系统是 Ubuntu 20.04,从 Kubernetes 集群中分离出来的,因 Tabby 请求 CUDA >= 11.7,需要重新安装新版本的驱动。
sudo sh NVIDIA-Linux-x86_64-535.129.03.run
就两步就完成了,简单吧 😄
实际安装过程 😭
安装驱动
sudo sh NVIDIA-Linux-x86_64-535.129.03.run
日志查看错误信息
Coding LLMs Leaderboard (TabbyML Team)
Introducing the Coding LLM Leaderboard

更新日期:2023-11-13
Next Line Accuracy
什么是 Next Line Accuracy ?
在代码补全中,模型预测的是跨越多行的代码块。一种朴素的方法是直接将预测的代码块与实际提交的代码进行比较。虽然这种方法看起来理想,但它通常被认为是一个“过于稀疏”的度量标准。另一方面,下一行准确度可以作为整体代码块匹配准确度的可靠代理。
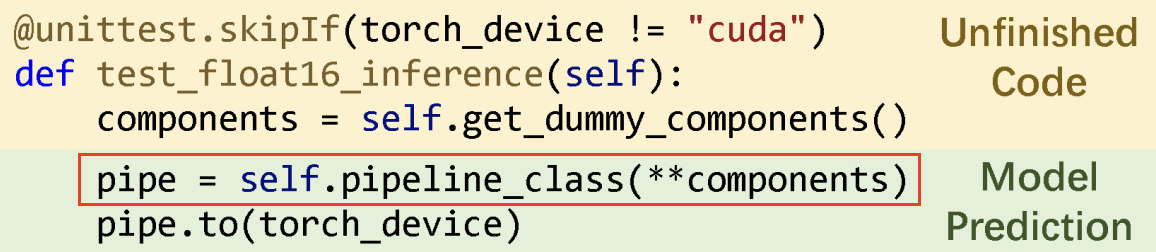
只有红色框内的内容被用于与真实值进行比较,以计算准确度指标。
安装 Tabby
安装 tabby brew install tabbyml/tabby/tabby ==> Fetching tabbyml/tabby/tabby ==> Downloading https://github.com/TabbyML/tabby/releases/download/v0.7.
安装 Python 3.11
brew install python@3.11
安装
git clone https://github.com/imartinez/privateGPT && cd privateGPT && \
python3.11 -m venv .venv && source .venv/bin/activate && \
pip install --upgrade pip poetry && poetry install --with ui,local && ./scripts/setup

# Launch the privateGPT API server **and** the gradio UI
poetry run python3.11 -m private_gpt

# In another terminal, create a new browser window on your private GPT!
open http://127.0.0.1:8001/
安装失败 😭
参考资料
DeepSeek Coder
Code LLM 排行榜
选择了两个通用基准来评估:
下面显示了 OctoCoder vs Base HumanEval prompt 的示例,在这里可以找到它。

LLM 排行榜
介绍 DeepSeek Coder 由一系列代码语言模型组成,每个模型都在 2T 令牌上从头开始训练,其中 87% 是英文和中文的代码,13% 是自然语言。我们提供各种尺寸的代码模型,范围从 1B 到 33B 版本。
安装 InteliJ IDEA
安装 CodeGPT
打开 IntelliJ IDEA,选择 Settings 菜单,选择 Plugins,搜索 CodeGPT,点击 Install 安装。
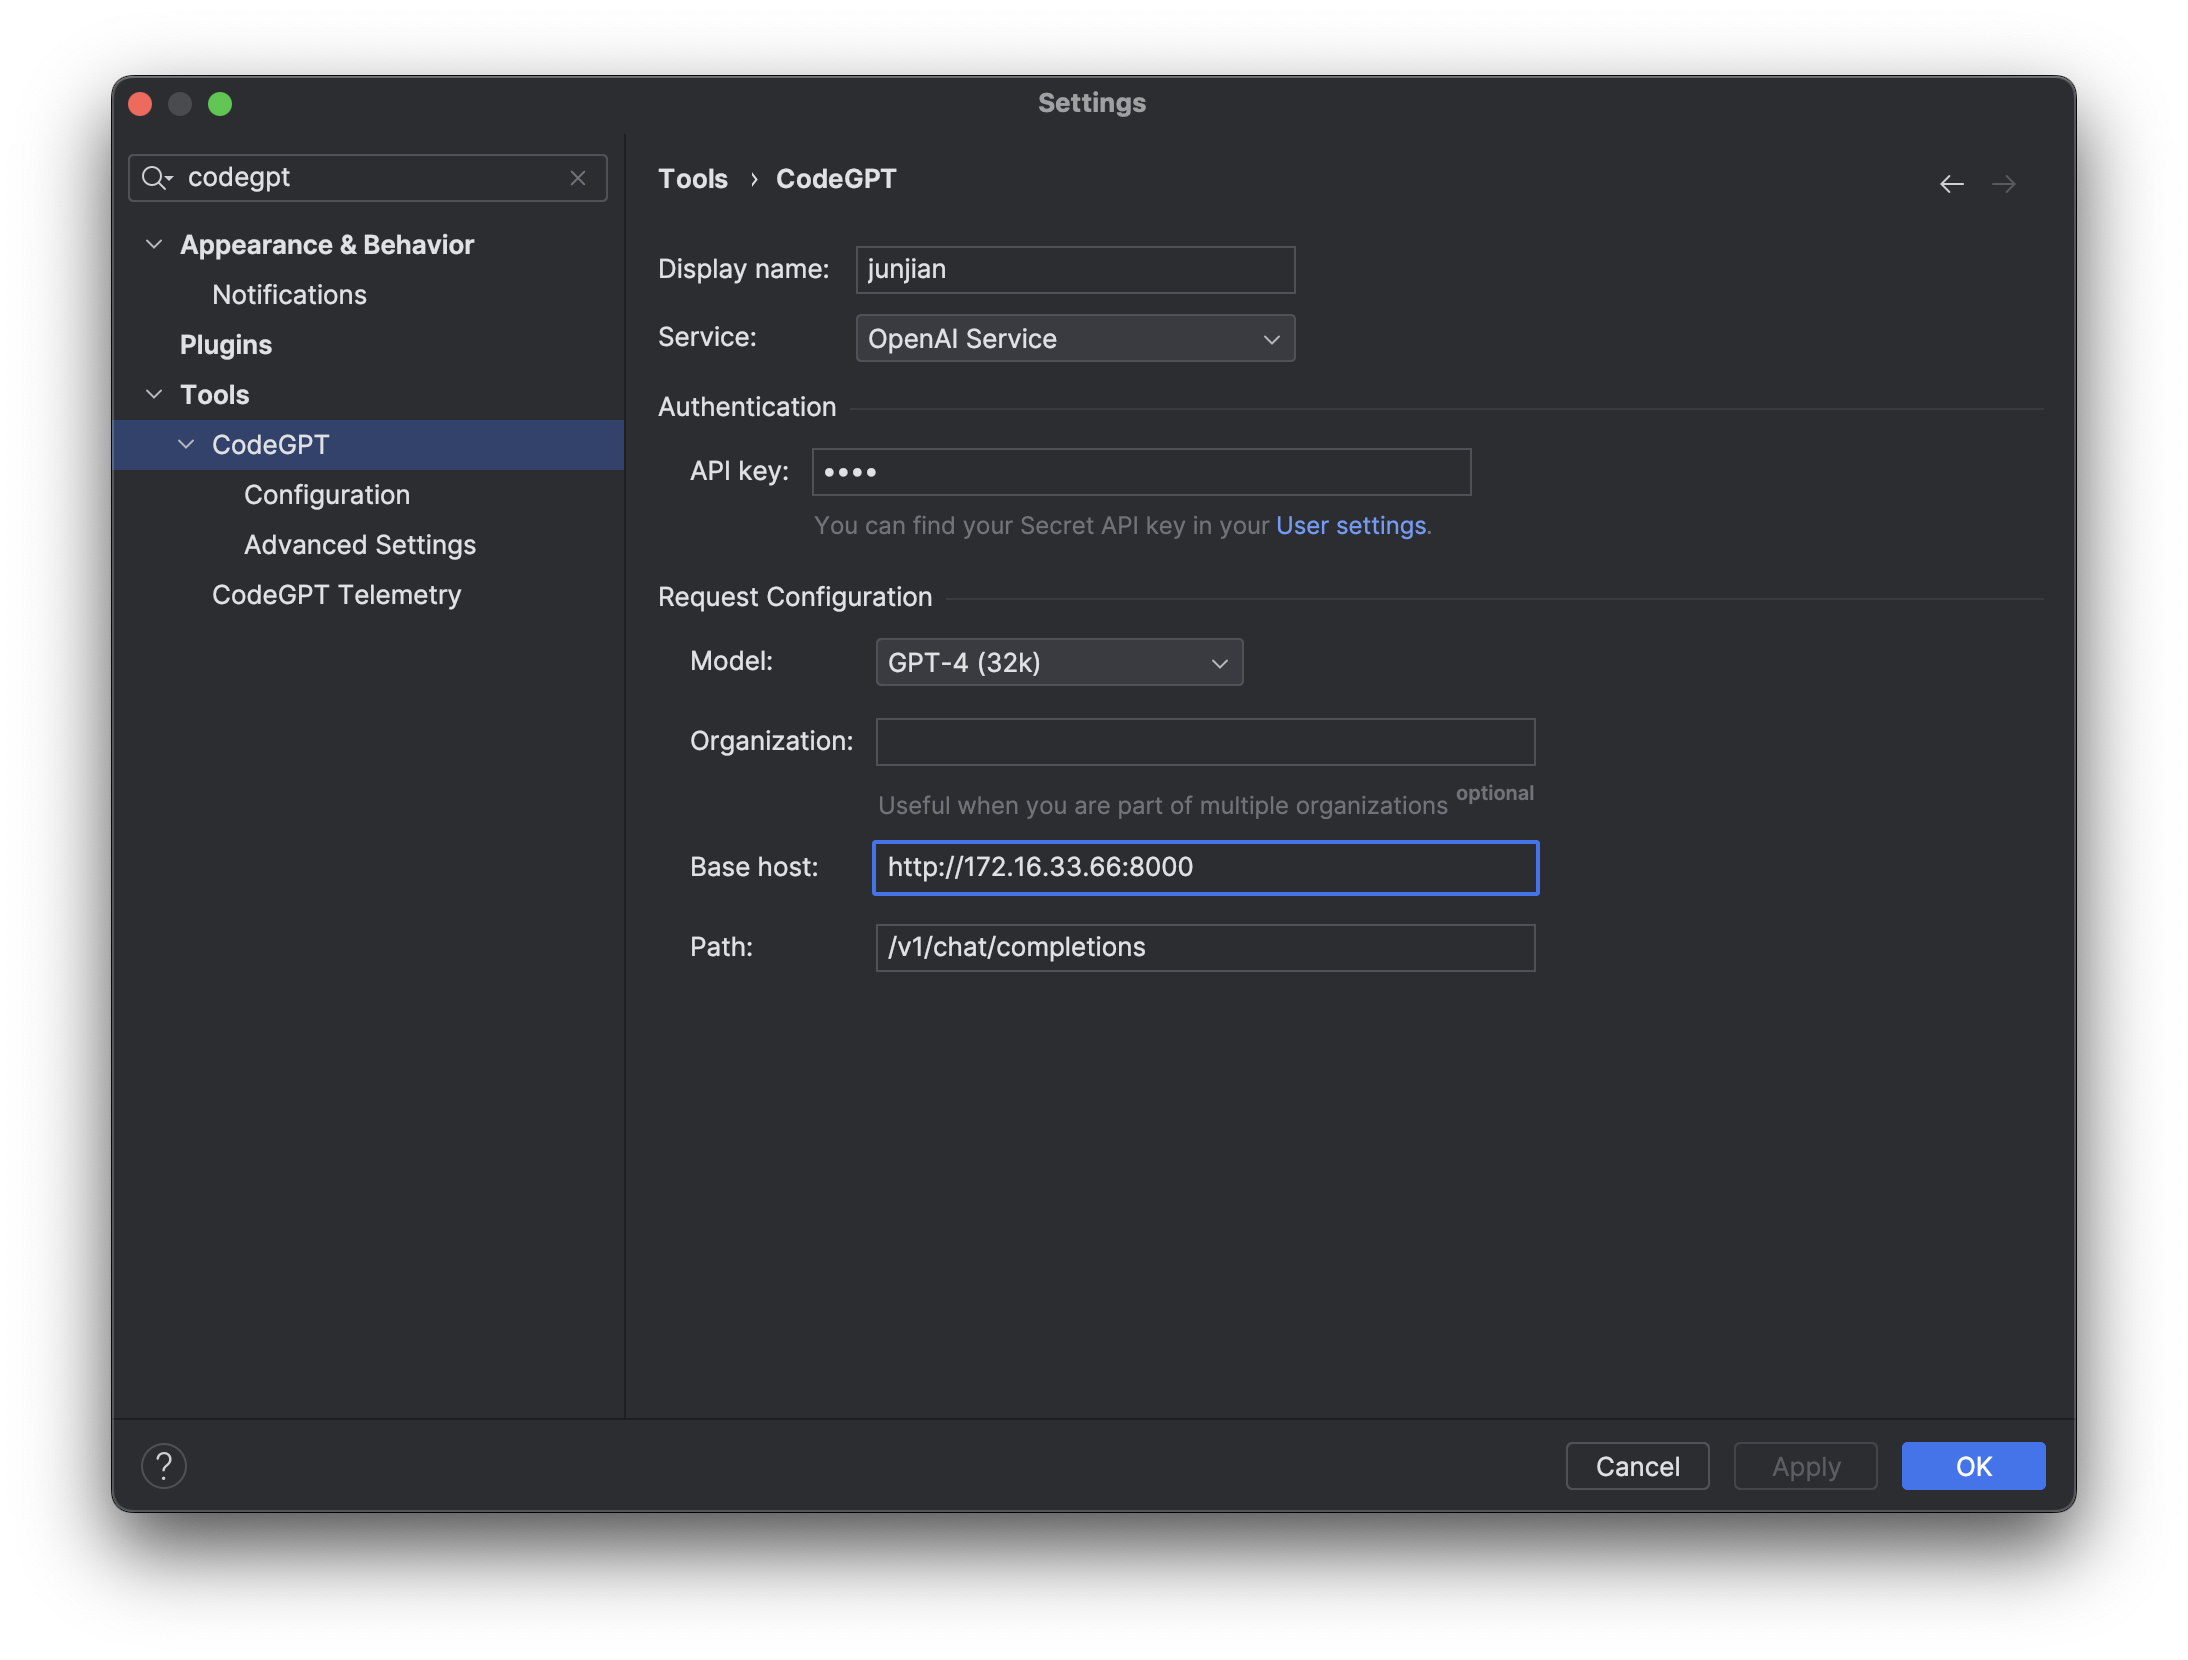
配置 CodeGPT
这里访问的 OpenAI 服务是我自己搭建的,使用的是 FastChat + ChatGLM3-6B。
模型 GPT-3.5(4k)

模型 GPT-4(32k)
模型缓存到 ~/.
CodeFuse 的使命是开发专门设计用于支持整个软件开发生命周期的大型代码语言模型(Code LLMs),涵盖设计、需求、编码、测试、部署、运维等关键阶段。我们致力于打造创新的解决方案,让软件开发者们在研发的过程中如丝般顺滑。

大模型基础服务架构图

<center>
<div class="mermaid">
%%{init: {"flowchart": {"htmlLabels": false}} }%%
flowchart TB
  subgraph tool[聊天工具]
    direction TB
    chatgpt-next(ChatGPT Next Web)
    langchain-chatchat(Langchain-Chatchat)
    wechat(chatgpt-on-wechat)
  end
  subgraph business-application[业务应用层]
    direction TB
    app1(发电)
    app2(调度)
    app3(输变电)
// ...
代码大模型基础服务架构图

[FastChat][FastChat]
安装
# 克隆仓库
git clone https://github.com/lm-sys/FastChat
cd FastChat

# 创建虚拟环境
python -m venv env
source env/bin/activate

# 安装
pip install --upgrade pip
pip install -e ".[model_worker,webui]"
创建大模型链接
LLM
mkdir THUDM
ln -s /Users/junjian/HuggingFace/THUDM/chatglm3-6b THUDM/chatglm3-6b
Embedding Model
mkdir BAAI
ln -s /Users/junjian/HuggingFace/BAAI/bge-base-zh-v1.5 BAAI/bge-base-zh-v1.5
启动服务 Controller
python -m fastchat.serve.controller
启动服务 Model Worker LLM python -m fastchat.serve.
NEON & MPS 🆚 CoreML
下载模型(large-v3)
models/download-ggml-model.sh large-v3
NEON & MPS
编译
make clean
make -j
main 帮助 ./main --help usage: ./main [options] file0.wav file1.wav ...
快速开始
克隆代码
git clone https://github.com/QwenLM/Qwen.git
cd Qwen
创建虚拟环境
python -m venv env
source env/bin/activate
安装依赖
pip install -r requirements.txt
创建大模型链接
mkdir Qwen
ln -s /Users/junjian/HuggingFace/Qwen/Qwen-14B-Chat Qwen/Qwen-14B-Chat
ln -s /Users/junjian/HuggingFace/Qwen/Qwen-1_8B Qwen/Qwen-1_8B
ln -s /Users/junjian/HuggingFace/Qwen/Qwen-1_8B-Chat Qwen/Qwen-1_8B-Chat
ln -s /Users/junjian/HuggingFace/Qwen/Qwen-7B-Chat Qwen/Qwen-7B-Chat
聊天
python cli_demo.py
python web_demo.py
FastChat
克隆代码
git clone https://github.com/lm-sys/FastChat
cd FastChat
创建虚拟环境 python -m venv env source env
克隆代码
git clone https://github.com/ml-explore/mlx-examples
cd mlx-examples
创建虚拟环境
python -m venv env
source env/bin/activate

pip install -r llms/phi2/requirements.txt
pip install -r llms/qwen/requirements.txt
创建大模型链接 mkdir llms/phi2/microsoft ln -s /Users/junjian/HuggingFace/microsoft/phi-2 llms/phi2/microsoft/phi-2 mkdir llms/qwen/Qwen ln -s /Users/junjian/HuggingFace/Qwen/Qwen-14B-Chat llms/qwen/Qwen/Qwen-14B-Chat ln -s /Users/junjian/HuggingFace/Qwen/Qwen-1_8B llms/qwen/Qwen/Qwen-1_8B ln -s /Users/junjian/HuggingFace/Qwen/Qwen-1_8B-Chat llms/qwen/Qwen/Qwen-1_8
统一内存:与 MLX 和其他框架的显着区别是统一内存模型。 MLX 中的数组位于共享内存中。 MLX 阵列上的操作可以在任何支持的设备类型上执行,而无需传输数据。
创建虚拟环境
mkdir ml-explore && cd ml-explore
git clone https://github.com/ml-explore/mlx
git clone https://github.com/ml-explore/mlx-examples

python -m venv env
source env/bin/activate
cd llms/phi2
pip install -r requirements.txt
使用已经下载的模型
mkdir microsoft
ln -s /Users/junjian/HuggingFace/microsoft/phi-2 microsoft/phi-2
转换模型
python convert.py
这将生成 MLX 可以读取的 weights.npz 文件。
-rw-r--r-- 1 junjian staff 5.2G 12 20 20:36 weights.npz
Phi-2: The surprising power of small language models
创建虚拟环境
conda create -n huggingface python==3.10.9
conda activate huggingface
安装依赖包
conda install pytorch torchvision -c pytorch
pip install transformers
pip install einops
下载模型
huggingface-cli download microsoft/phi-2 --local-dir microsoft/phi-2 --local-dir-use-symlinks False
代码 import torch from transformers import AutoModelForCausalLM, AutoTokenizer torch.set_default_device("mps") model = AutoModelForCausalLM.
下载代码
git clone https://github.com/Stability-AI/generative-models.git Stability-AI/generative-models
cd Stability-AI/generative-models/
创建虚拟环境
python -m venv env
source env/bin/activate
pip install -r requirements/pt2.txt
pip install .
Apple Silicon 上没有安装成功,安装包 triton 不支持
下载模型
pip install "huggingface_hub[cli]"
huggingface-cli download stabilityai/sdxl-turbo --local-dir checkpoints --local-dir-use-symlinks False
CLIP huggingface-cli download openai/clip-vit-large-patch14 --lo
TGI 是一个用于部署和服务大型语言模型(LLM)的工具包。 TGI 为最流行的开源 LLM 提供高性能文本生成,包括 Llama、Falcon、StarCoder、BLOOM、GPT-NeoX 和 T5 。
系统架构
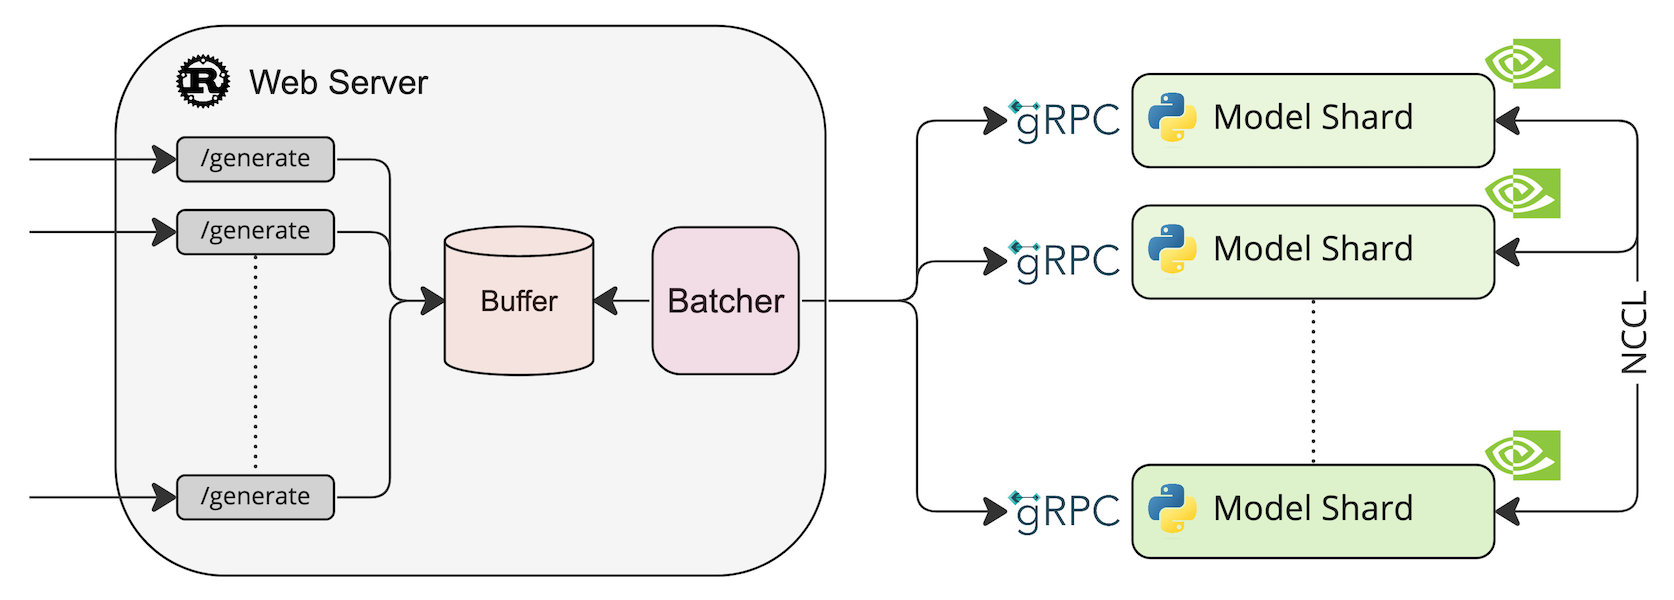
部署模型 HuggingFaceH4/zephyr-7b-beta model=HuggingFaceH4/zephyr-7b-beta volume=$PWD/data # Avoid downloading weights every run docker run --
部署
ollama run llama2
通过 API 访问
curl http://localhost:11434/api/generate -d '{
  "model": "llama2",
  "prompt": "Why is the sky blue?",
  "stream": false
}'
ollama 帮助 ollama --help Large language model runner Usage: ollama [flags] ollama [command] Available Commands: serve Start ollama create Create a model from a Modelfile show Show information for a model run Run a model pull Pull a model from a registry push Push a model to a registry list List models cp Copy a model rm Remove a model help Help about any comman
没有找到匹配的文章