2025-12-01-reachy-mini
conda create -n reachy-mini python=3.10.9 -y
conda activate reachy-mini
pip install reachy-mini[mujoco]
conda create -n reachy-mini python=3.10.9 -y
conda activate reachy-mini
pip install reachy-mini[mujoco]
安装
macOS
conda create -n autotrain python=3.10
conda activate autotrain
pip install autotrain-advanced
conda install pytorch torchvision torchaudio -c pytorch
pip install numpy==1.26.0
export HF_TOKEN=xxx
autotrain app --port 8080 --host 127.0.0.1
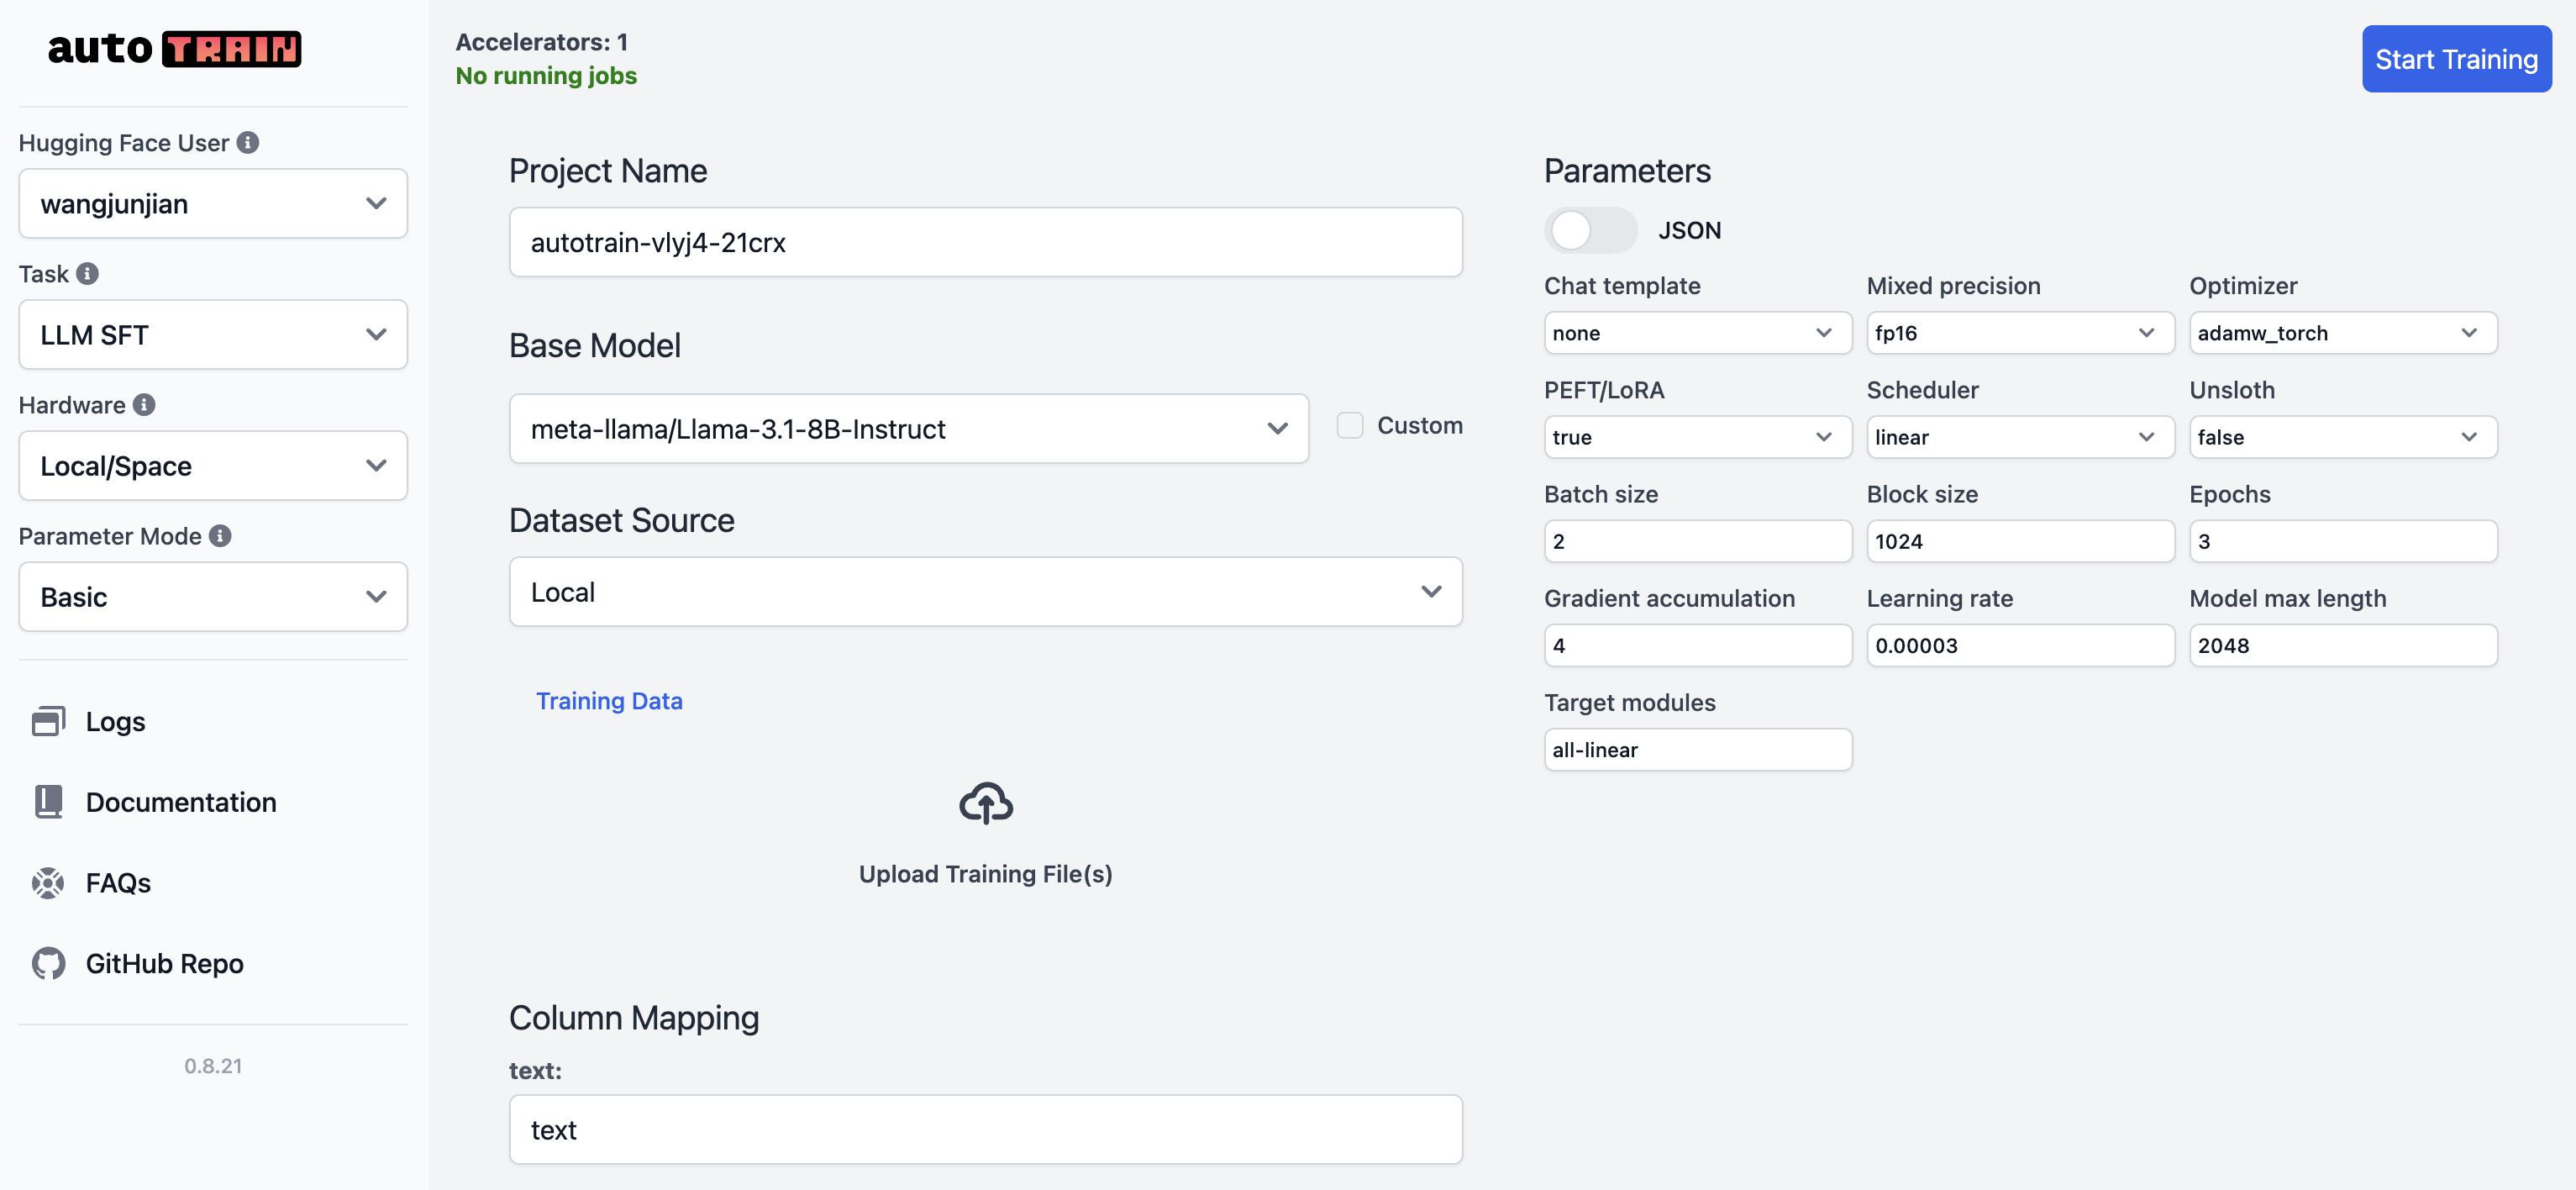
浏览器打开 http://127.0.0.1:8080/ui/ 以查看 AutoTrain 的界面。
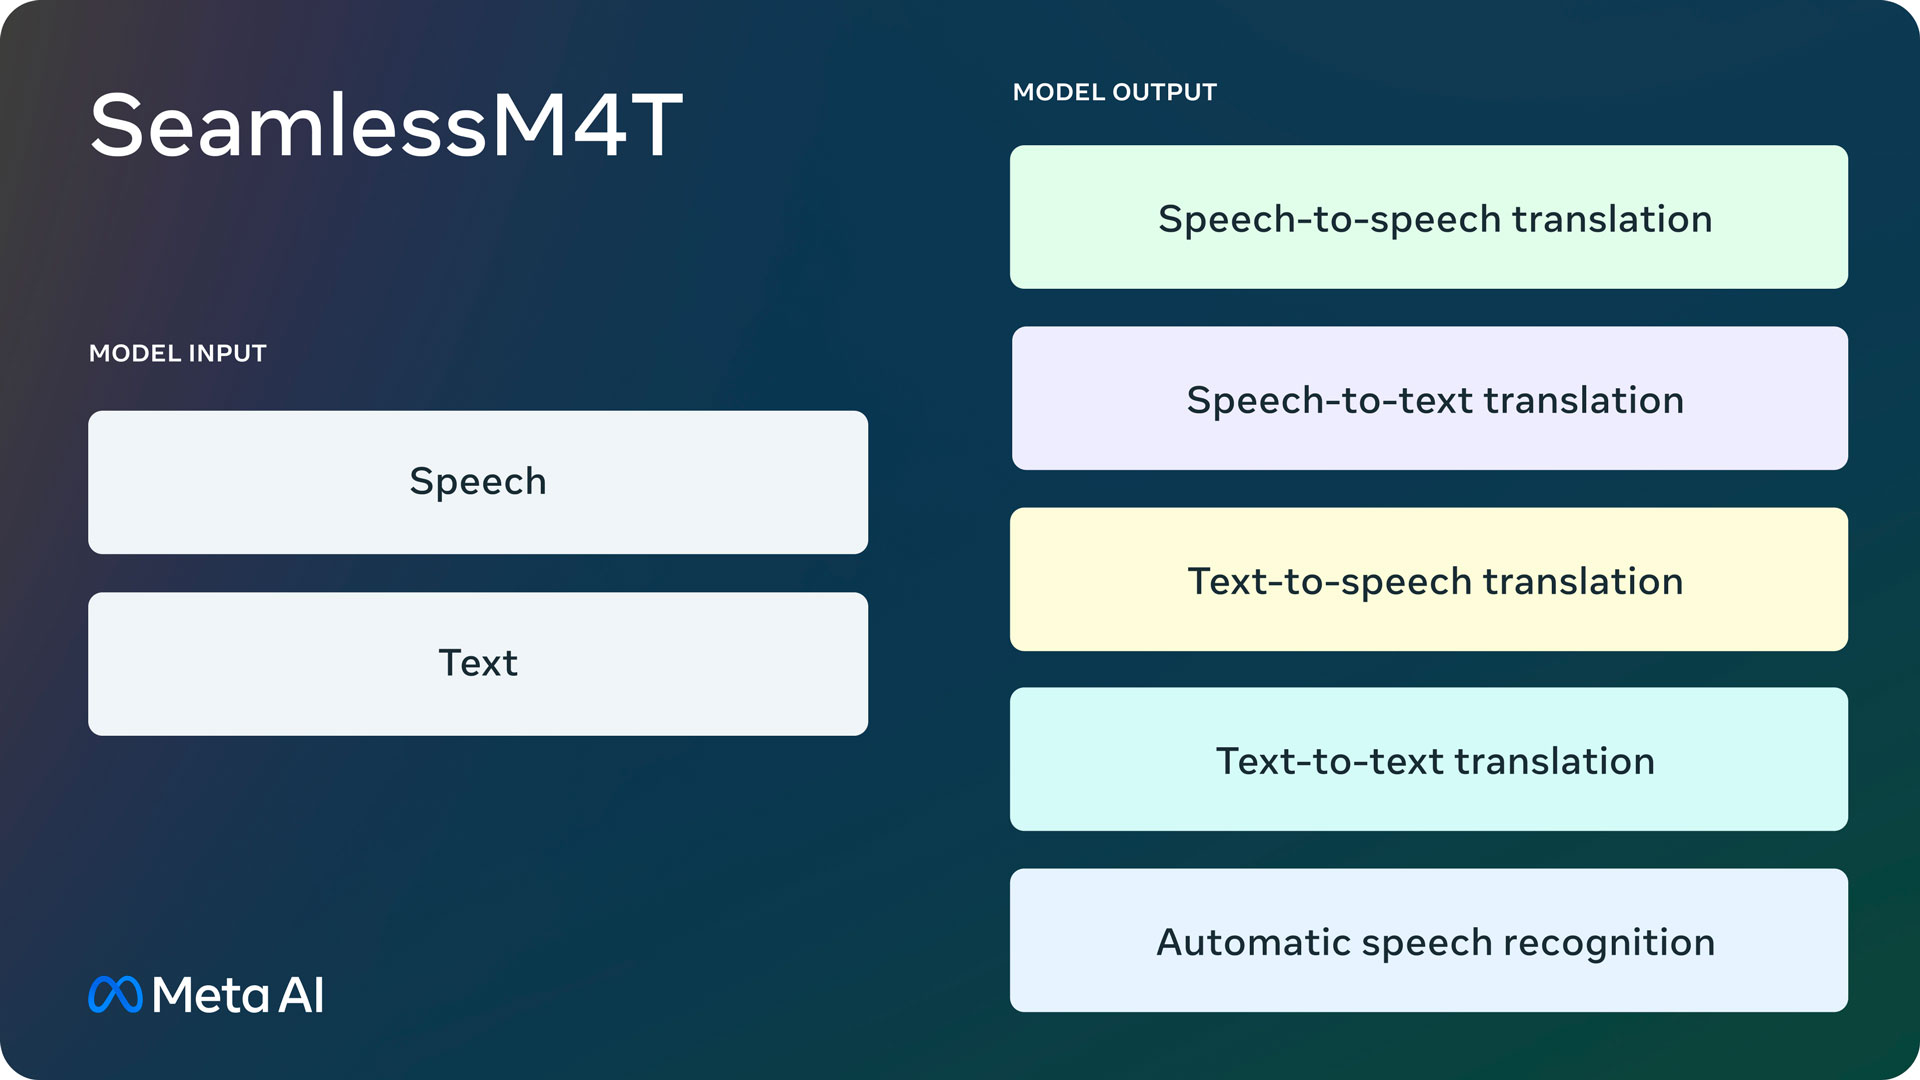
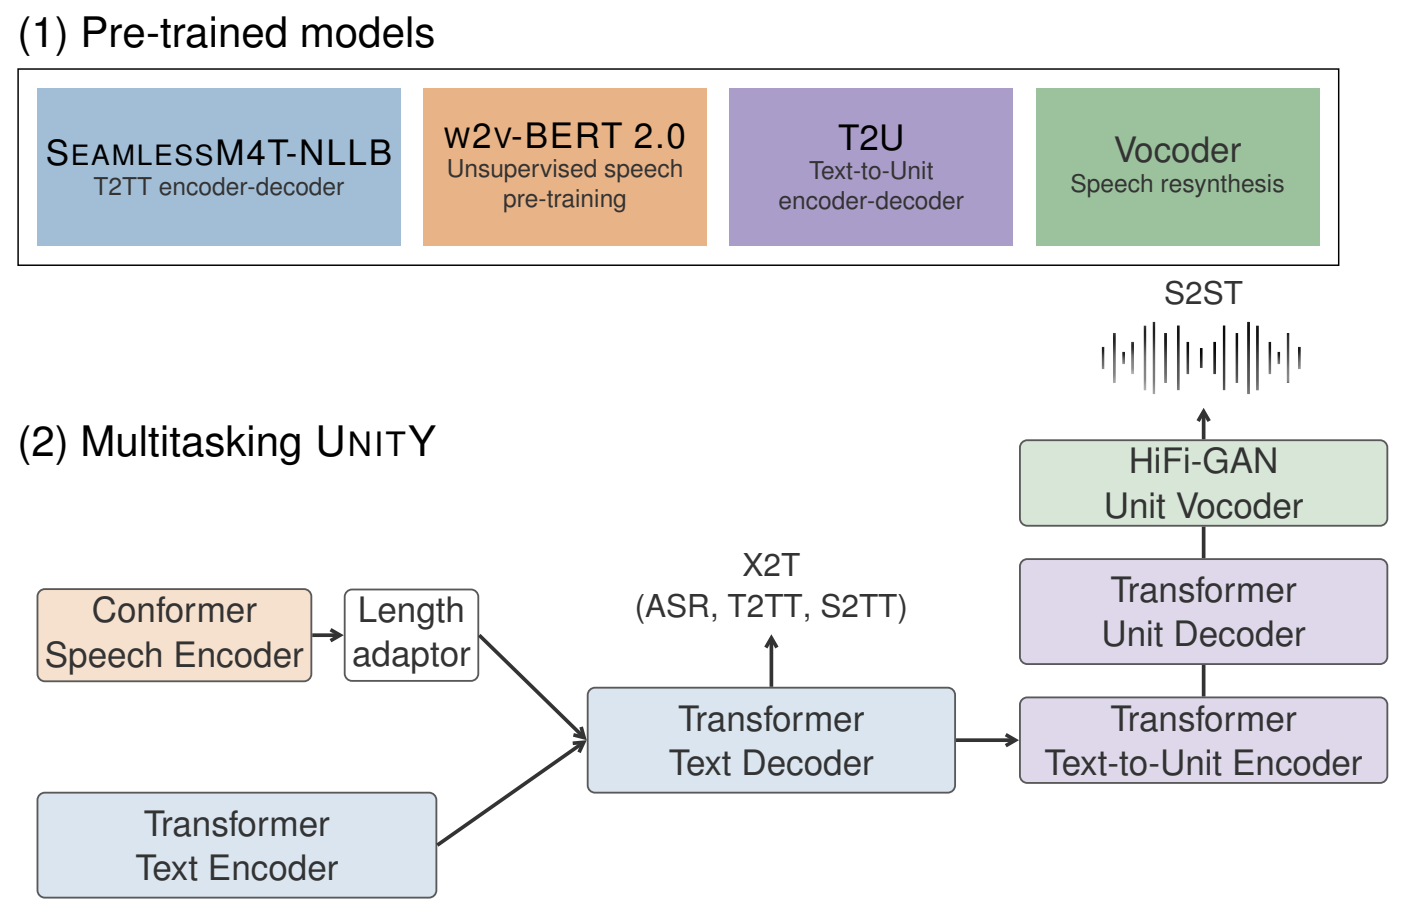
SeamlessM4T 概述
安装 [Seamless Communication][seamless_communication]
克隆仓库 git clone https://github.
共享软件包缓存的好处是,一旦用户已经下载了软件包的特定版本,它将不会再次下载并存储在单独的缓存中。这节省了磁盘使用量并加快了安装速度,因为它不需要再次下载软件包。
Conda 查看 Conda 当前环境的信息 conda info active environment : base active env location : /opt/miniconda shell level : 1 user config file : /Users/junjian/.condarc populated config files : conda version : 23.3.1 conda-build version : not installed python version : 3.10.9.final.0 virtual packages : __archspec=1=arm64 __osx=13.2.1=0 __unix=0=0 base environment : /opt/miniconda (writable) conda av data dir : /opt/miniconda/etc/conda conda av metadata url : None channel URLs : https://repo.anaconda.
准备音频文件
macOS 上打开 QuickTimePlayer
m4a 转换 wav
ffmpeg -i test.m4a -ar 16000 -ac 1 -c:a pcm_s16le test.wav
创建虚拟环境
conda create --name whisper python
conda activate whisper
安装
pip install --upgrade --no-deps --force-reinstall git+https://github.com/openai/whisper.git

wget https://raw.githubusercontent.com/openai/whisper/main/requirements.txt
pip install -r requirements.txt
测试 模型默认保存在 ~/.cache/whisper ls ~/.cache/whisper base.pt large-v2.
安装 OpenVINO(手动编译)
brew install cmake
brew install automake
brew install --build-from-source libtool
brew install --build-from-source libunistring
brew install --build-from-source libidn2
brew install --build-from-source wget
brew install --build-from-source libusb

sudo conda install scons -y

# 克隆时把依赖的子模块进行克隆(先克隆OpenVINO,再进行子模块克隆失败)
git clone --depth 1 --recurse-submodules https://github.com/openvinotoolkit/openvino.git

cd openvino
python3 -m pip install -r src/bindings/python/wheel/requirements-dev.txt

# 安装OpenCV(可选)
sudo conda install -c conda-forge opencv

mkdir build && cd build

# 配置(-DOPENVINO_EXTRA_MODULES=../openvino_contrib/modules/arm_plugin 好像不需要)
cmake -DCMAKE_BUILD_TYPE=Release ..

# 编译
cmake --build . --config Release --parallel $(sysctl -n hw.ncpu)
**没有生成 wheel**

# 安装
sudo mkdir /opt/openvino
sudo cmake -DCMAKE_INSTALL_PREFIX=/opt/openvino -P cmake_install.cmake

# 查看可用设备
./bin/arm64/Release/hello_query_device
[ INFO ] Build ................................. 2023.0.0-1-b300df1be6c
[ INFO ]
[ INFO ] Available devices:
[ INFO ] CPU
[ INFO ] 	SUPPORTED_PROPERTIES:
[ INFO ] 		Immutable: SUPPORTED_METRICS : SUPPORTED_METRICS SUPPORTED_CONFIG_KEYS RANGE_FOR_ASYNC_INFER_REQUESTS RANGE_FOR_STREAMS
[ INFO ] 		Immutable: SUPPORTED_CONFIG_KEYS : LP_TRANSFORMS_MODE DUMP_GRAPH PERF_COUNT CPU_THROUGHPUT_STREAMS CPU_BIND_THREAD CPU_THREADS_NUM CPU_THREADS_PER_STREAM BIG_CORE_STREAMS SMALL_CORE_STREAMS THREADS_PER_STREAM_BIG THREADS_PER_STREAM_SMALL SMALL_CORE_OFFSET ENABLE_HYPER_THREAD NUM_STREAMS INFERENCE_NUM_THREADS AFFINITY
[ INFO ] 		Mutable: PERF_COUNT : YES
[ INFO ] 		Immutable: AVAILABLE_DEVICES : NEON
[ INFO ] 		Immutable: FULL_DEVICE_NAME : arm_compute::NEON
[ INFO ] 		Immutable: OPTIMIZATION_CAPABILITIES : FP16 FP32
[ INFO ] 		Immutable: RANGE_FOR_ASYNC_INFER_REQUESTS : 1 12 1
[ INFO ] 		Mutable: PERFORMANCE_HINT : ""
[ INFO ] 		Immutable: RANGE_FOR_STREAMS : 1 12
[ INFO ] 		Mutable: CPU_THROUGHPUT_STREAMS : 1
[ INFO ] 		Mutable: CPU_BIND_THREAD : NO
[ INFO ] 		Mutable: CPU_THREADS_NUM : 0
[ INFO ] 		Mutable: CPU_THREADS_PER_STREAM : 12
[ INFO ] 		Mutable: BIG_CORE_STREAMS : 0
[ INFO ] 		Mutable: SMALL_CORE_STREAMS : 0
[ INFO ] 		Mutable: THREADS_PER_STREAM_BIG : 0
[ INFO ] 		Mutable: THREADS_PER_STREAM_SMALL : 0
[ INFO ] 		Mutable: SMALL_CORE_OFFSET : 0
[ INFO ] 		Mutable: ENABLE_HYPER_THREAD : YES
[ INFO ] 		Mutable: NUM_STREAMS : 1
[ INFO ] 		Mutable: INFERENCE_NUM_THREADS : 0
[ INFO ] 		Mutable: AFFINITY : NONE
[ INFO ]
安装 PyTorch
sudo conda create --name pytorch python
conda activate pytorch

conda install pytorch torchvision torchaudio -c pytorch
安装每日构建版本
pip3 install --pre torch torchvision torchaudio --index-url https://download.pytorch.org/whl/nightly/cpu
升级
pip3 install --upgrade --pre torch torchvision torchaudio --index-url https://download.pytorch.org/whl/nightly/cpu
训练模型 import torch import torchvision import torchvision.transforms as transforms print(f"PyTorch version: {torch.
安装 TensorFlow
sudo conda create --name tensorflow python
conda activate tensorflow

# 不指定环境(-n),默认安装到base环境
sudo conda install -c apple -n tensorflow tensorflow-deps
pip install tensorflow-macos
pip install tensorflow-metal
sudo conda install notebook -y

pip install numpy  --upgrade
pip install pandas  --upgrade
pip install matplotlib  --upgrade
pip install scikit-learn  --upgrade
pip install scipy  --upgrade
pip install plotly  --upgrade
验证 import sys import tensorflow.keras import tensorflow as tf import platform print(f"Python Platform: {platform.
今天预订的 MacBook Pro M2Max 16寸 顶配 64G内存 2T硬盘到了,¥36097 。
硬件信息
芯片、内存
system_profiler SPHardwareDataType | head -n 9
Hardware:

    Hardware Overview:

      Model Name: MacBook Pro
      Model Identifier: Mac14,6
      Model Number: XXXXXXXXXXXX
      Chip: Apple M2 Max
      Total Number of Cores: 12 (8 performance and 4 efficiency)
      Memory: 64 GB
硬盘
system_profiler SPStorageDataType | head -n 8
Storage:

    Macintosh HD:

      Free: 1.37 TB (1,372,357,345,280 bytes)
      Capacity: 2 TB (1,995,218,165,760 bytes)
      Mount Point: /System/Volumes/Update/mnt1
      File System: APFS
更改主机名
sudo scutil --set HostName MBP

hostname
MBP
HomeBrew 安装 /bin/bash -c "$(