119 篇文章带有标签 “python”

LangChain - Chain

Chain

链允许我们将多个组件组合在一起以创建一个单一的、连续的应用程序。我们可以通过将多个链组合在一起,或者通过将链与其他组件组合来构建更复杂的链。

LLMChain

LLMChain 是一个简单的链,它接受一个提示模板,用用户输入格式化它并返回来自 LLM 的响应。

语言模型(text-davinci-003) from langchain.chains import LLMChain from langchain.llms import OpenAI from langchain.prompts import PromptTemplate llm = OpenAI(temperature=0.9) prompt = PromptTemplate(input_variables=["product"], template="What is a good name for a company that makes {product}?
LangChain 快速入门

LangChain

通过可组合性使用 LLM 构建应用程序

介绍

大型语言模型 (LLM) 正在成为一种变革性技术,使开发人员能够构建他们以前无法构建的应用程序。 但是,单独使用这些 LLM 往往不足以创建真正强大的应用程序——当您可以将它们与其他计算或知识来源相结合时,真正的力量就来了。

Documentation

安装

pip install langchain
# or
conda install langchain -c conda-forge

配置环境

使用 LangChain 通常需要与一个或多个模型提供者、数据存储、api 等集成。

对于这个例子,将使用 OpenAI 的 API

pip install openai
export OPENAI_API_KEY="..."

LLMs:从语言模型获得预测结果

在这个例子中,我们可能希望输出更加随机,所以将 temperature 设置的更高一些。

from langchain.llms import OpenAI

llm = OpenAI(temperature=0.9)

text = "一家生产彩色袜子的公司取什么名字好?"
print(llm(text))
可以取名为:Colorful Socks Factory。

提示模板(Prompt Templates):管理 LLM 的提示 from la

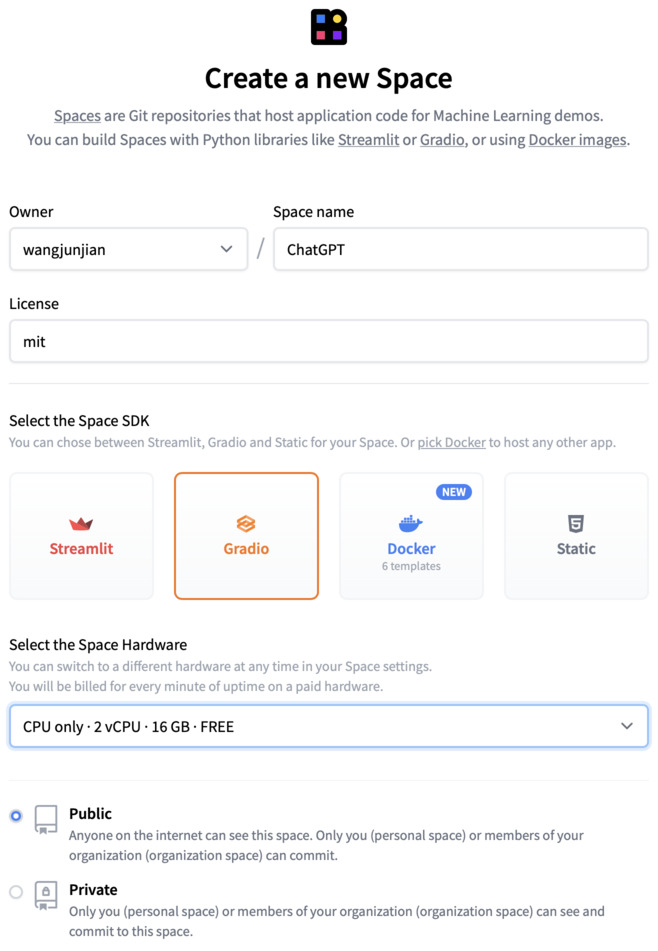
在 Hugging Face 上搭建 ChatGPT 聊天机器人

Hugging Face 上创建 ChatGPT Space

克隆

git clone https://huggingface.co/spaces/wangjunjian/ChatGPT
cd ChatGPT

创建应用(聊天机器人)

chat.py

这里的 Conversation 记录了所有的对话消息,在提问前,会检查是否超过最大 token 数量,如果超过,会删除第一条与用户的对话消息,然后再提问。

import openai
import tiktoken


class Conversation:
    def __init__(self, prompt, model="gpt-3.5-turbo", temperature=0.8, max_tokens=250):
        self.prompt = prompt
        self.model = model
        self.temperature = temperature
        self.max_tokens = max_tokens

        self._init_messages()

    def _init_messages(self):
        self.messages = [{"role": "system", "content": self.prompt}]
// ...

OpenAI API Documentation Chat Completion

Chat Completion

模型

  • gpt-3.5-turbo
  • gpt-4

可以做很多事情

  • 起草电子邮件或其他书面文件
  • 编写 Python 代码
  • 回答有关一组文件的问题
  • 创建会话代理
  • 为您的软件提供自然语言界面
  • 一系列科目的导师
  • 翻译语言
  • 模拟视频游戏中的角色等等

API 调用 例子 import os import openai openai.api_key = os.getenv("OPENAI_API_KEY") response = openai.ChatCompletion.create( model="gpt-3.5-turbo", messages=[ {"role": "system", "content": "You are a helpful assistant."}, {"role": "user", "content": "Who won the world series in 2020?

OpenAI API Documentation Embeddings

什么是 Embedding?

文本嵌入用于衡量文本字符串的相关性。嵌入通常用于:

  • 搜索(结果按与查询字符串的相关性排序)
  • 聚类(其中文本字符串按相似性分组)
  • 推荐(推荐具有相关文本字符串的项目)
  • 异常检测(识别出相关性很小的异常值)
  • 多样性测量(分析相似性分布)
  • 分类(其中文本字符串按其最相似的标签分类)

嵌入是浮点数的向量(列表)。两个向量之间的距离衡量它们的相关性。小距离表示高相关性,大距离表示低相关性。

如何获得 Embedding?

Embedding API

请求格式

{
  "input": "A string to be embedded",
  "model": "text-embedding-ada-002"
}

响应格式 { "data": [ { "embedding": [ -0.02181987278163433, ... -0.

OpenAI API Documentation 快速入门

工具

Examples

Playground

了解标记和概率

分词器工具

GPT 比较工具

介绍

概述

OpenAI API 几乎可以应用于任何涉及理解或生成自然语言、代码或图像的任务。提供一系列具有不同功率级别的模型,适用于不同的任务,并且能够微调您自己的自定义模型。这些模型可用于从内容生成到语义搜索和分类的所有领域。

关键概念

Prompts

设计提示本质上是您“编程”模型的方式,通常是通过提供一些说明或一些示例。通过 completionschat completions 端点可用于几乎任何任务,包括内容或代码生成、摘要、扩展、对话、创意写作、风格转换等。

Tokens

模型通过将文本分解为标记来理解和处理文本。标记可以是单词或只是字符块。例如,单词“hamburger”被分解为标记“ham”、“bur”和“ger”,而像“pear”这样的短而常见的单词是一个标记。许多标记以空格开头,例如“ hello”和“ bye”。

在给定的 API 请求中处理的令牌数量取决于输入和输出的长度。根据粗略的经验法则,对于英文文本,1 个标记大约为 4 个字符或 0.75 个单词。要记住的一个限制是,您的文本提示和生成的完成组合不能超过模型的最大上下文长度(对于大多数模型,这是 2048 个标记,或大约 1500 个单词)。

Playground 了解标记和概率 我们的模型通过将文本分

基于 FastAPI 开发 Ultralytics Serving

Ultralytics Serving

Inference service based on Ultralytics

创建虚拟环境

python -m venv venv source venv/bin/activate

安装依赖包

创建 requirements.txt

fastapi
python-multipart
aiofiles
onnxruntime
ultralytics
uvicorn[standard]
gunicorn
pytest
httpx

安装

pip install -r requirements.txt

调试

创建 launch.json 文件,用于调试 FastAPI 应用。

.vscode/launch.json { "version": "0.2.0", "configurations": [ { "name": "Python: FastAPI", "type": "python", "request": "launch", "module": "uvicorn", "args": [ "app.

Python in Visual Studio Code

开发文档

扩展

选择 Python 解释器

  1. 通过 Shift + Command + P 快捷键,打开命令面板。
  2. 输入 Python: Select Interpreter ,回车。
  3. 选择您想使用的环境。

在状态栏上可以单击进行切换不同的环境

测试

我选择了 pytest 测试框架,这个写起来更自然且简单。

Roboflow 快速入门

创建工作区

在 Workspaces 侧边栏单击 ”Add Workspace“。

工作区是团队可以协作创建、管理和标记数据集以及训练和部署模型的地方。

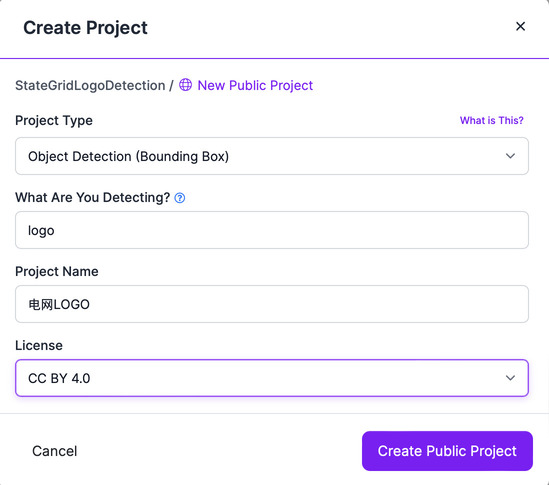
创建项目

单击 “Create New Project”

项目的菜单项

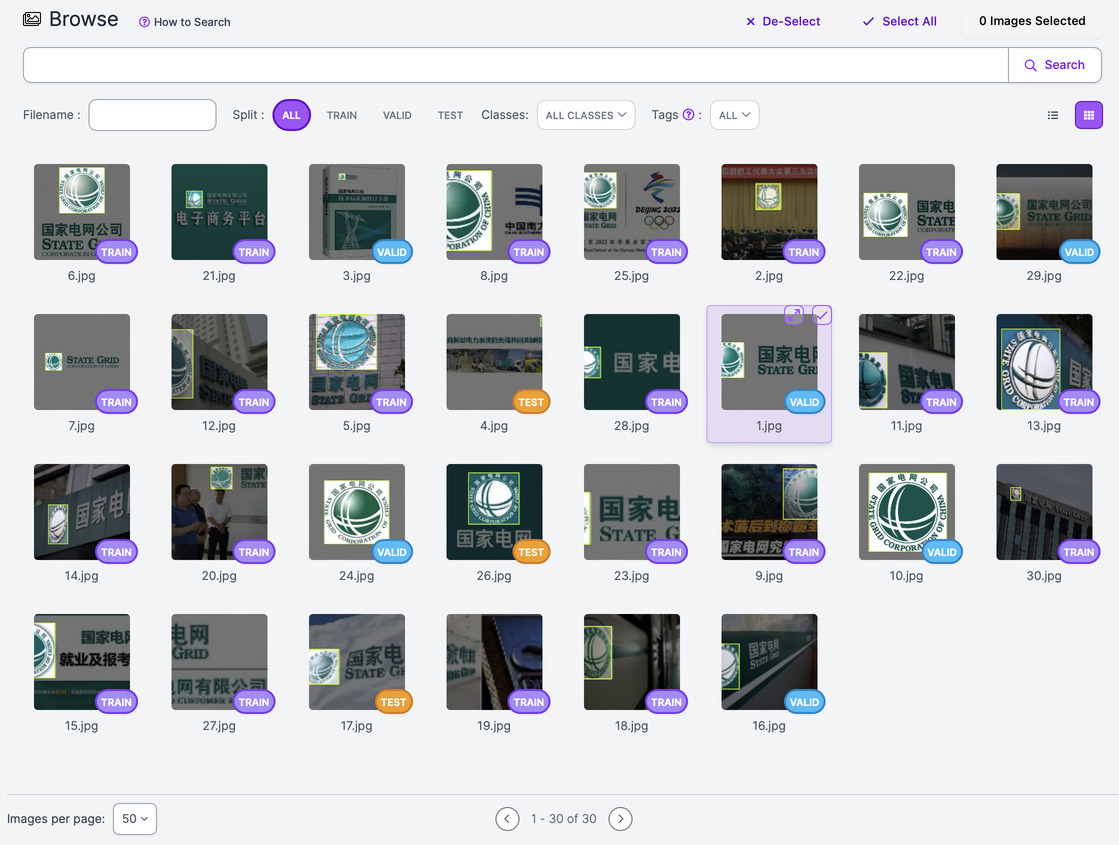
Upload(上传数据集)

支持直接上传标注好的数据集。

Annotate(标注)

Dataset(数据集)

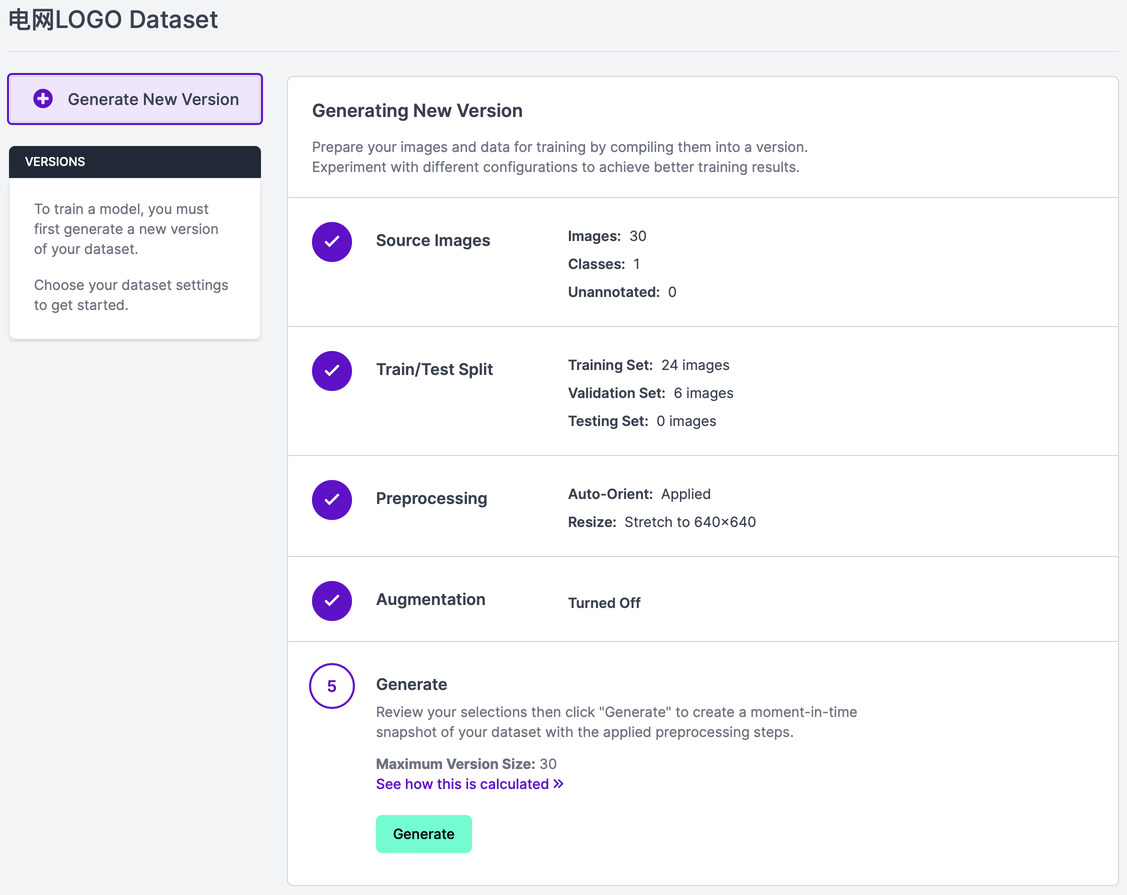
Generate(生成新版本数据集)

1️⃣ Source Images

2️⃣ Train/Test Split

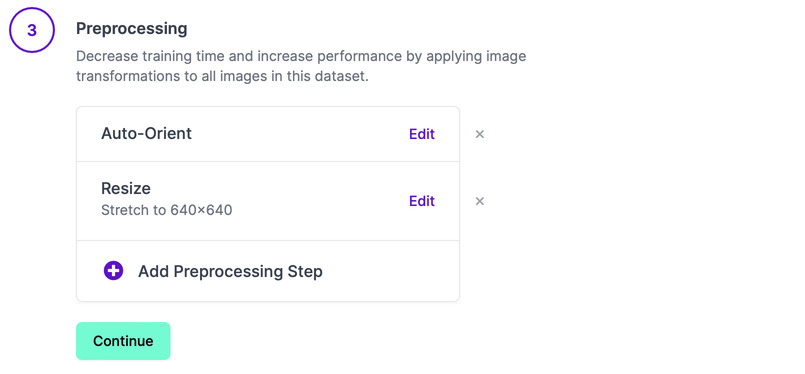
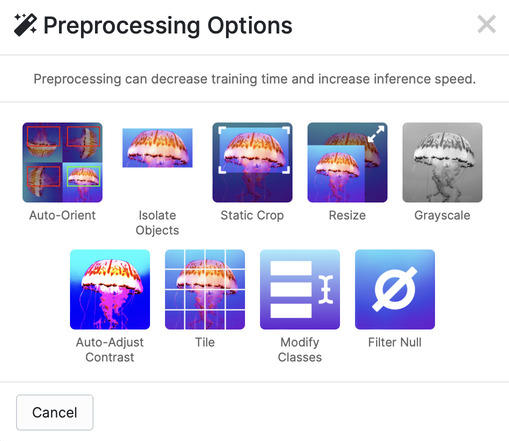
3️⃣ Preprocessing

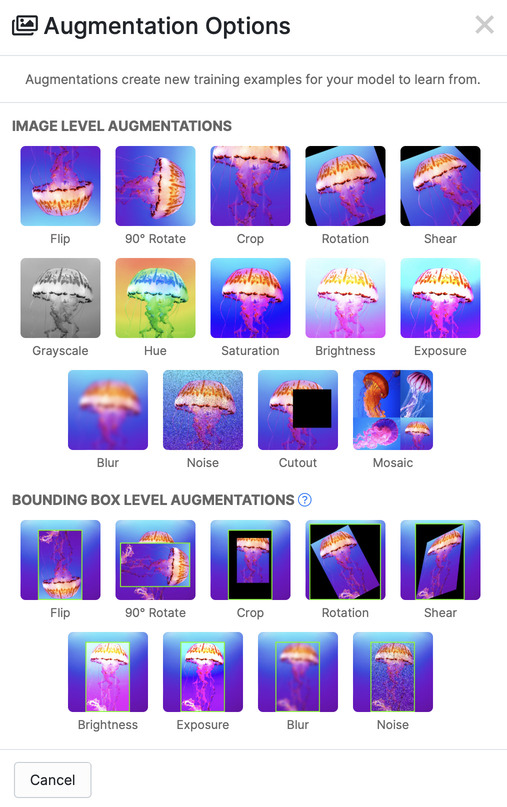
4️⃣ Augmentation

5️⃣ Generate

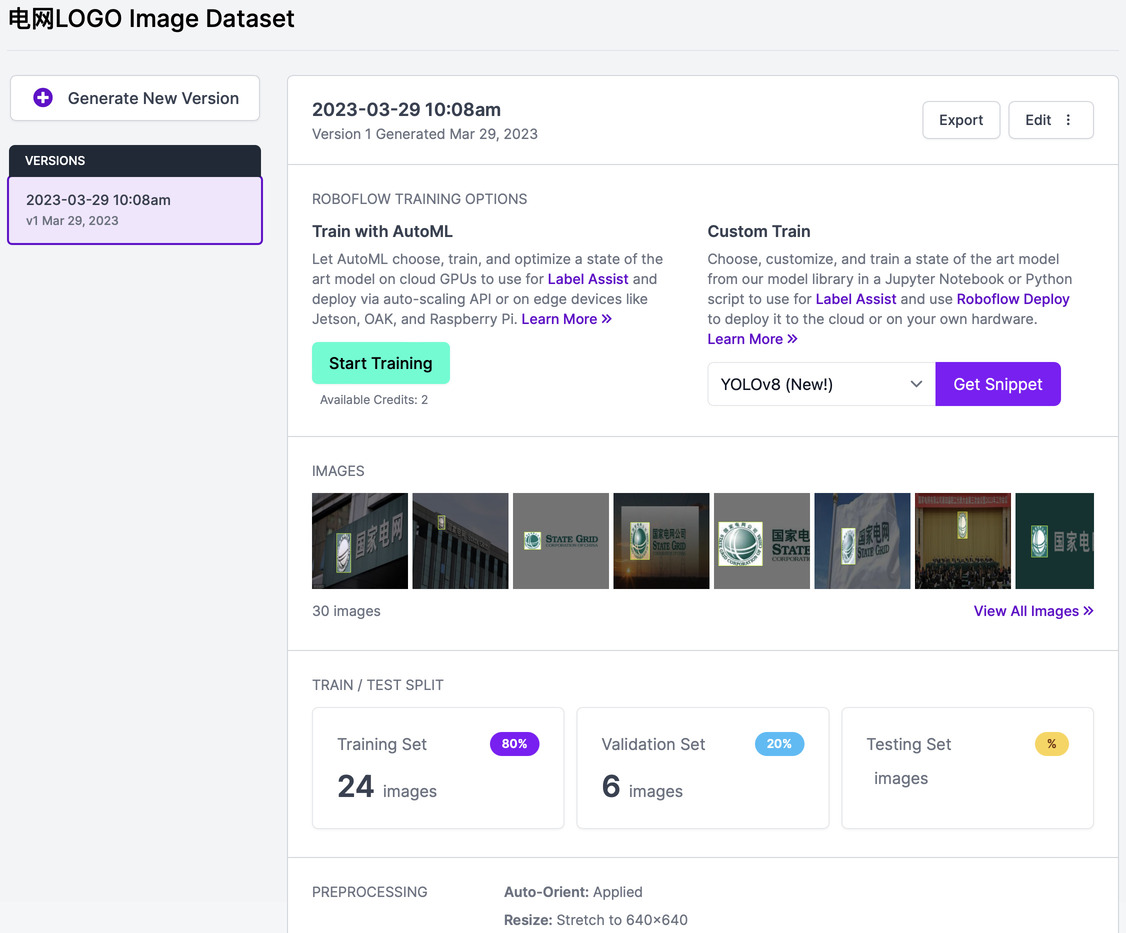
Versions(数据集版本)

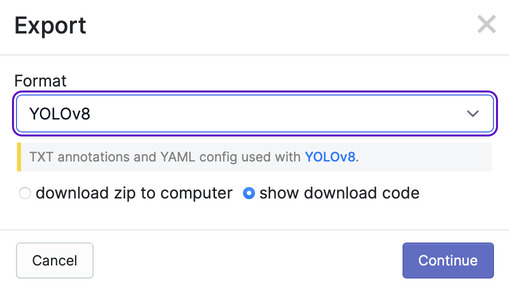
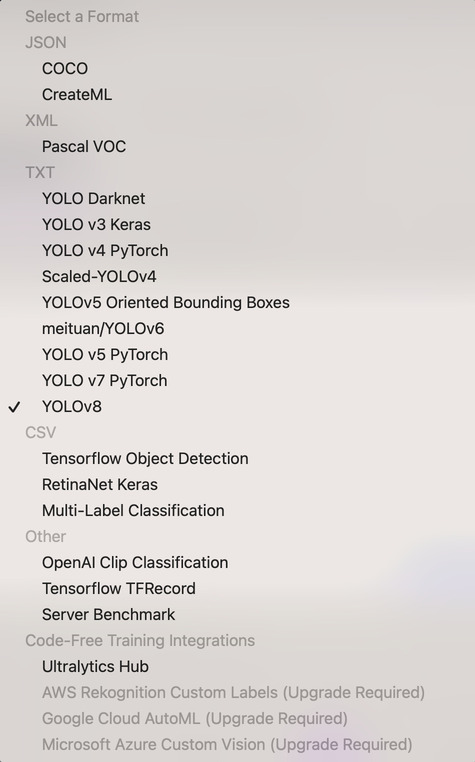
单击“Export”,可以导出不同格式的数据集。

单击“Start Training”,可以进行训练,能够进行3次免费训练。

Deploy(预测或部署)

基于 Python 的推理示例

pip install roboflow

Ultralytics YOLOv8

Ultralytics

构建环境

Ultralytics 镜像

  • GPU
docker pull ultralytics/ultralytics:latest
  • CPU
docker pull ultralytics/ultralytics:latest-cpu
  • Apple Silicon
docker pull ultralytics/ultralytics:latest-arm64

本地安装

pip install ultralytics

基于 COCO128 数据集的目标检测范例

运行容器

git clone https://github.com/ultralytics/ultralytics.git
docker run --runtime=nvidia -it --name ultralytics -v `pwd`/ultralytics:/usr/src/ultralytics ultralytics/ultralytics:latest

yolo 命令的使用参数

yolo TASK MODE ARGS

训练模型

yolo train data=coco128.yaml model=yolov8n.pt

训练可视化(Comet) pip install comet_ml export

在 MacBook Pro M2 Max 上测试 LLaMA

LLaMA

LLaMA-13B 在大多数基准上的表现优于 GPT-3(175B),LLaMA-65B 与最好的型号 Chinchilla-70B 和 PaLM-540B 具有竞争力。

克隆

git clone https://github.com/facebookresearch/llama
cd llama

下载模型

修改 download.sh,配置下载模型的 地址(PRESIGNED_URL)下载目录(TARGET_FOLDER)

vim download.sh
PRESIGNED_URL="https://agi.gpt4.org/llama/LLaMA/*"             # replace with presigned url from email
TARGET_FOLDER="./"             # where all files should end up
bash download.sh

llama.cpp

构建

git clone https://github.com/ggerganov/llama.cpp
cd llama.cpp
make

拷贝 LLaMA 模型到当前目录 ls .

在 MacBook Pro M2 Max 上测试 Whisper

准备音频文件

macOS 上打开 QuickTimePlayer

  1. [文件] -> [新建音频录制]
  2. 录制
  3. 朗读:荷兰发布了一份主题为“宣布即将对先进半导体制造设备采取的出口管制措施”的公告表示,鉴于技术的发展和地缘政治的背景,政府已经得出结论,有必要扩大现有的特定半导体制造设备的出口管制。
  4. 停止
  5. 保存(test.m4a)

m4a 转换 wav

ffmpeg -i test.m4a -ar 16000 -ac 1 -c:a pcm_s16le test.wav

OpenAI Whisper

创建虚拟环境

conda create --name whisper python
conda activate whisper

安装

pip install --upgrade --no-deps --force-reinstall git+https://github.com/openai/whisper.git

wget https://raw.githubusercontent.com/openai/whisper/main/requirements.txt
pip install -r requirements.txt

测试 模型默认保存在 ~/.cache/whisper ls ~/.cache/whisper base.pt large-v2.

通过命令使用 ChatGPT

ChatGPT Wrapper

ChatGPT Wrapper is an open-source unofficial Power CLI, Python API and Flask API that lets you interact programmatically with ChatGPT.

安装

必要条件

  • macOS
brew install moreutils
  • Ubuntu
sudo apt install moreutils

创建虚拟环境

mkdir chatgpt-wrapper && cd chatgpt-wrapper

python -m venv env
source ./env/bin/activate

使用 GitHub 安装最新版本

pip install --upgrade pip
pip install git+https://github.com/mmabrouk/chatgpt-wrapper

Playwright 中安装浏览器,默认为 firefox。

playwright install

ChatGPT 安装

以安装模式启动程序。 这将打开一个浏览器窗口。 在浏览器窗口中登录 ChatGPT,然后停止该程序。

在 MacBook Pro M2 Max 上安装 OpenVINO

安装 OpenVINO(手动编译)

brew install cmake
brew install automake
brew install --build-from-source libtool
brew install --build-from-source libunistring
brew install --build-from-source libidn2
brew install --build-from-source wget
brew install --build-from-source libusb

sudo conda install scons -y                                                                        

# 克隆时把依赖的子模块进行克隆(先克隆OpenVINO,再进行子模块克隆失败)
git clone --depth 1 --recurse-submodules https://github.com/openvinotoolkit/openvino.git

cd openvino
python3 -m pip install -r src/bindings/python/wheel/requirements-dev.txt

# 安装OpenCV(可选)
sudo conda install -c conda-forge opencv

mkdir build && cd build

# 配置(-DOPENVINO_EXTRA_MODULES=../openvino_contrib/modules/arm_plugin 好像不需要)
cmake -DCMAKE_BUILD_TYPE=Release ..

# 编译
cmake --build . --config Release --parallel $(sysctl -n hw.ncpu)
**没有生成 wheel**

# 安装
sudo mkdir /opt/openvino
sudo cmake -DCMAKE_INSTALL_PREFIX=/opt/openvino -P cmake_install.cmake

# 查看可用设备
./bin/arm64/Release/hello_query_device 
[ INFO ] Build ................................. 2023.0.0-1-b300df1be6c
[ INFO ] 
[ INFO ] Available devices: 
[ INFO ] CPU
[ INFO ] 	SUPPORTED_PROPERTIES: 
[ INFO ] 		Immutable: SUPPORTED_METRICS : SUPPORTED_METRICS SUPPORTED_CONFIG_KEYS RANGE_FOR_ASYNC_INFER_REQUESTS RANGE_FOR_STREAMS
[ INFO ] 		Immutable: SUPPORTED_CONFIG_KEYS : LP_TRANSFORMS_MODE DUMP_GRAPH PERF_COUNT CPU_THROUGHPUT_STREAMS CPU_BIND_THREAD CPU_THREADS_NUM CPU_THREADS_PER_STREAM BIG_CORE_STREAMS SMALL_CORE_STREAMS THREADS_PER_STREAM_BIG THREADS_PER_STREAM_SMALL SMALL_CORE_OFFSET ENABLE_HYPER_THREAD NUM_STREAMS INFERENCE_NUM_THREADS AFFINITY
[ INFO ] 		Mutable: PERF_COUNT : YES
[ INFO ] 		Immutable: AVAILABLE_DEVICES : NEON
[ INFO ] 		Immutable: FULL_DEVICE_NAME : arm_compute::NEON
[ INFO ] 		Immutable: OPTIMIZATION_CAPABILITIES : FP16 FP32
[ INFO ] 		Immutable: RANGE_FOR_ASYNC_INFER_REQUESTS : 1 12 1
[ INFO ] 		Mutable: PERFORMANCE_HINT : ""
[ INFO ] 		Immutable: RANGE_FOR_STREAMS : 1 12
[ INFO ] 		Mutable: CPU_THROUGHPUT_STREAMS : 1
[ INFO ] 		Mutable: CPU_BIND_THREAD : NO
[ INFO ] 		Mutable: CPU_THREADS_NUM : 0
[ INFO ] 		Mutable: CPU_THREADS_PER_STREAM : 12
[ INFO ] 		Mutable: BIG_CORE_STREAMS : 0
[ INFO ] 		Mutable: SMALL_CORE_STREAMS : 0
[ INFO ] 		Mutable: THREADS_PER_STREAM_BIG : 0
[ INFO ] 		Mutable: THREADS_PER_STREAM_SMALL : 0
[ INFO ] 		Mutable: SMALL_CORE_OFFSET : 0
[ INFO ] 		Mutable: ENABLE_HYPER_THREAD : YES
[ INFO ] 		Mutable: NUM_STREAMS : 1
[ INFO ] 		Mutable: INFERENCE_NUM_THREADS : 0
[ INFO ] 		Mutable: AFFINITY : NONE
[ INFO ] 

ChatGPT 快速入门

GPT

由 OpenAI 训练的大型语言模型,也称为 Generative Pretrained Transformer。

版本 发布时间 模型参数 GPU内存 能力
GPT 2018年 1.17亿 8G 文本自动补全、问答、语句生成
GPT-2 2019年 15亿 16G 文本自动补全、问答、语句生成、命名实体识别、关系抽取
GPT-3 2020年 1750亿 32G 文本自动补全、问答、语句生成、命名实体识别、关系抽取、文本分类、翻译
GPT-3.5 2021年 1750亿 32G 基于 GPT-3 微调的一系列模型
  • 语言生成任务:文本自动补全、问答、语句生成
  • 语言理解任务:命名实体识别、关系抽取、文本分类、翻译

OpenAI API

模型能力

  • 执行各种自然语言任务的 GPT-3
  • 将自然语言翻译成代码的 Codex
  • 创建和编辑原始图像的 DALL·E

价格

  • 开始试用可在前 3 个月内使用 18 美元免费额度。
  • 1000 tokens 为 1 个计量单位
    • 一个汉字为 2 个 tokens
    • 大约 4 英文字母为 1 个 tokens
  • Tokenizer tool

Python 示例

调用 API 的参数 model: text-davinci-003 是基于 GPT-3 最好的模型,能力:复杂意图、因果关系、创建生成、搜索、总结等。

在 MacBook Pro M2 Max 上安装 PyTorch

安装 PyTorch

sudo conda create --name pytorch python
conda activate pytorch

conda install pytorch torchvision torchaudio -c pytorch

安装每日构建版本

pip3 install --pre torch torchvision torchaudio --index-url https://download.pytorch.org/whl/nightly/cpu

升级

pip3 install --upgrade --pre torch torchvision torchaudio --index-url https://download.pytorch.org/whl/nightly/cpu

训练模型 import torch import torchvision import torchvision.transforms as transforms print(f"PyTorch version: {torch.

在 MacBook Pro M2 Max 上安装 TensorFlow

安装 TensorFlow

sudo conda create --name tensorflow python
conda activate tensorflow

# 不指定环境(-n),默认安装到base环境
sudo conda install -c apple -n tensorflow tensorflow-deps
pip install tensorflow-macos
pip install tensorflow-metal
sudo conda install notebook -y

pip install numpy  --upgrade
pip install pandas  --upgrade
pip install matplotlib  --upgrade
pip install scikit-learn  --upgrade
pip install scipy  --upgrade
pip install plotly  --upgrade

验证 import sys import tensorflow.keras import tensorflow as tf import platform print(f"Python Platform: {platform.

在 MacBook Pro M2 Max 上构建开发环境

今天预订的 MacBook Pro M2Max 16寸 顶配 64G内存 2T硬盘到了,¥36097 。

硬件信息

芯片、内存

system_profiler SPHardwareDataType | head -n 9
Hardware:

    Hardware Overview:

      Model Name: MacBook Pro
      Model Identifier: Mac14,6
      Model Number: XXXXXXXXXXXX
      Chip: Apple M2 Max
      Total Number of Cores: 12 (8 performance and 4 efficiency)
      Memory: 64 GB

硬盘

system_profiler SPStorageDataType | head -n 8
Storage:

    Macintosh HD:

      Free: 1.37 TB (1,372,357,345,280 bytes)
      Capacity: 2 TB (1,995,218,165,760 bytes)
      Mount Point: /System/Volumes/Update/mnt1
      File System: APFS

更改主机名

sudo scutil --set HostName MBP

hostname
MBP

HomeBrew 安装 /bin/bash -c "$(

使用 Python 自动进行工作量估算

安装依赖库

pip install typer python-docx

编写脚本 workload-evaluation.py import os import logging import shutil import random import zipfile import openpyxl import typer from copy import copy from openpyxl.utils import rows_from_range # 日志设置 logger = logging.getLogger() logger.setLevel(logging.DEBUG) ## 文件输出 file_handler = logging.FileHandler("log.txt") file_handler.setLevel(logging.DEBUG) ## 控制台输出 stream_handler = logging.StreamHandler() stream_handler.setLevel(logging.DEBUG) formatter = logging.

Install TVM from Source

Ubuntu 下安装依赖包

sudo apt-get update
sudo apt-get install -y python3 python3-dev python3-setuptools gcc libtinfo-dev zlib1g-dev build-essential cmake libedit-dev libxml2-dev

获取源代码

git clone --recursive https://github.com/apache/tvm tvm

安装 LLVM

TVM 需要 LLVM 用于 CPU 代码生成,使用 LLVM 构建需要 LLVM 4.0 或更高版本。

LLVM Download Page

wget https://github.com/llvm/llvm-project/releases/download/llvmorg-11.0.0/clang+llvm-11.0.0-x86_64-linux-gnu-ubuntu-20.04.tar.xz
tar xvf clang+llvm-11.0.0-x86_64-linux-gnu-ubuntu-20.04.tar.xz
mv clang+llvm-11.0.0-x86_64-linux-gnu-ubuntu-20.04 llvm

构建共享库 创建 build 目录,将 cmake/config.