macOS 录屏视频压缩工具(Automator)
macOS 录屏视频压缩工具使用说明
本工具是一个专为 macOS 设计的自动化脚本,它能帮助您将录屏或大体积视频文件压缩为高兼容性、恒定帧率(60 FPS)的 MP4 格式,有效解决体积过大以及剪辑时的“音画不同步”问题。
该工具设计为通过 macOS 的“快速操作”或 Automator 工作流程来调用,从而实现便捷的视频压缩操作。
-
作为“快速操作”使用:
-
设置“快速操作”: 您需要将提供的脚本保存为 Automator 工作流程的“快速操作”。
-
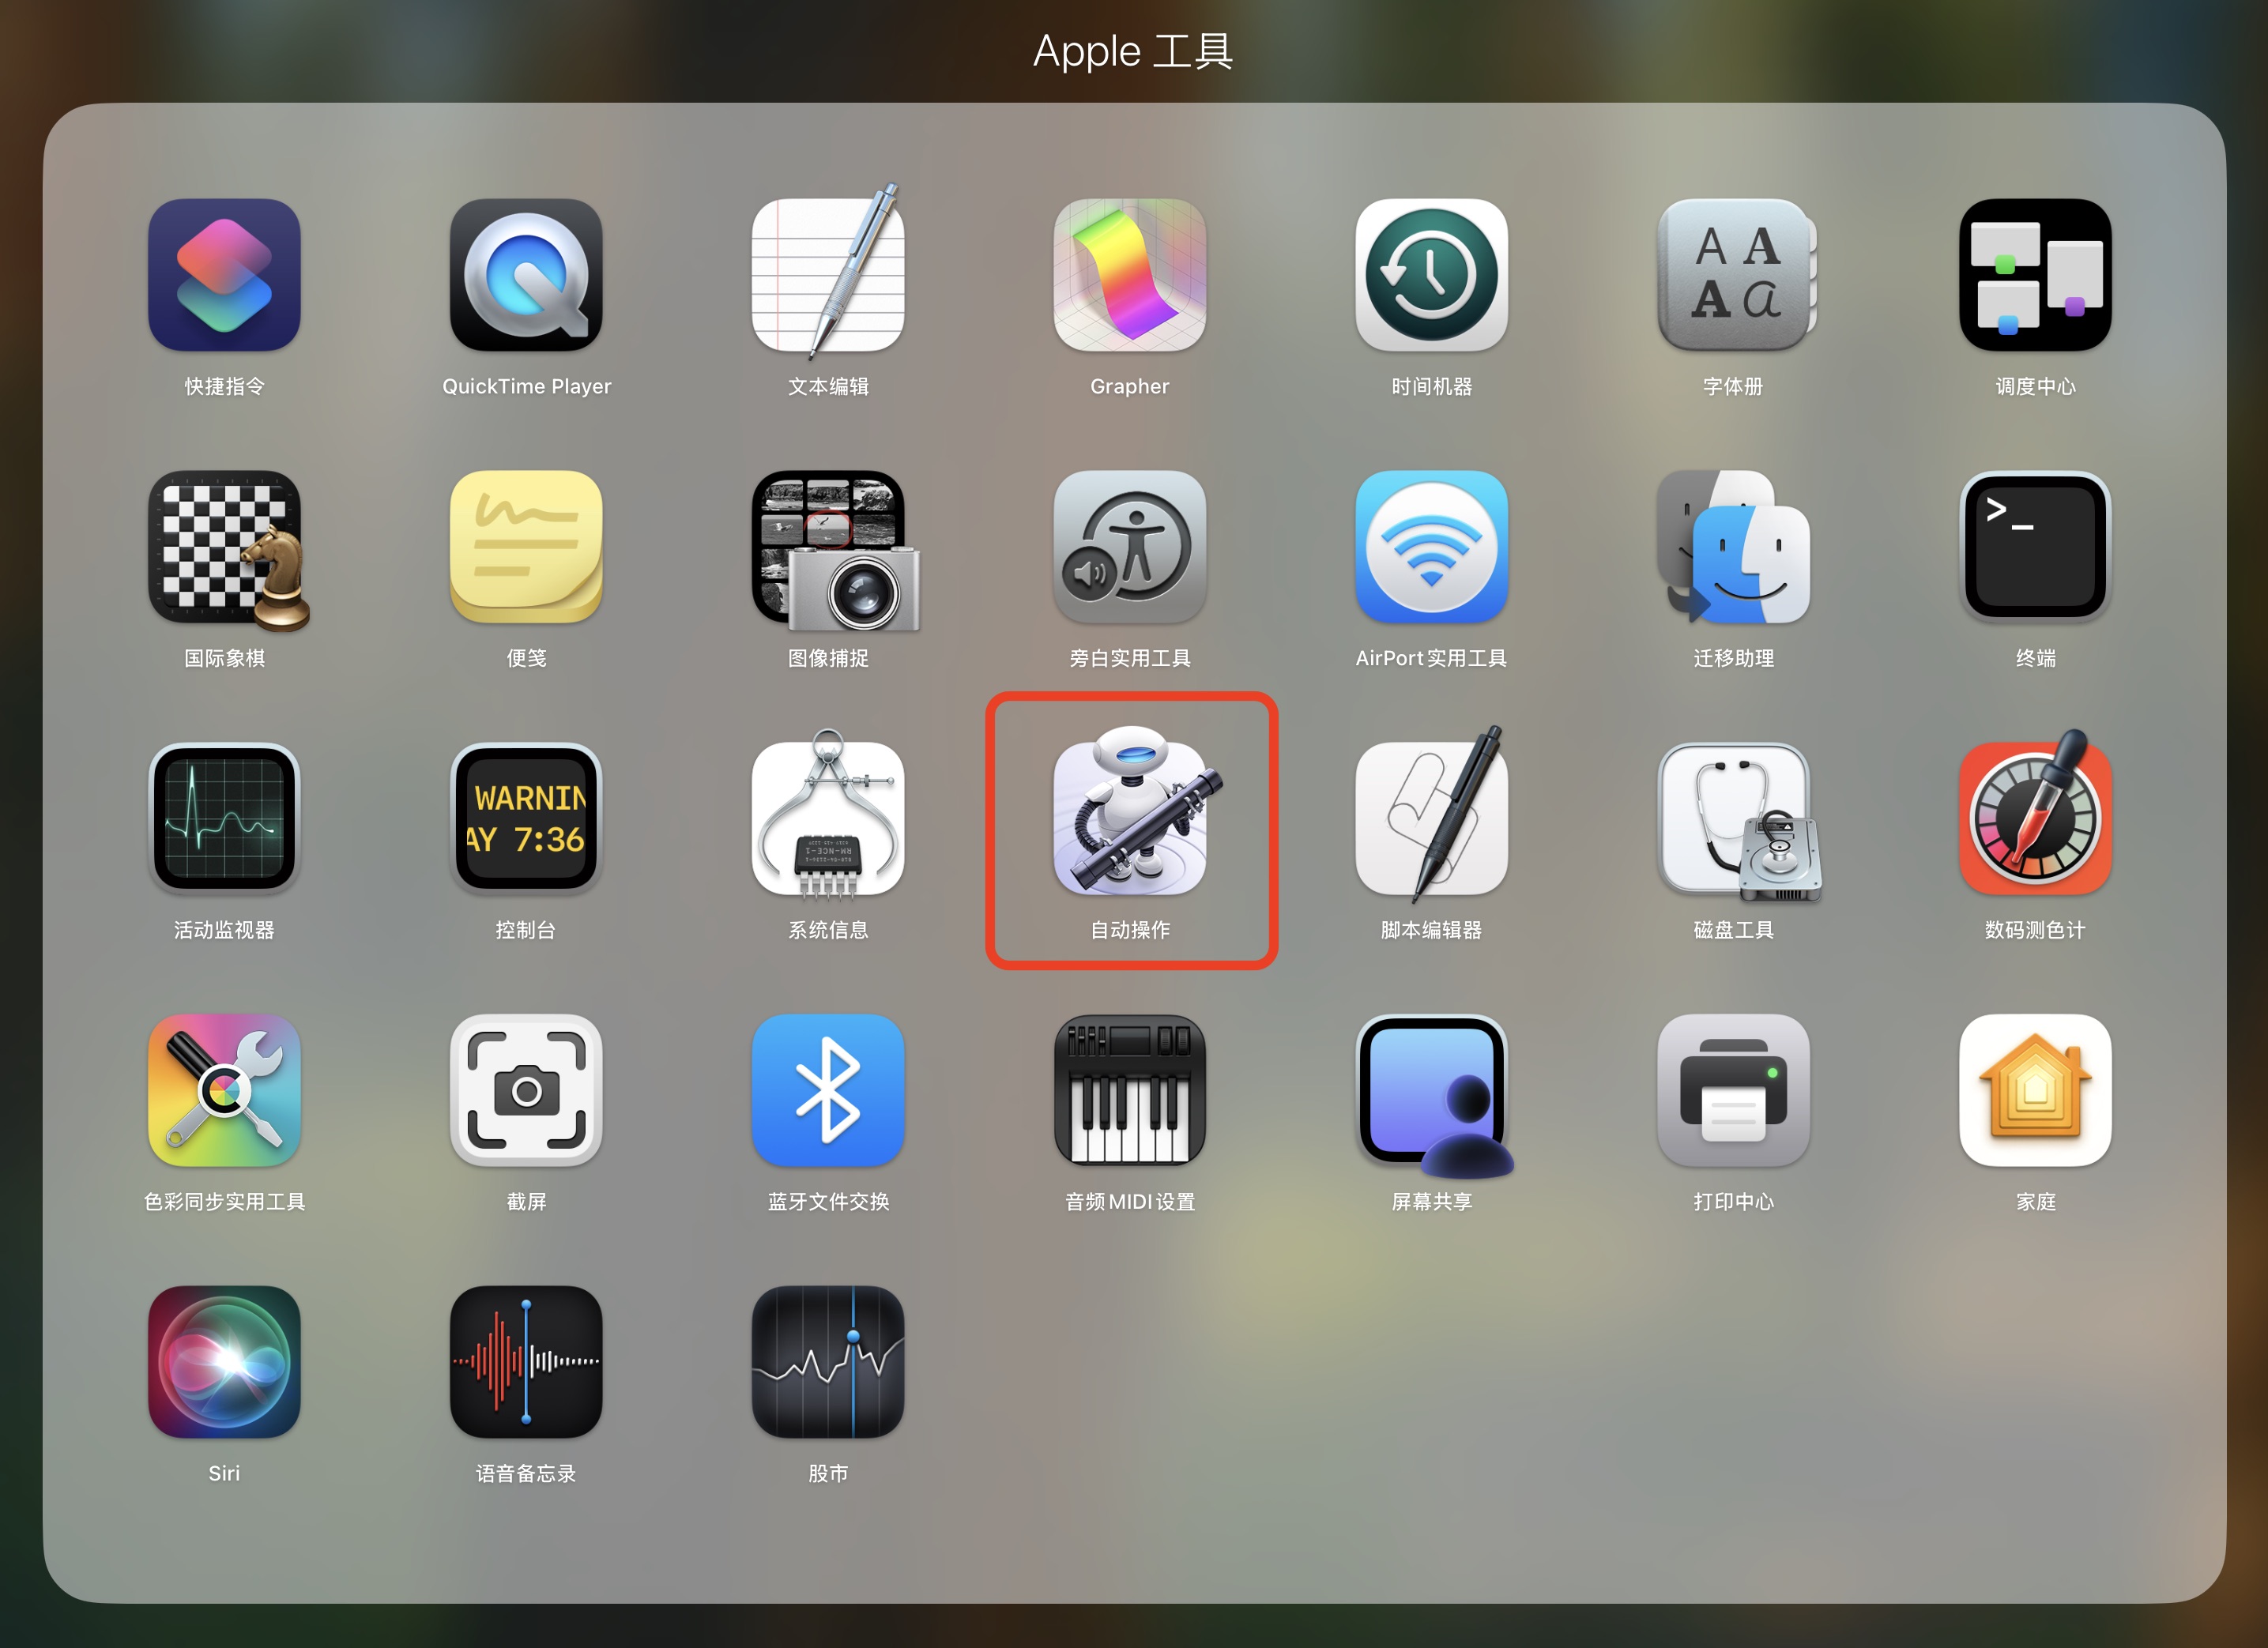
打开 Automator 应用(在“应用程序” -> “实用工具”中)。
-
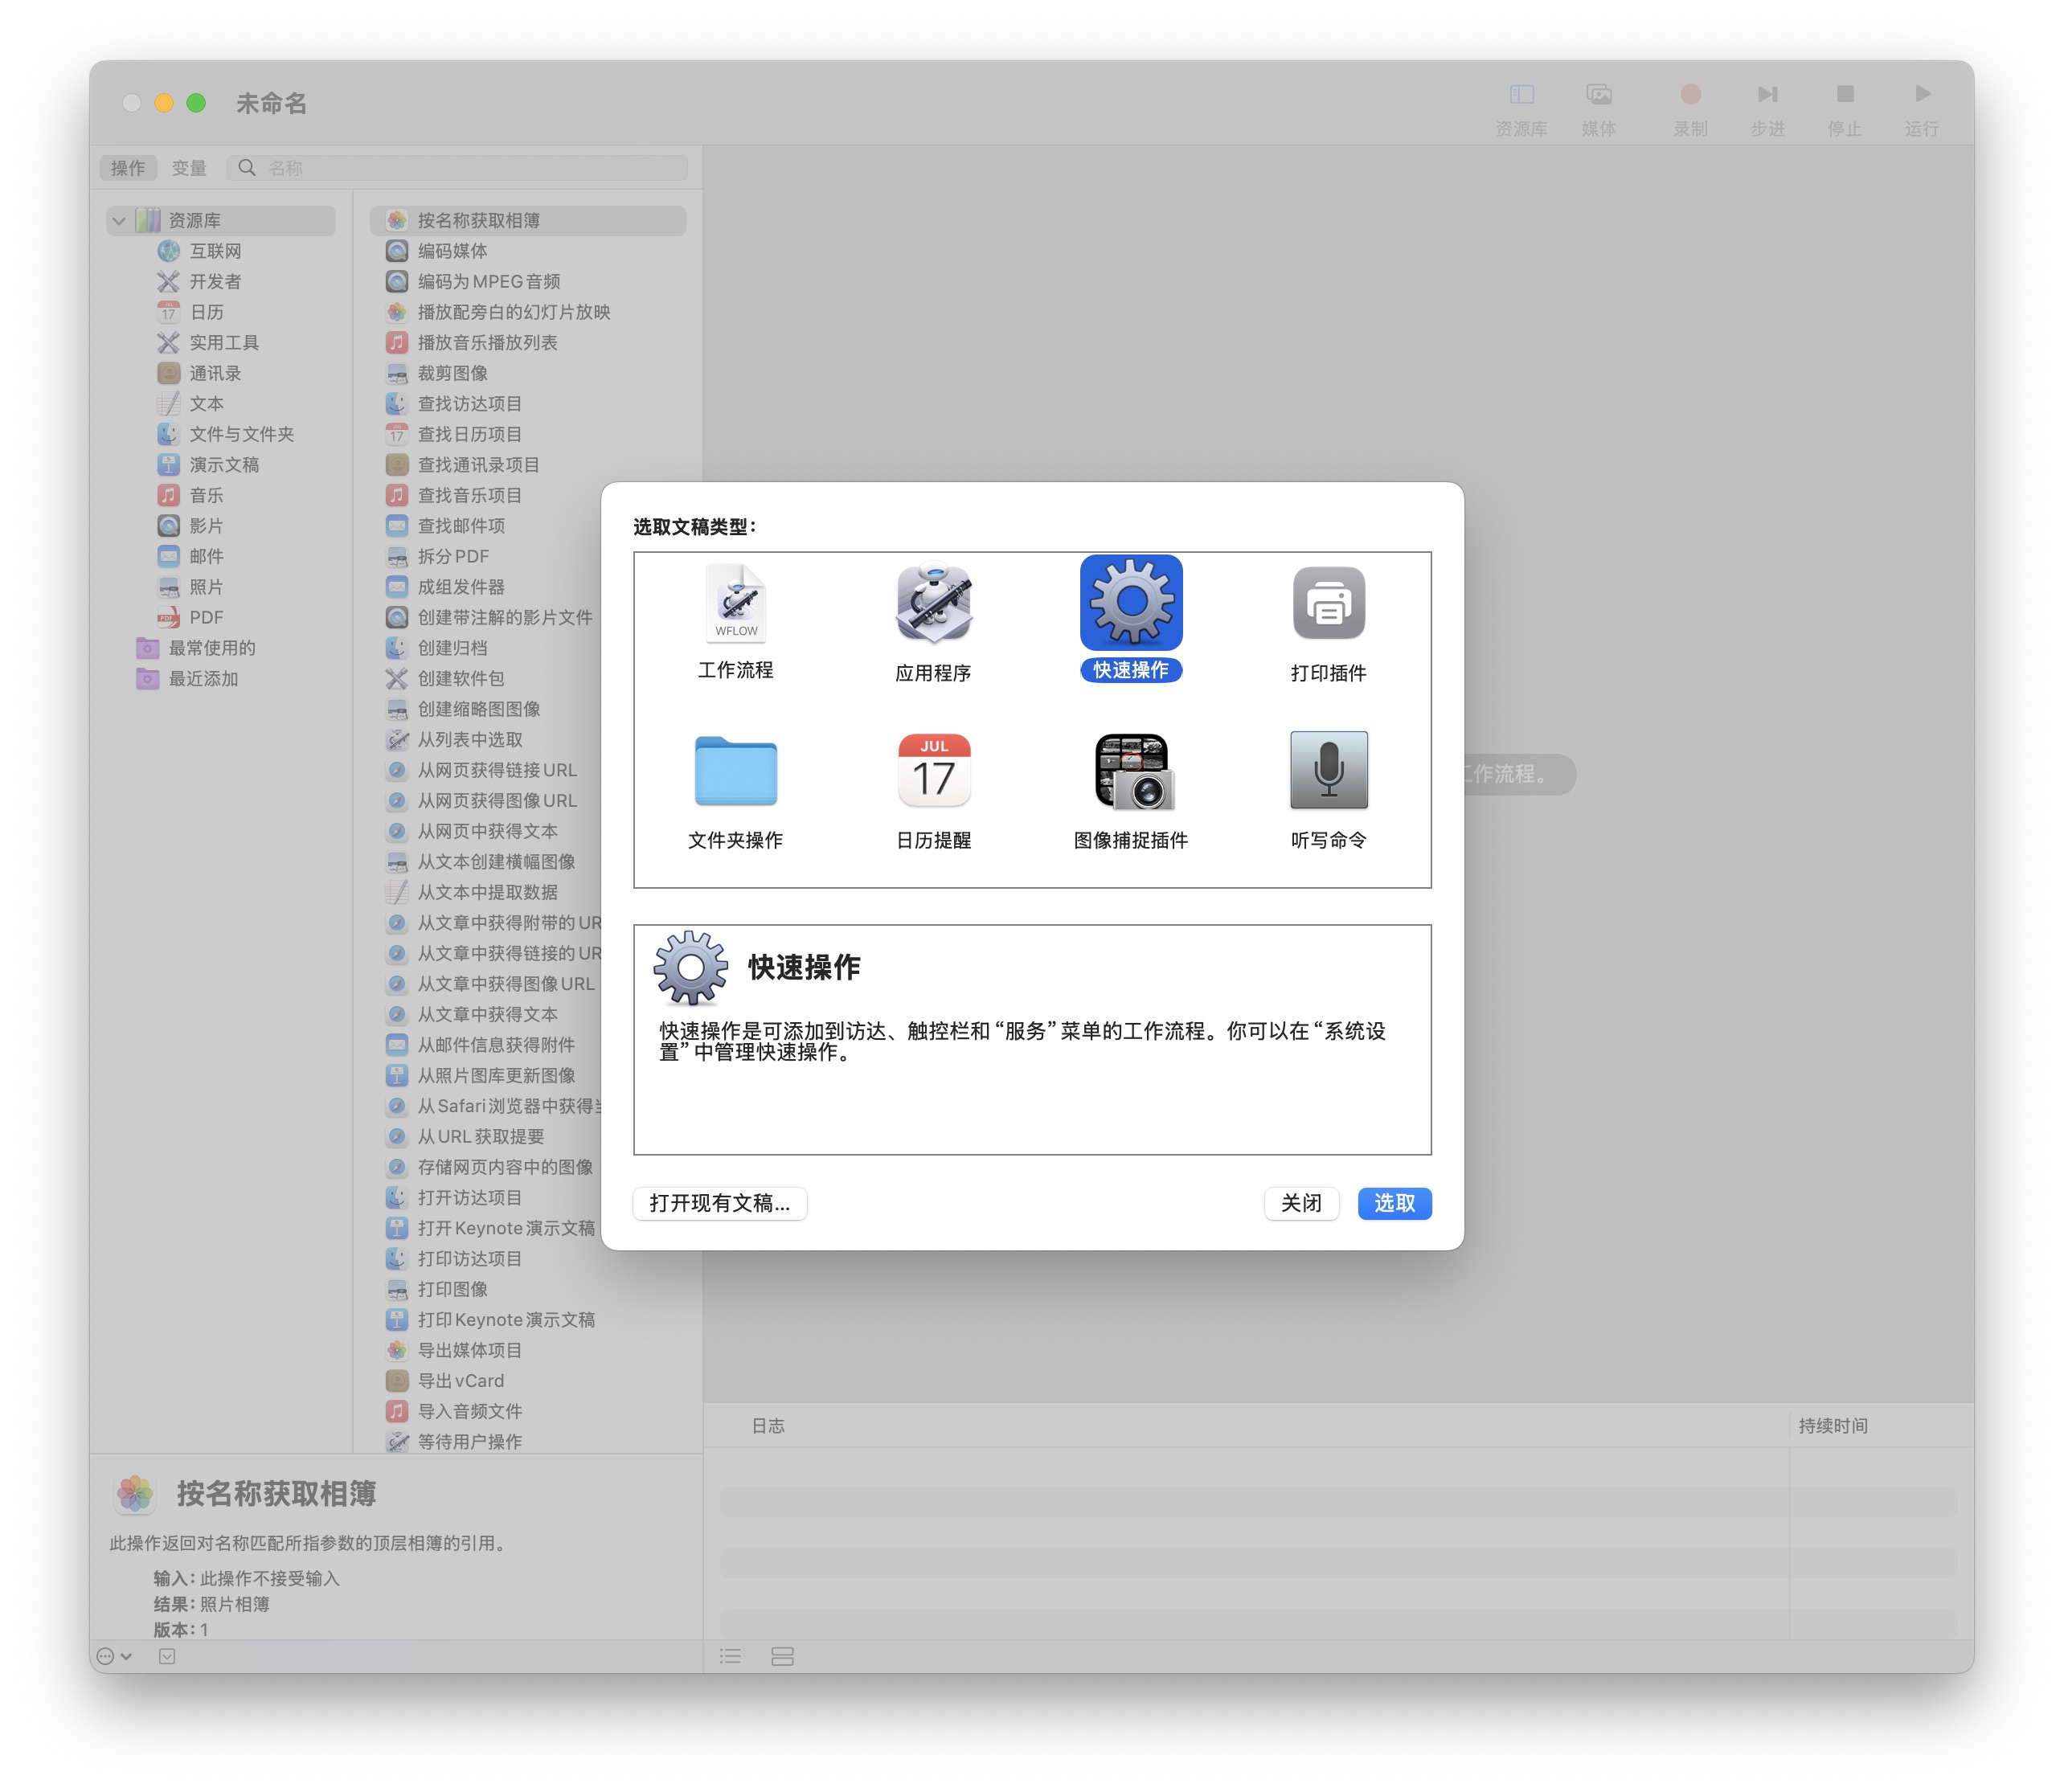
选择 “文件”>“新建”。
-
选择 “快速操作” 并点击“选取”。
-
在顶部设置中,将“工作流程收到当前”修改为 影片文件(或 文件或文件夹)。
-
在左侧的库中,搜索并拖动 “运行 Shell 脚本” 到右侧的工作流程区域。
-
在“运行 Shell 脚本”模块中,将“传递输入”设置为 “作为自变量”(至关重要,请勿选错)。
-
将本工具的完整 Bash 代码粘贴到“运行 Shell 脚本”的文本框中。
-
选择 “文件”>“存储”,为您的快速操作命名,例如 “压缩录屏视频”。
-
使用方法:
-
打开 Finder,导航到您要压缩的视频文件(如
.mov或.mp4)所在的文件夹。 -
选中您希望压缩的视频文件(支持单选或批量多选)。
-
右键点击选中的视频,在弹出的菜单中选择 “快捷动作”(或顶部的“服务”菜单)。
-
点击您刚才创建的快速操作名称 “压缩录屏视频”。
-
系统会弹窗或通知提示已开始处理,工具将自动完成转码,并将压缩后的新视频(文件名附带
_compressed.mp4后缀)保存在原始视频所在的同一文件夹中。
打开自动操作(Automator)
创建快速操作
配置工作流程
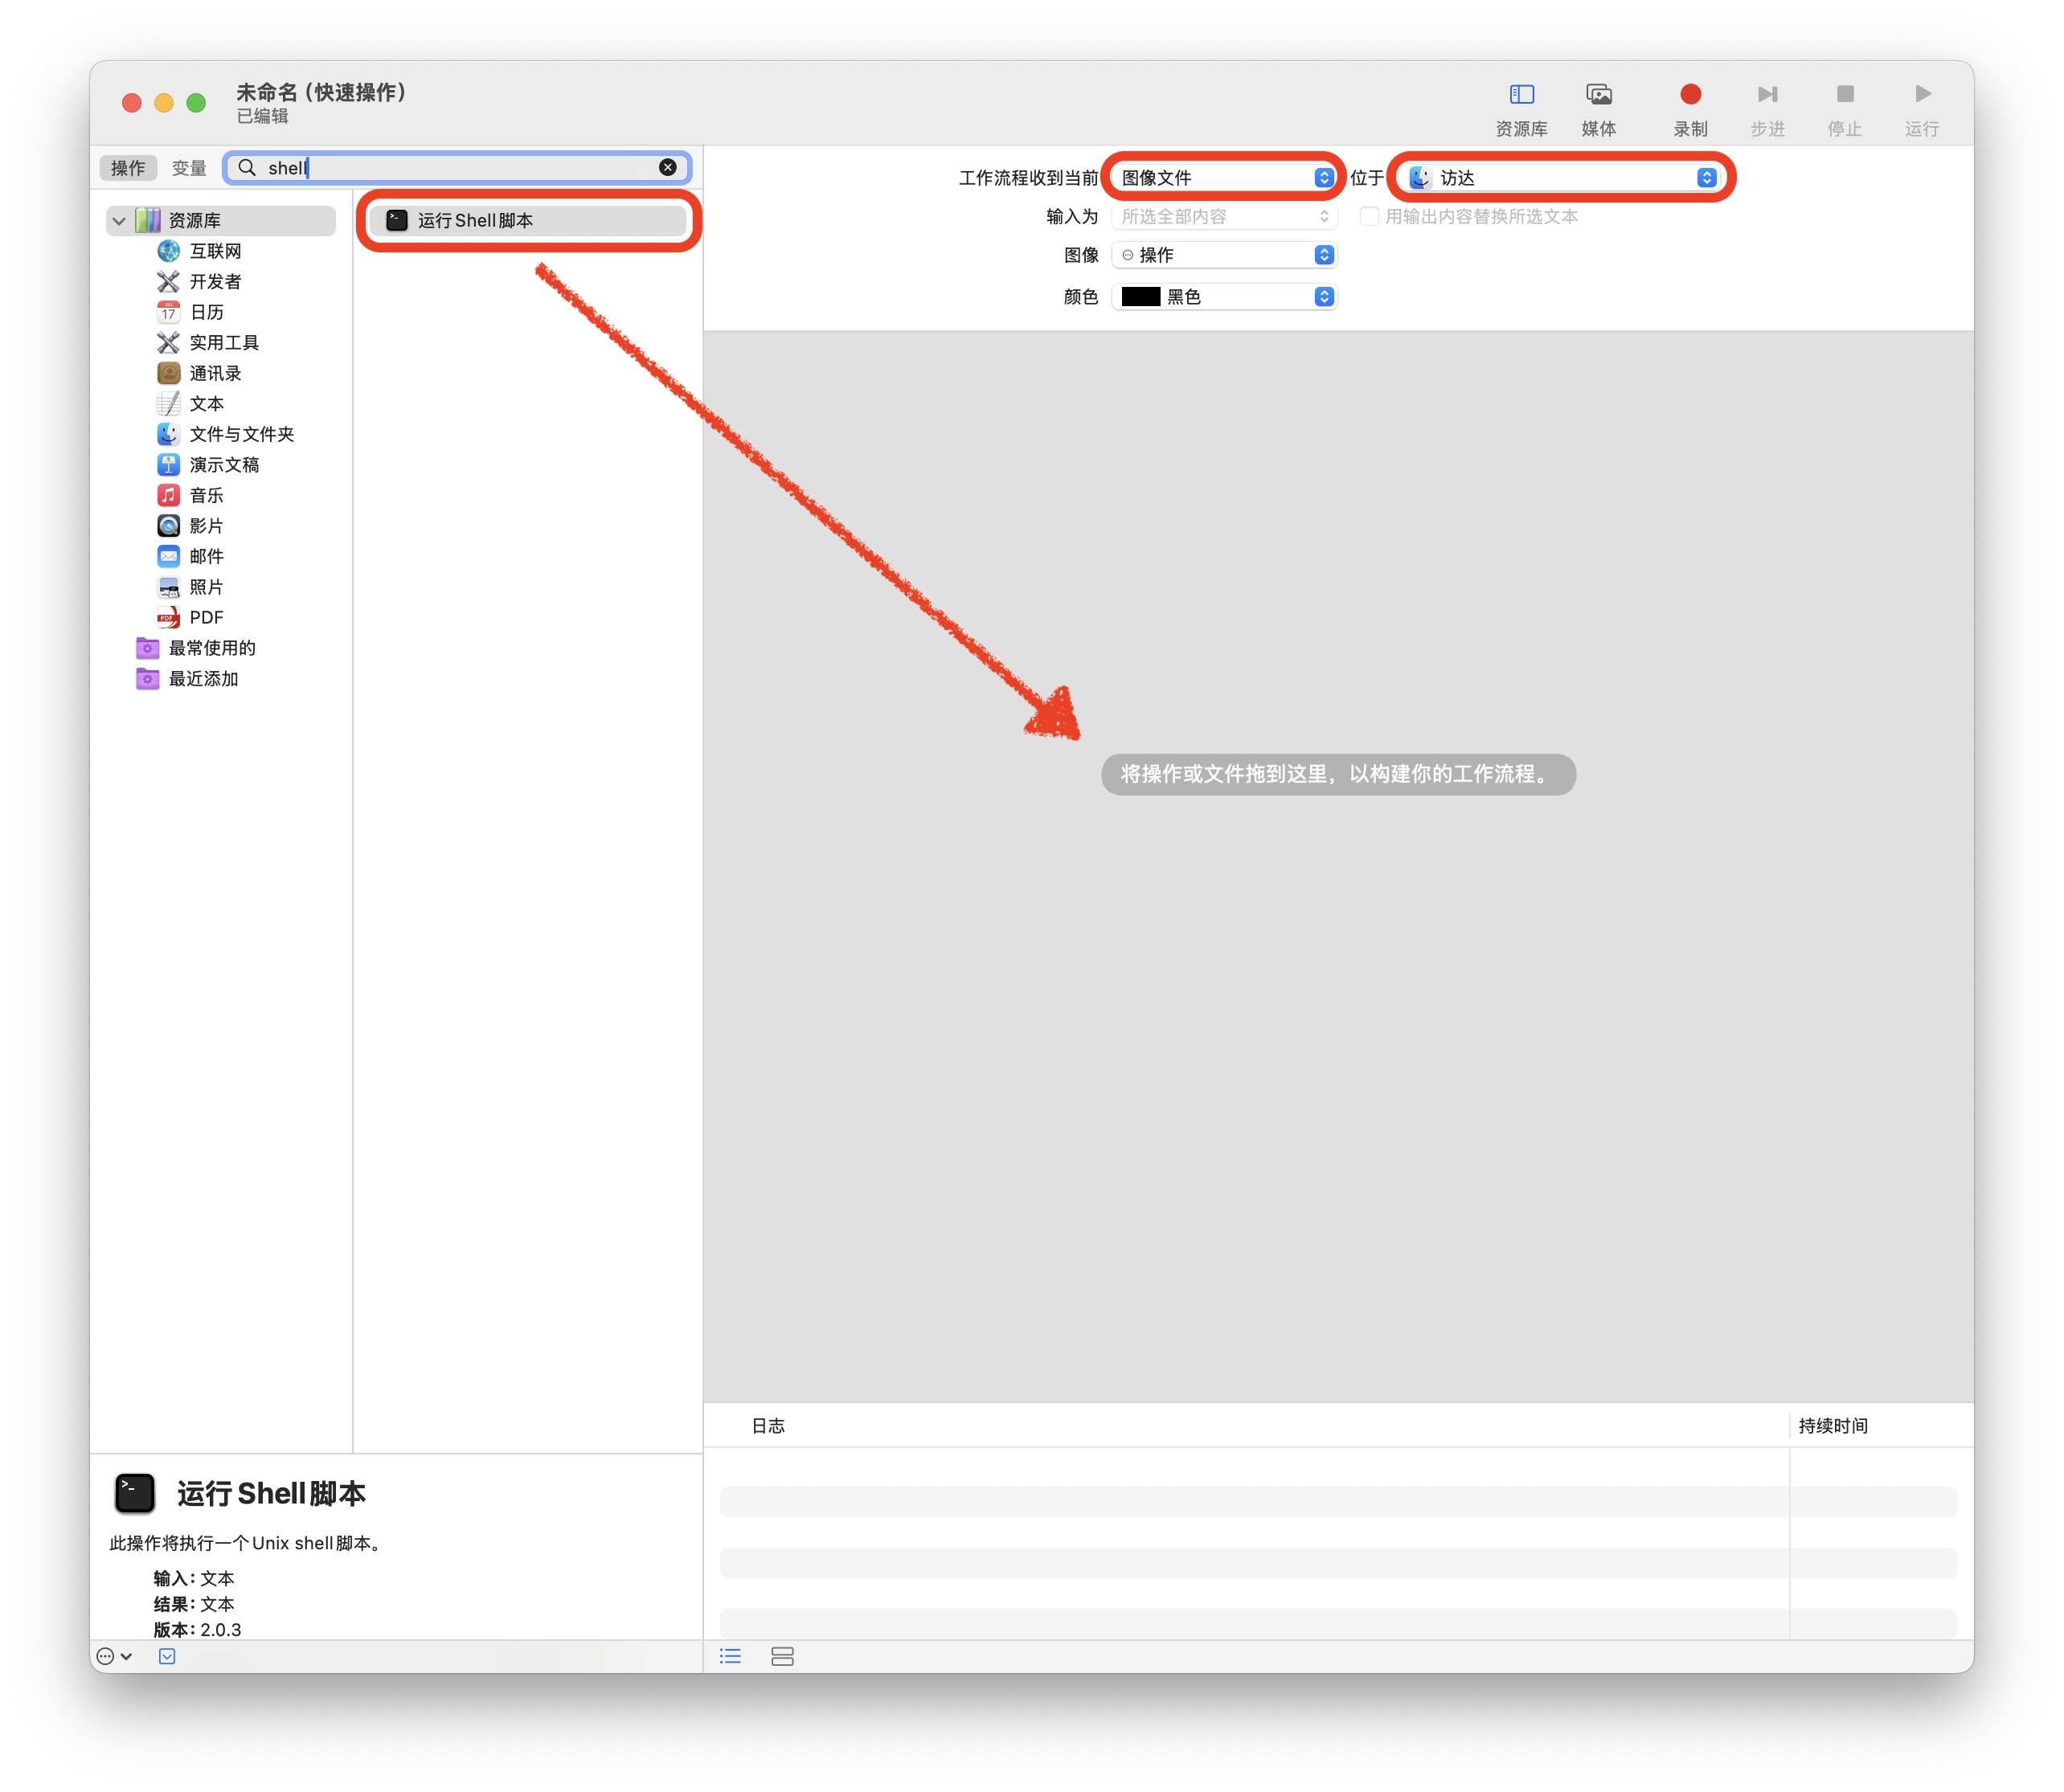
⚠️ 图像文件 换成 影片文件,以便处理视频文件。
Shell 脚本
#!/bin/bash

# 1. 环境加载(确保 Automator 能正确找到 ffmpeg)
if [ -f "/opt/homebrew/bin/brew" ]; then
    eval "$(/opt/homebrew/bin/brew shellenv)"
elif [ -f "/usr/local/bin/brew" ]; then
    eval "$(/usr/local/bin/brew shellenv)"
fi
export PATH="/usr/local/bin:/opt/homebrew/bin:$PATH"

# 检查依赖项 ffmpeg 是否安装
if ! command -v ffmpeg &> /dev/null; then
    osascript -e 'display dialog "缺少依赖:未找到 ffmpeg,请先运行 brew install ffmpeg 安装!" buttons {"确认"} with icon stop'
    exit 1
fi

# 2. 处理选中的文件
for file in "$@"; do
    # 跳过目录,只处理文件
    [ -f "$file" ] || continue

    dir=$(dirname "$file")
    filename=$(basename "$file")
    extension="${filename##*.}"
    filename_base="${filename%.*}"
    ext_lower=$(echo "$extension" | tr '[:upper:]' '[:lower:]')

    # 过滤常见视频格式(如 mov, mp4, m4v 等)
    case "$ext_lower" in
        mov|mp4|m4v|mkv|avi) ;;
        *) continue ;; # 跳过非视频文件
    esac

    # 输出路径:加上 _compressed 后缀,避免覆盖同名的 MP4 源文件
    output_file="${dir}/${filename_base}_compressed.mp4"

    # 发送开始压缩通知
    osascript -e "display notification \"开始压缩:${filename}\" with title \"视频处理中...\""

    # 执行 ffmpeg 压缩(捕获错误输出)
    # -y 表示若输出文件已存在则自动覆盖
    err_msg=$(ffmpeg -y -i "$file" \
        -c:v libx264 \
        -crf 23 \
        -r 60 \
        -vsync cfr \
        -pix_fmt yuv420p \
        -c:a aac -b:a 128k \
        "$output_file" 2>&1)

    if [ $? -eq 0 ]; then
        osascript -e "display notification \"生成:${filename_base}_compressed.mp4\" with title \"视频压缩完成\""
    else
        # 转码失败时清理残留的空文件,并弹窗提示错误
        [ -f "$output_file" ] && rm "$output_file"
        # 截取错误日志最后 300 字符,避免对话框文字过长导致排版溢出
        short_err=$(echo "$err_msg" | tail -n 10)
        osascript -e "display dialog \"压缩失败:${filename}\n错误摘要:\n${short_err}\" buttons {\"确认\"} with icon stop"
    fi
done