Continue 源码分析
Continue
VS Code Extension

通过配置创建新的 Extension,用于区别于 Continue 。
{
  "name": "continue",
  "icon": "media/icon.png",
  "version": "0.9.218",
  "displayName": "LNSoft Continue",
  "description": "The leading open-source AI code assistant",
  "publisher": "LNSoft Continue"
}
入口
VS Code 扩展的起点是 activate.ts。activateExtension 这里的函数将注册所有命令,并将 Continue GUI 作为 webview 加载到 IDE 的侧边栏中。
配置
目录:extensions/vscode
package.json 由开发者手动创建和维护,主要用于定义项目的配置信息。
- configuration
- commands
- keybindings
- menus
- views
package-lock.json 由 npm 自动生成和更新,主要用于锁定依赖的具体版本,确保安装一致性。
国际化
可以通过使用 package.nls.json 文件来支持多语言。package.nls.json 文件包含了所有需要本地化的字符串,并且可以为不同的语言创建相应的翻译文件,如 package.nls.zh-cn.json。
- 步骤
- 在 package.json 中使用占位符: 在 package.json 文件中,用占位符(
%占位符%)替换需要本地化的字符串。 - 创建 package.nls.json 文件: 在扩展的根目录下创建 package.nls.json 文件,定义占位符和默认语言的映射。默认语言(通常是英文)的字符串。
- 创建语言特定的翻译文件: 为每种语言创建一个翻译文件(
package.nls.<language>.json),如 package.nls.zh-cn.json,并提供相应的翻译。
- 在 package.json 中使用占位符: 在 package.json 文件中,用占位符(
{
  "name": "continue",
  "icon": "media/icon.png",
  "version": "0.9.191",
  "contributes": {
    "commands": [
      {
        "command": "continue.focusContinueInputWithoutClear",
        "category": "Continue",
        "title": "%focusContinueInputWithoutClear%",
        "group": "Continue"
      },
      {
        "command": "continue.toggleFullScreen",
        "category": "Continue",
        "title": "%toggleFullScreen%",
        "icon": "$(fullscreen)",
        "group": "Continue"
      },
      {
        "command": "continue.newSession",
        "category": "Continue",
        "title": "%newSession%",
        "icon": "$(add)",
        "group": "Continue"
      },
      {
        "command": "continue.viewHistory",
        "category": "Continue",
        "title": "%viewHistory%",
        "icon": "$(history)",
        "group": "Continue"
      },
      {
        "command": "continue.writeCommentsForCode",
        "category": "Continue",
        "title": "%writeCommentsForCode%",
        "group": "Continue"
      },
      {
        "command": "continue.writeDocstringForCode",
        "category": "Continue",
        "title": "%writeDocstringForCode%",
        "group": "Continue"
      },
      {
        "command": "continue.fixCode",
        "category": "Continue",
        "title": "%fixCode%",
        "group": "Continue"
      },
      {
        "command": "continue.optimizeCode",
        "category": "Continue",
        "title": "%optimizeCode%",
        "group": "Continue"
      }
    ]
}
package.nls.json
{
  "newSession": "New Session",
  "toggleFullScreen": "Toggle Full Screen",
  "viewHistory": "View History",
  "fixCode": "Fix this Code",
  "optimizeCode": "Optimize this Code",
  "writeDocstringForCode": "Write a Docstring for this Code",
  "writeCommentsForCode": "Write Comments for this Code",
  "focusContinueInputWithoutClear": "Add Highlighted Code to Context"
}
package.nls.zh-cn.json
{
  "newSession": "新会话",
  "toggleFullScreen": "切换全屏",
  "viewHistory": "查看历史记录",
  "fixCode": "修复代码",
  "optimizeCode": "优化代码",
  "writeDocstringForCode": "为此代码编写文档字符串",
  "writeCommentsForCode": "为此代码编写注释",
  "focusContinueInputWithoutClear": "将高亮显示的代码添加到上下文"
}
GUI
主界面
左边是主界面,不同的元素使用不同的颜色区分;右边是主界面中元素对应的组件或配置(颜色一致),通过 缩进 方式表示他们之间的包含关系。
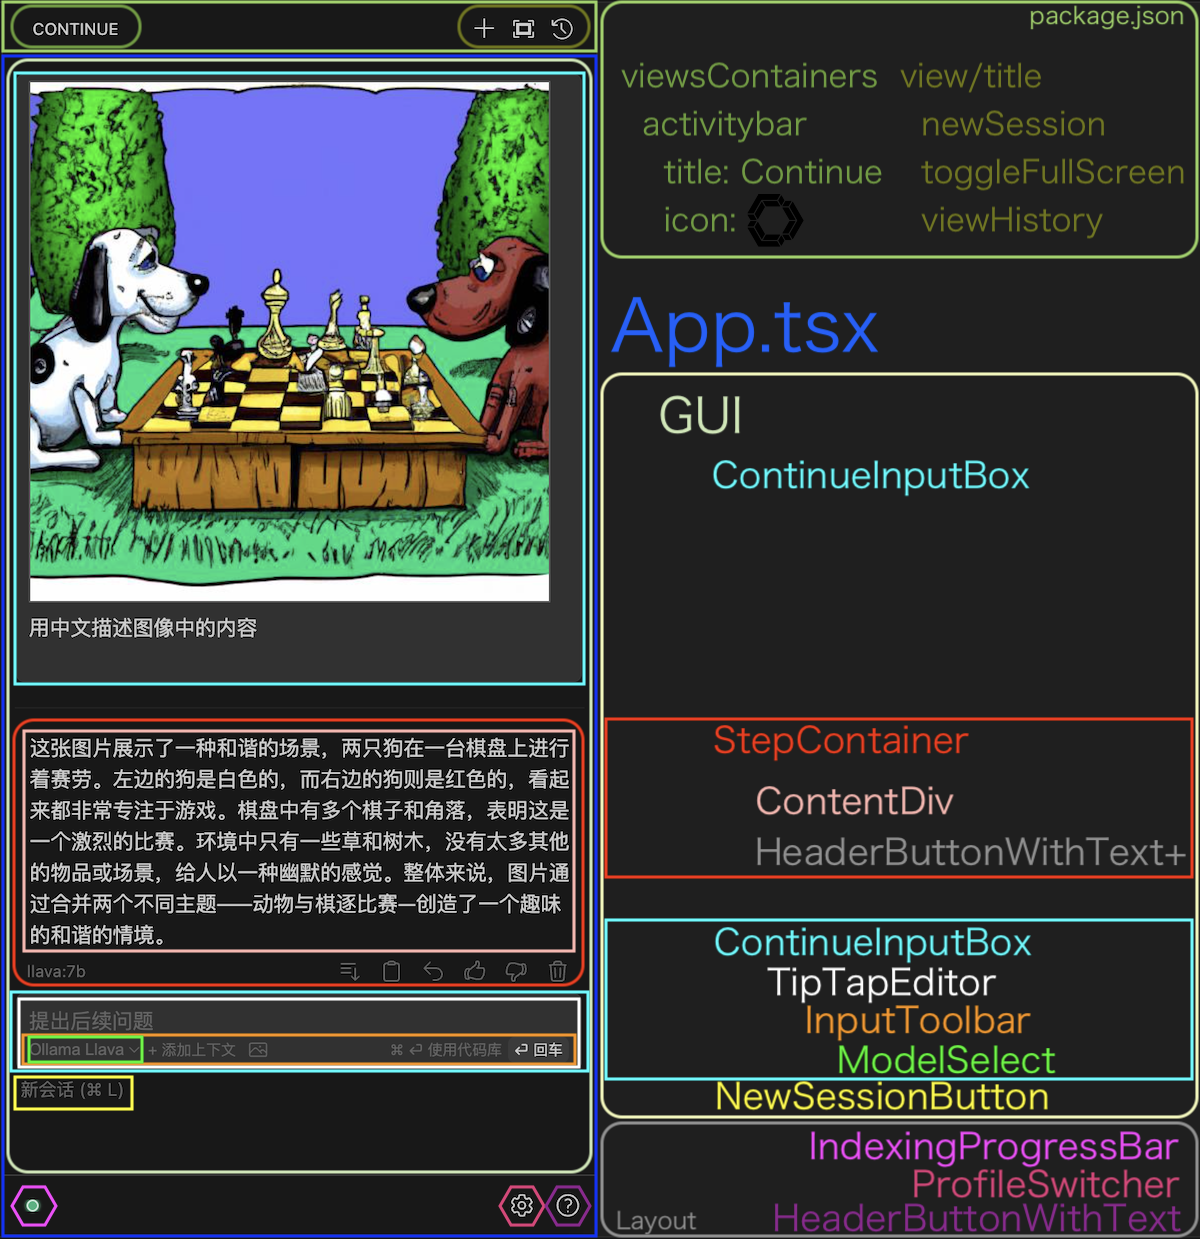
路由
| 路径 | 组件 |
|---|---|
| / | GUI |
| /index.html | GUI |
| /history | History |
| /stats | Stats |
| /help | Help |
| /help | HelpPage |
| /settings | SettingsPage |
| /addModel | AddNewModel |
| /addModel/provider/:providerName | ConfigureProvider |
| /monaco | MonacoPage |
| /onboarding | Onboarding |
| /localOnboarding | LocalOnboarding |
| /migration | MigrationPage |
| /apiKeysOnboarding | ApiKeysOnboarding |
| /apiKeyAutocompleteOnboarding | ApiKeyAutocompleteOnboarding |
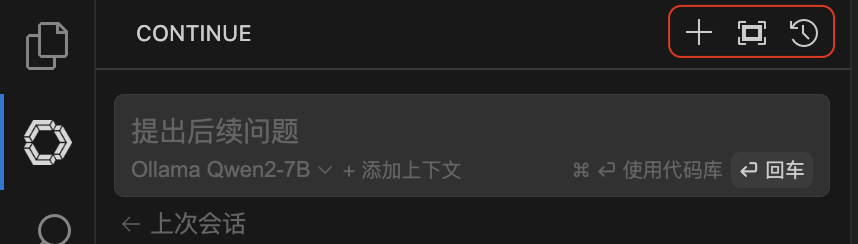
标题 & 图标
![]()
extensions/vscode/package.json
{
  "contributes": {
    "viewsContainers": {
      "activitybar": [
        {
          "id": "continue",
          "title": "Continue",
          "icon": "media/sidebar-icon.png"
        }
      ]
    },
    "views": {
      "continue": [
        {
          "type": "webview",
          "id": "continue.continueGUIView",
          "name": "",
          "visibility": "visible"
        }
      ]
    }
  }
}
在 Visual Studio Code 扩展中,viewsContainers 配置用于在活动栏(Activity Bar)中添加自定义视图容器。
菜单
通过编辑配置文件 package.json
WebView View/Title
{
  "contributes": {
    "menus": {
      "view/title": [
        {
          "command": "continue.newSession",
          "group": "navigation@1",
          "when": "view == continue.continueGUIView"
        },
        {
          "command": "continue.toggleFullScreen",
          "group": "navigation@1",
          "when": "view == continue.continueGUIView"
        },
        {
          "command": "continue.viewHistory",
          "group": "navigation@1",
          "when": "view == continue.continueGUIView"
        }
      ]
    }
  }
}
上下文菜单

{
  "contributes": {
    "menus": {
      "continue.continueSubMenu": [
        {
          "command": "continue.focusContinueInputWithoutClear",
          "group": "Continue",
          "when": "editorHasSelection"
        },
        {
          "command": "continue.writeCommentsForCode",
          "group": "Continue",
          "when": "editorHasSelection"
        },
        {
          "command": "continue.writeDocstringForCode",
          "group": "Continue",
          "when": "editorHasSelection"
        },
        {
          "command": "continue.fixCode",
          "group": "Continue",
          "when": "editorHasSelection"
        },
        {
          "command": "continue.optimizeCode",
          "group": "Continue",
          "when": "editorHasSelection"
        },
        {
          "command": "continue.fixGrammar",
          "group": "Continue",
          "when": "editorHasSelection && editorLangId == 'markdown'"
        }
      ]
    }
  }
}
Tab AutoComplete
getTabCompletion core/autocomplete/completionProvider.ts
使用 Ollama 设置
在 ~/.continue/config.json 文件中配置。
{
  "tabAutocompleteModel": {
    "title": "Tab Autocomplete",
    "provider": "ollama",
    "model": "codeqwen:7b",
    "apiKey": ""
  }
}
Tab AutoComplete 选项
默认 Tab AutoComplete 选项配置在代码:core/util/parameters.ts
{
  "tabAutocompleteOptions": {
    "multilineCompletions": "auto",
    "maxPromptTokens": 400
  }
}
- multilineCompletions 控制是否提供多行代码的自动补全
"always": 默认。总是在多行代码上提供自动补全"never": 从不在多行代码上提供自动补全"auto": 根据代码上下文自动决定是否提供多行代码的自动补全
- maxPromptTokens 要使用的提示 Token 的最大数量。数字越小,完成速度越快,但上下文越少。
使用什么样的模型
建议用于自动完成的模型是使用高度特定的提示格式进行训练的,这使它们能够响应完成代码的请求。出色的自动完成不需要庞大的模型。大多数最先进的自动完成模型的参数不超过 10B,超过这个数字并不能显着提高性能。
| 模型 | 大小 |
|---|---|
| deepseek-coder:1.3b-base | 1.3B |
| starcoder2:3b | 3B |
| deepseek-coder:6.7b-base | 6.7B |
| codeqwen:7b | 7B |
| deepseek-coder-v2:16b | 16B |
| codestral:22b | 22B |
支持编程语言
您需要支持编程语言,可以通过编辑代码:core/autocomplete/languages.ts
// TypeScript
export const Typescript = {
  name: "TypeScript",
  topLevelKeywords: ["function", "class", "module", "export", "import"],
  singleLineComment: "//",
  endOfLine: [";"],
};

// Python
export const Python = {
  name: "Python",
  // """"#" is for .ipynb files, where we add '"""' surrounding markdown blocks.
  // This stops the model from trying to complete the start of a new markdown block
  topLevelKeywords: ["def", "class", '"""#'],
  singleLineComment: "#",
  endOfLine: [],
};

// ...

export const LANGUAGES: { [extension: string]: AutocompleteLanguageInfo } = {
  ts: Typescript,
  js: Typescript,
  tsx: Typescript,
  jsx: Typescript,
  ipynb: Python,
  py: Python,
  pyi: Python,
  java: Java,
  cpp: Cpp,
  cxx: Cpp,
  h: Cpp,
  hpp: Cpp,
  cs: CSharp,
  c: C,
  scala: Scala,
  sc: Scala,
  go: Go,
  rs: Rust,
  hs: Haskell,
  php: PHP,
  rb: Ruby,
  rails: RubyOnRails,
  swift: Swift,
  kt: Kotlin,
  clj: Clojure,
  cljs: Clojure,
  cljc: Clojure,
  jl: Julia,
  fs: FSharp,
  fsi: FSharp,
  fsx: FSharp,
  fsscript: FSharp,
  r: R,
  R: R,
  dart: Dart,
  sol: Solidity,
  yaml: YAML,
  yml: YAML,
  md: Markdown,
};
Embedding Model
在配置文件 ~/.continue/config.json 中配置 transformers.js 模型,并不能生效,目前没有指定模型的功能。
{
  "embeddingsProvider": {
    "provider": "transformers.js",
    "model": "bge-small-zh-v1.5"  // 无效
  },
}
可以通过文件 core/indexing/embeddings/TransformersJsEmbeddingsProvider.ts 修改来指定中文模型 bge-small-zh-v1.5。
static model: string = "bge-small-zh-v1.5";
两处都要修改
transformers.js 支持的模型
- jina-embeddings-v2-base-zh
- bge-small-zh-v1.5
- bge-base-zh-v1.5
- bge-large-zh-v1.5
- all-MiniLM-L6-v2
- bge-base-en-v1.5
Slash Command
Slash 命令接口,定义在 core/index.d.ts 中,需要您定义一个 name(用于调用命令的文本),一个 description(在 slash 命令菜单中显示的文本)和一个在调用命令时将被调用的 run 函数。run 函数是一个异步生成器,它产生要在聊天中显示的内容。run 函数传递了一个 ContinueSDK 对象,可以用它与 IDE 交互,调用 LLM,并查看聊天历史,以及其他一些实用程序。
export interface SlashCommand {
  name: string;
  description: string;
  params?: { [key: string]: any };
  run: (sdk: ContinueSDK) => AsyncGenerator<string | undefined>;
}
在 core/commands/slash 中有许多示例的斜杠命令,我们建议从中借鉴。一旦您在此文件夹中创建了新的 SlashCommand,请确保完成以下操作:
- 将您的命令添加到 core/commands/slash/index.ts 中的数组中
- 将您的命令添加到 config_schema.json 中的列表中。这样可以确保智能感知在用户编辑
config.json时显示您的提供程序可用的命令。如果您的命令接受任何参数,您还应该按照现有示例将它们添加到 JSON 模式中。
编写内建 Slash Command:翻译中文(/tr)
增加文件 core/commands/slash/translate.ts,并在其中添加以下内容:
import { SlashCommand } from "../../index.js";
import { stripImages } from "../../llm/countTokens.js";

const TranslateChineseCommand: SlashCommand = {
  name: "tr",
  description: "Translate to Chinese",
  run: async function* ({ ide, llm, input }) {
    if (input.trim() === "") {
      yield "Please enter the text you want to translate into Chinese.";
      return;
    }

    // input = '/tr hello world' => 'hello world'
    input = input.replace("/tr", "").trim();

    const prompt = `The text the user wants to translate is:

"${input}"

Please translate into Chinese. Your output should contain only the corresponding Chinese, without any explanation or other output.`;

    for await (const chunk of llm.streamChat([
      { role: "user", content: prompt },
    ])) {
      yield stripImages(chunk.content);
    }
  },
};

export default TranslateChineseCommand;
修改文件 core/commands/slash/index.ts,并在其中添加以下内容:
//...
import TranslateChineseCommand from "./translate.js";

export default [
  //...
  TranslateChineseCommand,
];
LLM Providers
Adding an LLM Provider
Continue 支持十几种不同的 LLM “providers”,使得在 OpenAI、Ollama、Together、LM Studio、Msty 等平台上运行模型变得容易。你可以在这里找到所有现有的 providers,如果你发现缺少某个 provider,可以按照以下步骤添加:
- 在 core/llm/llms 目录中创建一个新文件。文件名应为 provider 的名称,并且应导出一个扩展自 BaseLLM 的类。这个类应包含以下最小实现。我们建议查看现有的 providers 以获取更多详细信息。LlamaCpp Provider 是一个很好的简单示例。
- providerName - 你的 provider 的标识符
- 至少一个 _streamComplete 或 _streamChat - 这是向 API 发出请求并返回流响应的函数。你只需要实现其中一个,因为 Continue 可以在 “chat” 和 “raw completion” 之间自动转换。
- 将你的 provider 添加到 core/llm/llms/index.ts 中的 LLMs 数组中。
- 如果你的 provider 支持图像,将其添加到 core/llm/index.ts 中的 PROVIDER_SUPPORTS_IMAGES 数组中。
- 将必要的 JSON Schema 类型添加到 config_schema.json 中。这确保了当用户编辑 config.json 时,Intellisense 会显示你的 provider 可用的选项。
- 在 docs/docs/reference/Model Providers 中为你的 provider 添加一个文档页面。这应该展示在 config.json 中配置你的 provider 的示例,并解释可用的选项。
Context Providers
ContextProvider 是一个 Continue 插件,可以通过输入 @ 来快速选择文档作为语言模型的上下文。 IContextProvider 接口在 core/index.d.ts 中定义,但所有内置上下文提供程序都扩展于 BaseContextProvider。
export interface IContextProvider {
  get description(): ContextProviderDescription;

  getContextItems(
    query: string,
    extras: ContextProviderExtras,
  ): Promise<ContextItem[]>;

  loadSubmenuItems(args: LoadSubmenuItemsArgs): Promise<ContextSubmenuItem[]>;
}
export abstract class BaseContextProvider implements IContextProvider {
  options: { [key: string]: any };

  constructor(options: { [key: string]: any }) {
    this.options = options;
  }

  static description: ContextProviderDescription;

  get description(): ContextProviderDescription {
    return (this.constructor as any).description;
  }

  // Maybe just include the chat message in here. Should never have to go back to the context provider once you have the information.
  abstract getContextItems(
    query: string,
    extras: ContextProviderExtras,
  ): Promise<ContextItem[]>;

  async loadSubmenuItems(
    args: LoadSubmenuItemsArgs,
  ): Promise<ContextSubmenuItem[]> {
    return [];
  }
}
在定义上下文提供程序之前,请确定要创建哪种 "type"。
"query"类型在选择时将显示一个小文本输入,使用户有机会输入类似 Google 搜索查询的 GoogleContextProvider 内容。"submenu"类型将打开一个可以搜索和选择的项目子菜单。示例包括 GitHubIssuesContextProvider 和 DocsContextProvider。"normal"类型将立即添加上下文项。示例包括 DiffContextProvider 和 OpenFilesContextProvider。
编写您的上下文提供程序,请确保完成以下操作:
- 将其添加到 core/context/providers/index.ts 中的上下文提供程序数组中
- 将其添加到 core/index.d.ts 中的
ContextProviderName类型 - 将其添加到 config_schema.json 中的列表中。
Prompt files
Prompt (.prompt) 文件是构建和与他人共享 LLM 提示的简单方法。该格式的灵感来自 HumanLoops 的 .prompt 文件。保存在目录 extensions/vscode/.prompts 里。
语法
Preamble
--- 分隔符上方的所有内容,可让您指定模型参数。它使用 YAML 语法,目前支持以下参数:
- temperature
- topP
- topK
- minP
- presencePenalty
- frequencyPenalty
- mirostat
- stop
- maxTokens
- name
- description
如果不需要任何这些参数,则可以省略 “Preamble”,并且不需要包含 --- 分隔符。
Body
--- 分隔符下方的所有内容,包含您的提示。正文可以只是文本。
要添加系统消息,以 <system></system> 标签开始正文,并将系统消息放入其中。
Body 支持使用 Handlebars 语法 进行模板化。当前可用的变量如下:
- input:侧边栏输入框中的全文,与斜杠命令一起发送
- currentFile:IDE 中当前打开的文件(目前只支持打开一个文件时有用)
Context providers
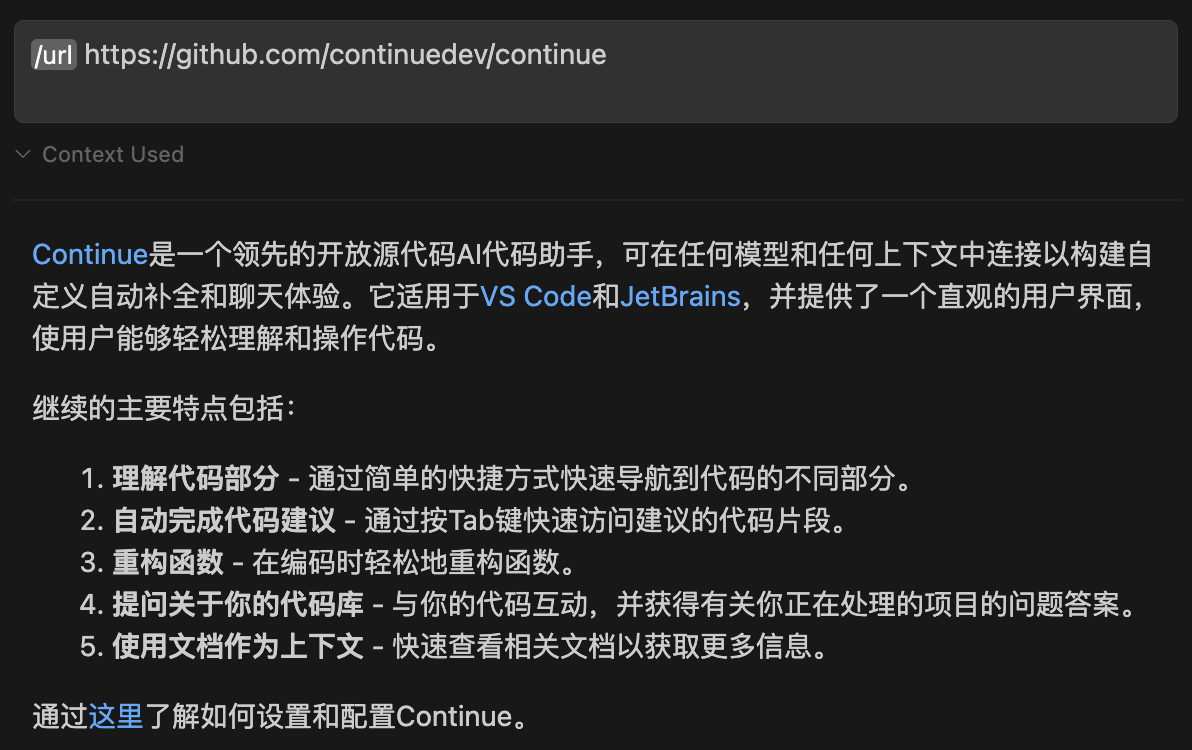
.prompt 文件的 Body 还支持您通过引用上下文提供程序的名称添加到配置中的 Context providers。
如果您想要使用 url 上下文提供程序来包含 https://github.com/continuedev/continue 的内容,您将使用},其中第二部分是上下文提供程序的参数,用空格分隔。
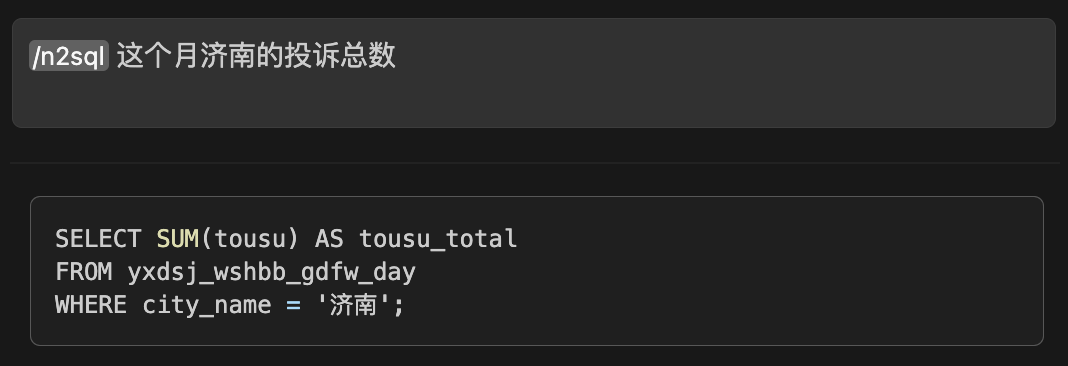
文本生成 SQL 语句
n2sql.prompt 文件
temperature: 0.5
maxTokens: 1024
name: n2sql
description: 文本生成 SQL 语句
---
<system>
你是一名数据库专家。根据以下表结构帮助用户编写 SQL 语句。
CREATE TABLE yxdsj_wshbb_gdfw_day(
  prov_name varchar(200) DEFAULT NULL COMMENT '省公司名称',
  city_name varchar(200) DEFAULT NULL COMMENT '地市公司名称',
  county_name varchar(200) DEFAULT NULL COMMENT '区县公司名称',
  tousu int(11) DEFAULT NULL COMMENT '投诉数量',
  yijian int(11) DEFAULT NULL COMMENT '意见数量',
  acpt_time varchar(200) DEFAULT NULL COMMENT '受理时间',
  tousu_bwhl  varchar(200) DEFAULT NULL COMMENT '投诉百万户量',
  yijian_bwhl  varchar(200) DEFAULT NULL COMMENT '意见百万户量'
)
</system>

}

根据上面的输入生成 SQL 语句
起名字
name.prompt 文件
temperature: 0.5
maxTokens: 256
name: name
description: 起名字
---
<system>
你是一名起名字的专家
</system>

}

根据上面的输入起名字
- 起一个有意义的名字
- 提示至少三个名字
- 名字应该有创意
总结网页内容
url.prompt 文件
temperature: 0.5
maxTokens: 4096
name: url
description: 总结网页信息
---
<system>
你是一名专业的文学家,你需要总结网页的信息。
</system>

}

总结:
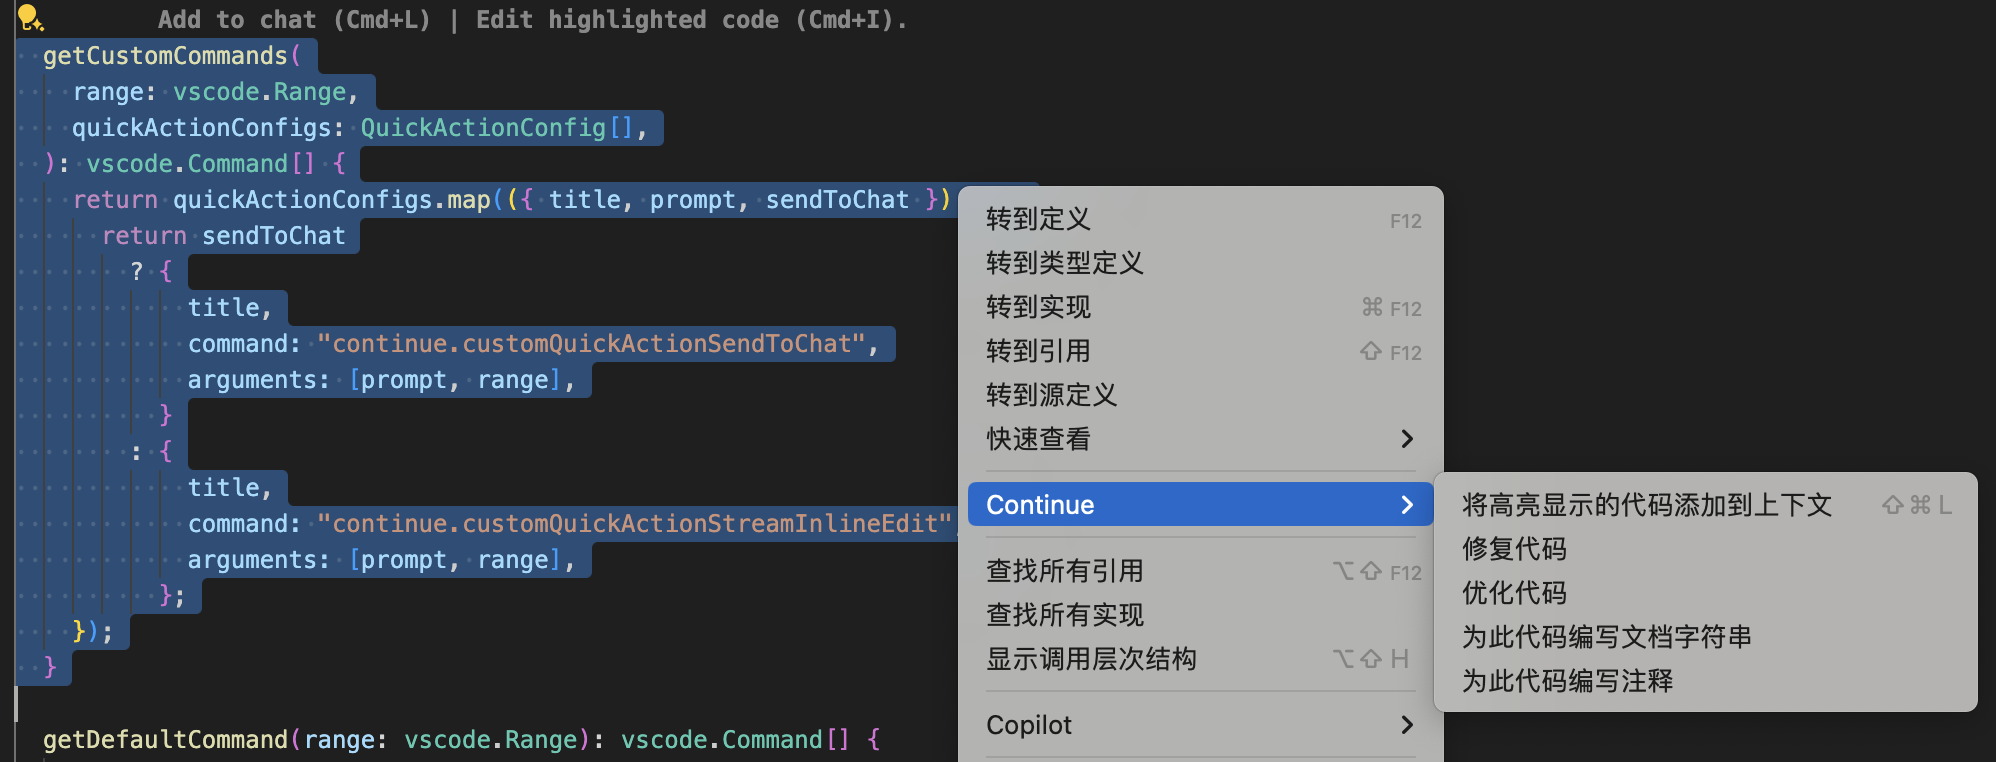
Quick Actions
快速操作使用 CodeLens 提供程序在代码中的函数和类上方添加交互元素。代码参考:extensions/vscode/src/lang-server/codeLens/providers/QuickActionsCodeLensProvider.ts
启用/禁用快速操作
要禁用快速操作,请打开设置菜单 (⌘ + ,),搜索"continue.enableQuickActions",然后切换复选框以禁用。
自定义快速操作
通过 ~/.continue/config.json 文件配置自定义快速操作。
单元测试
在选定的代码上方生成并插入单元测试的快速操作。
{
  "experimental": {
    "quickActions": [
      {
        "title": "Unit test",
        "prompt": "Write a unit test for this code. Do not change anything about the code itself.",
      }
    ]
  }
}
详细解释
将提示和代码发送到聊天面板,以提供详细解释。
{
  "experimental": {
    "quickActions": [
      {
        "title": "Detailed explanation",
        "prompt": "Explain the following code in detail, including all methods and properties.",
        "sendToChat": true
      }
    ]
  }
}
编程语言支持
对于您打开的文件的语言,您必须安装语言服务器协议(Language Server Protocol)扩展。
| 语言 | 扩展 |
|---|---|
| JavaScript | JavaScript and TypeScript Nightly |
| TypeScript | JavaScript and TypeScript Nightly |
| Python | Python |
| Java | Language Support for Java(TM) by Red Hat |
| C/C++ | C/C++ |
| Rust | rust-analyzer |