macOS 图像转为 WebP 格式工具使用说明
本工具是一个专为 macOS 设计的自动化脚本,它能帮助您将选择的图片转换为 WebP 格式。
该工具设计为通过 macOS 的“快速操作”或 Automator 工作流程来调用,从而实现便捷的图像转换操作。
- 作为“快速操作”使用:
- 设置“快速操作”: 您需要将提供的脚本保存为 Automator 工作流程的“快速操作”。
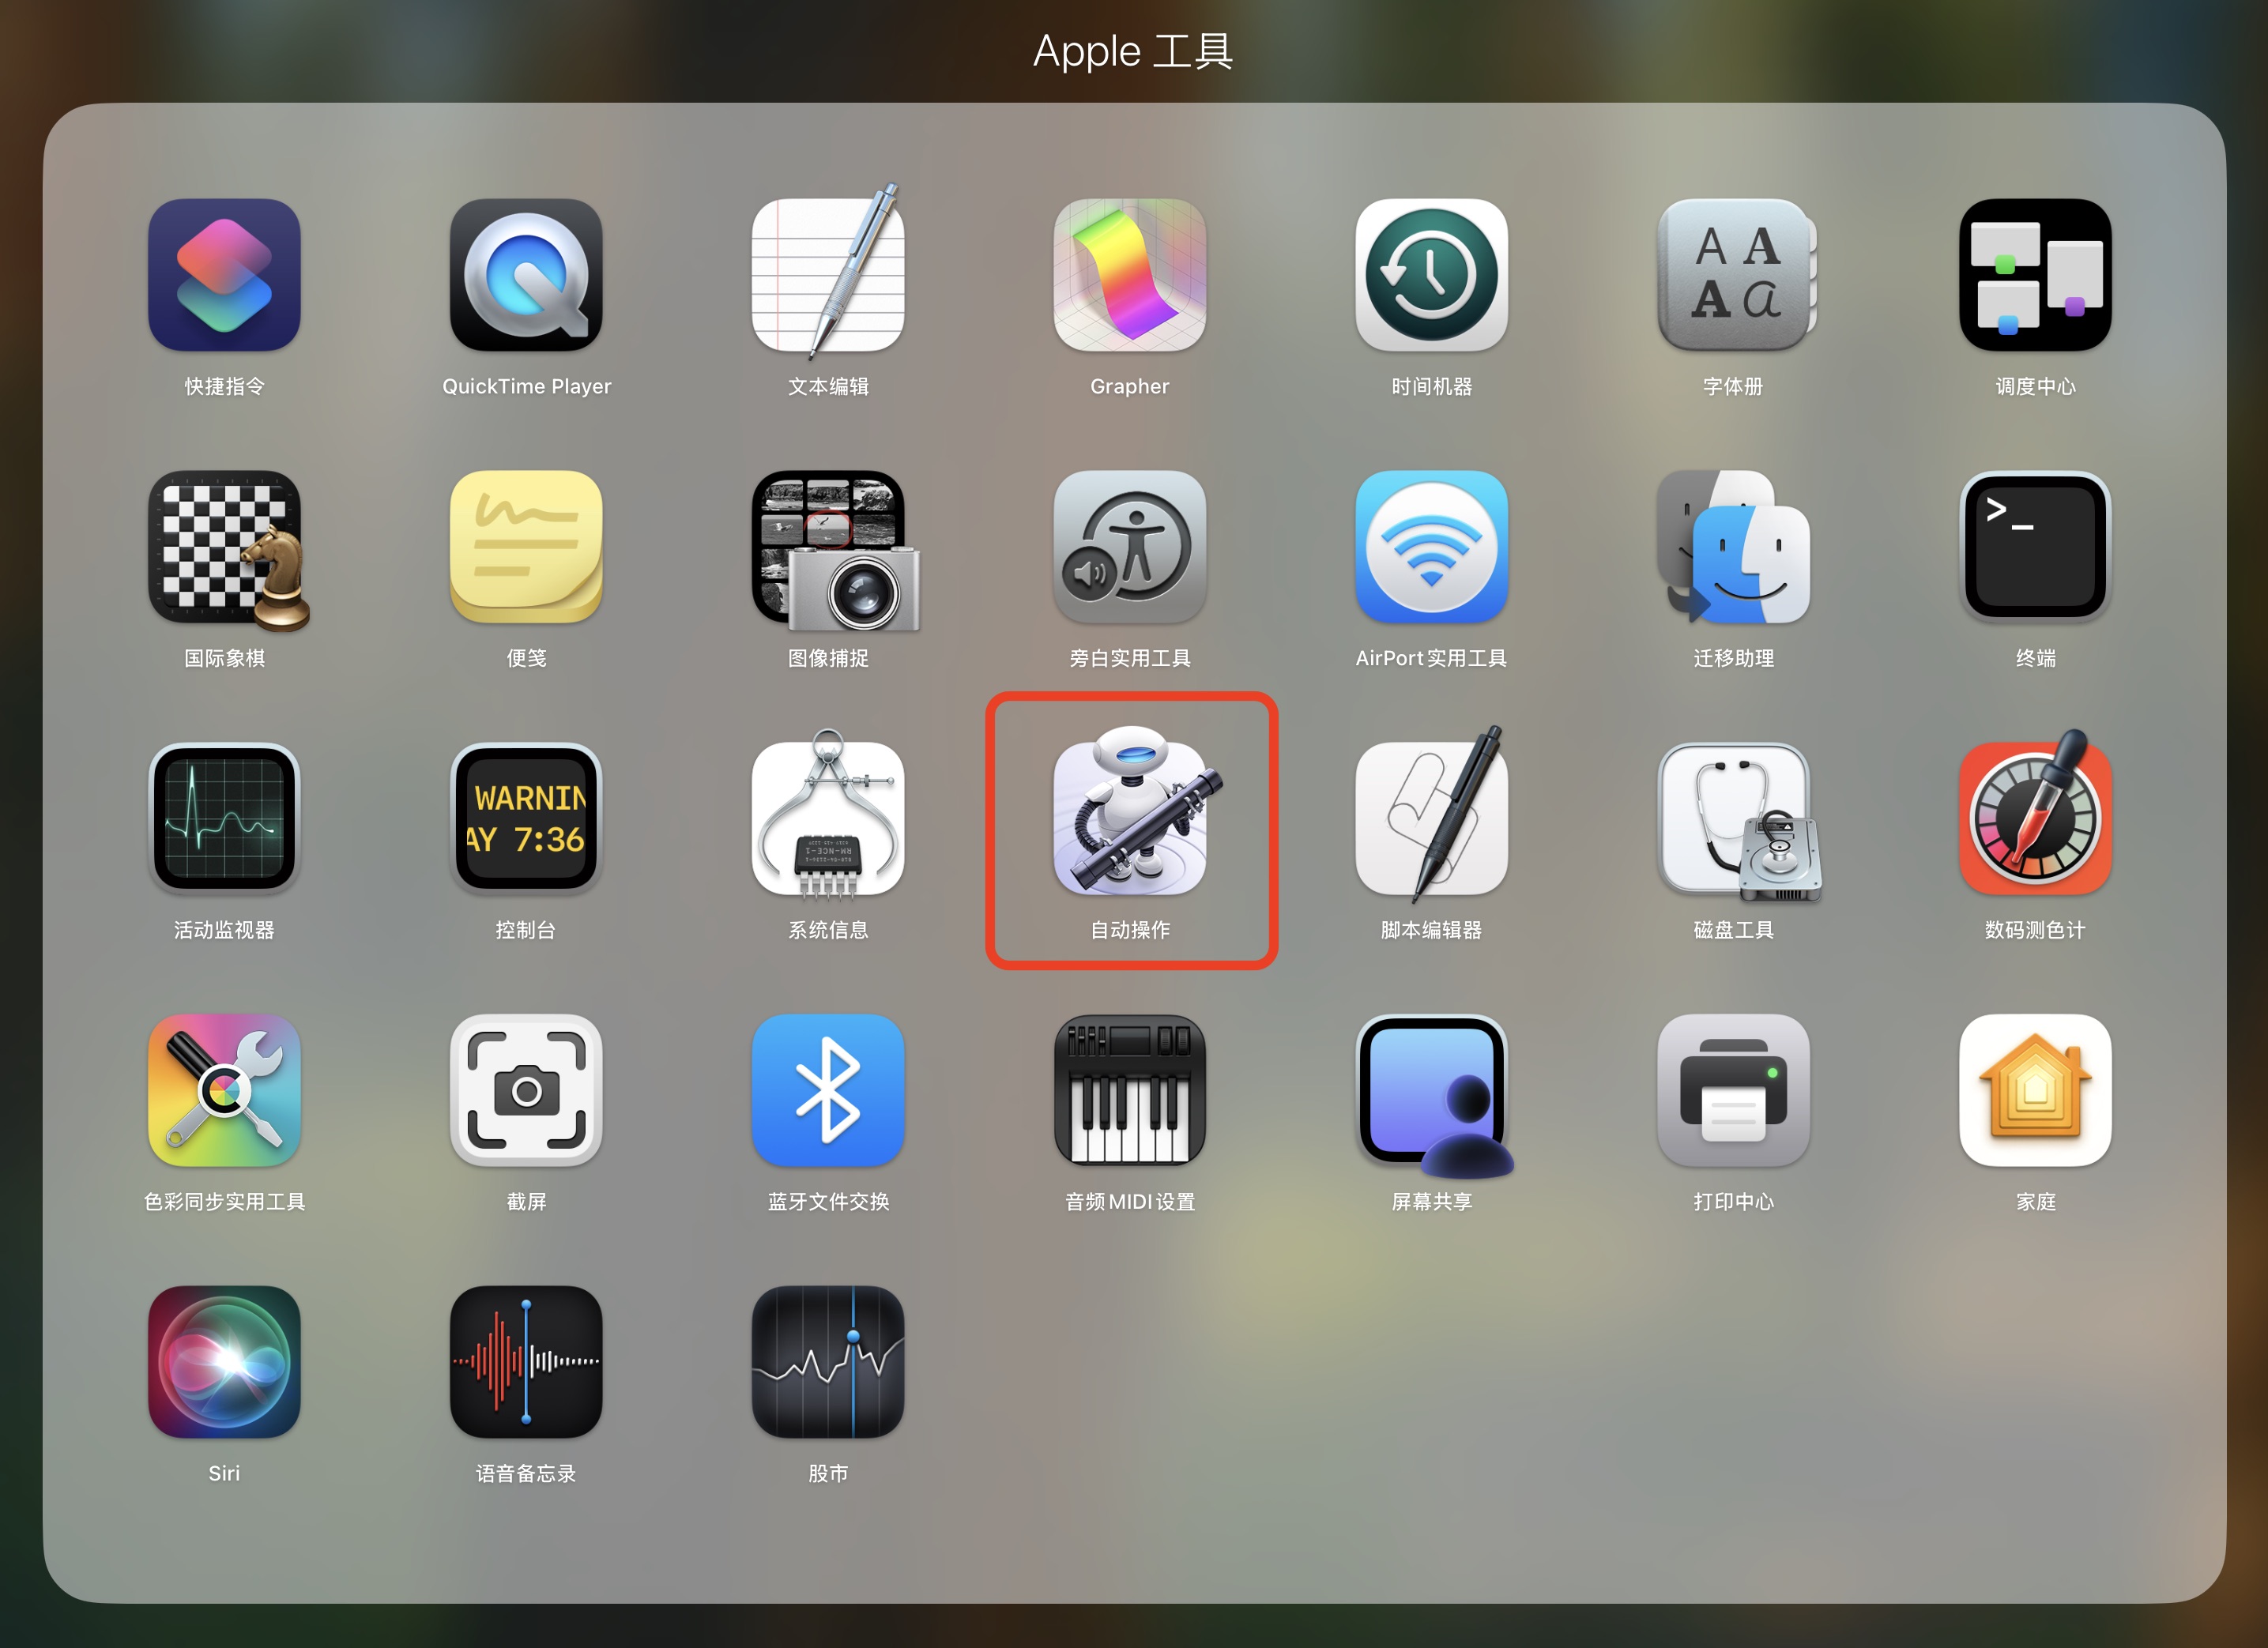
- 打开 Automator 应用(在“应用程序” -> “实用工具”中)。
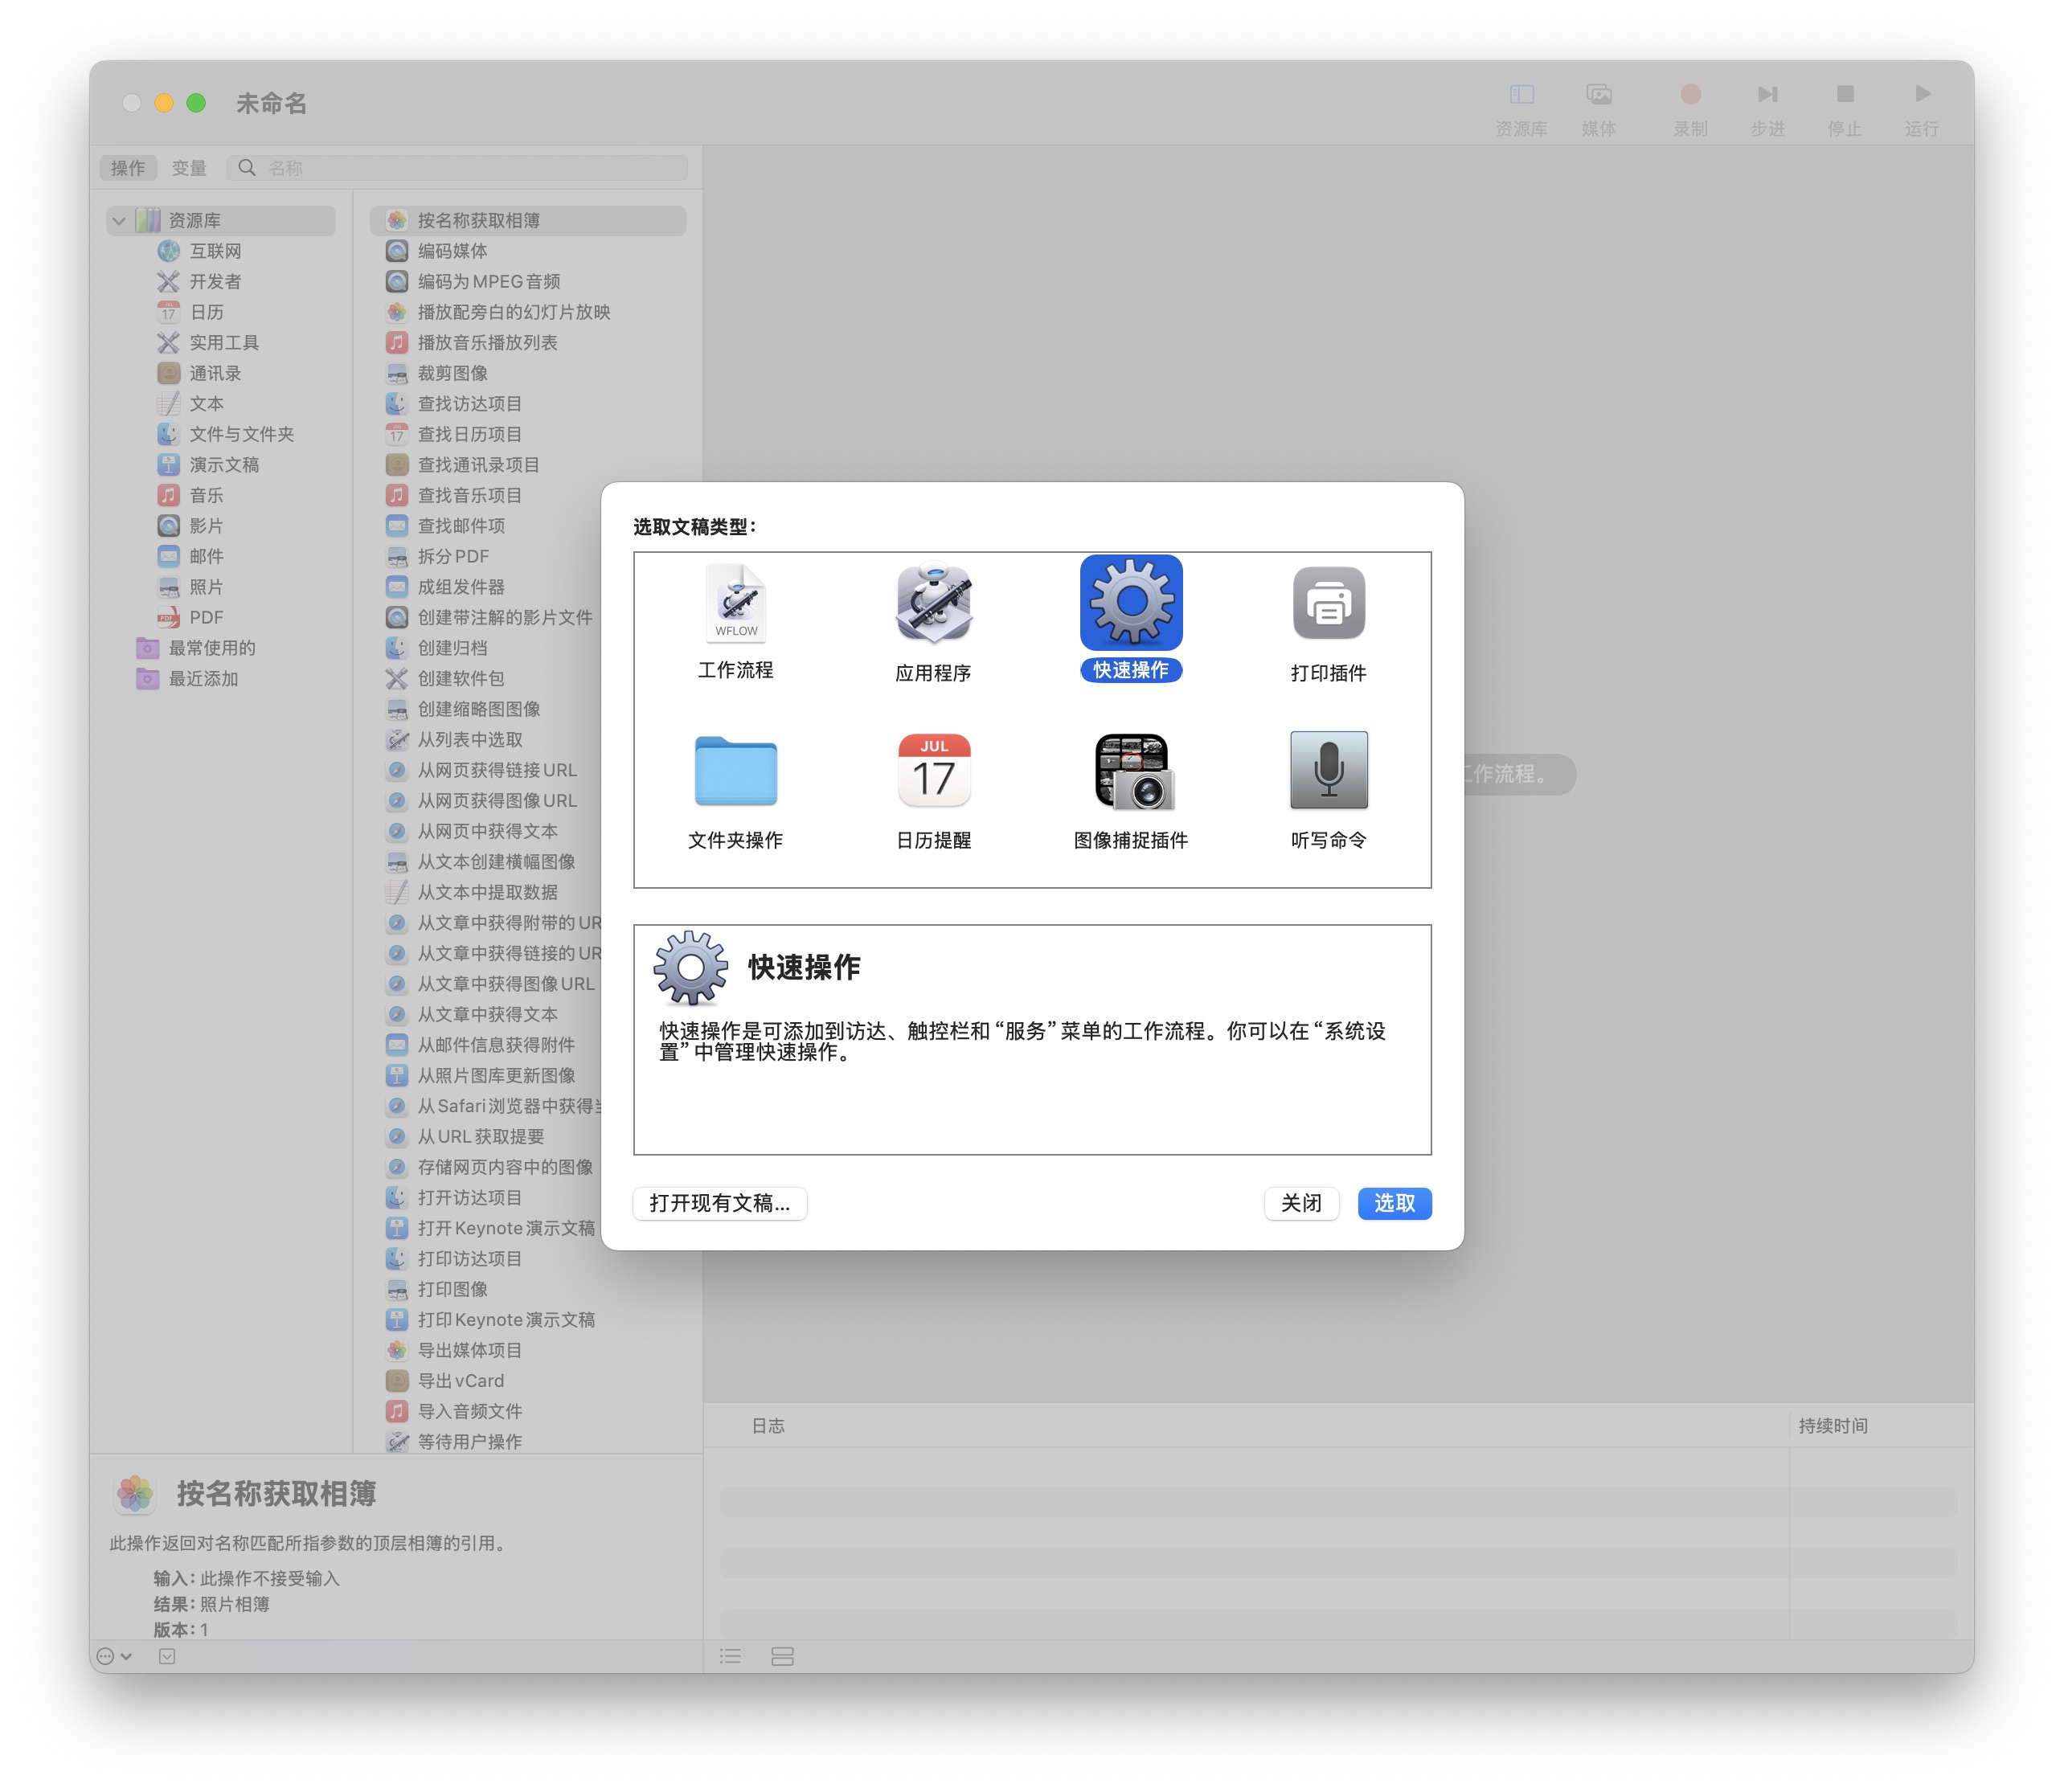
- 选择 “文件”>“新建”。
- 选择 “快速操作” 并点击“选取”。
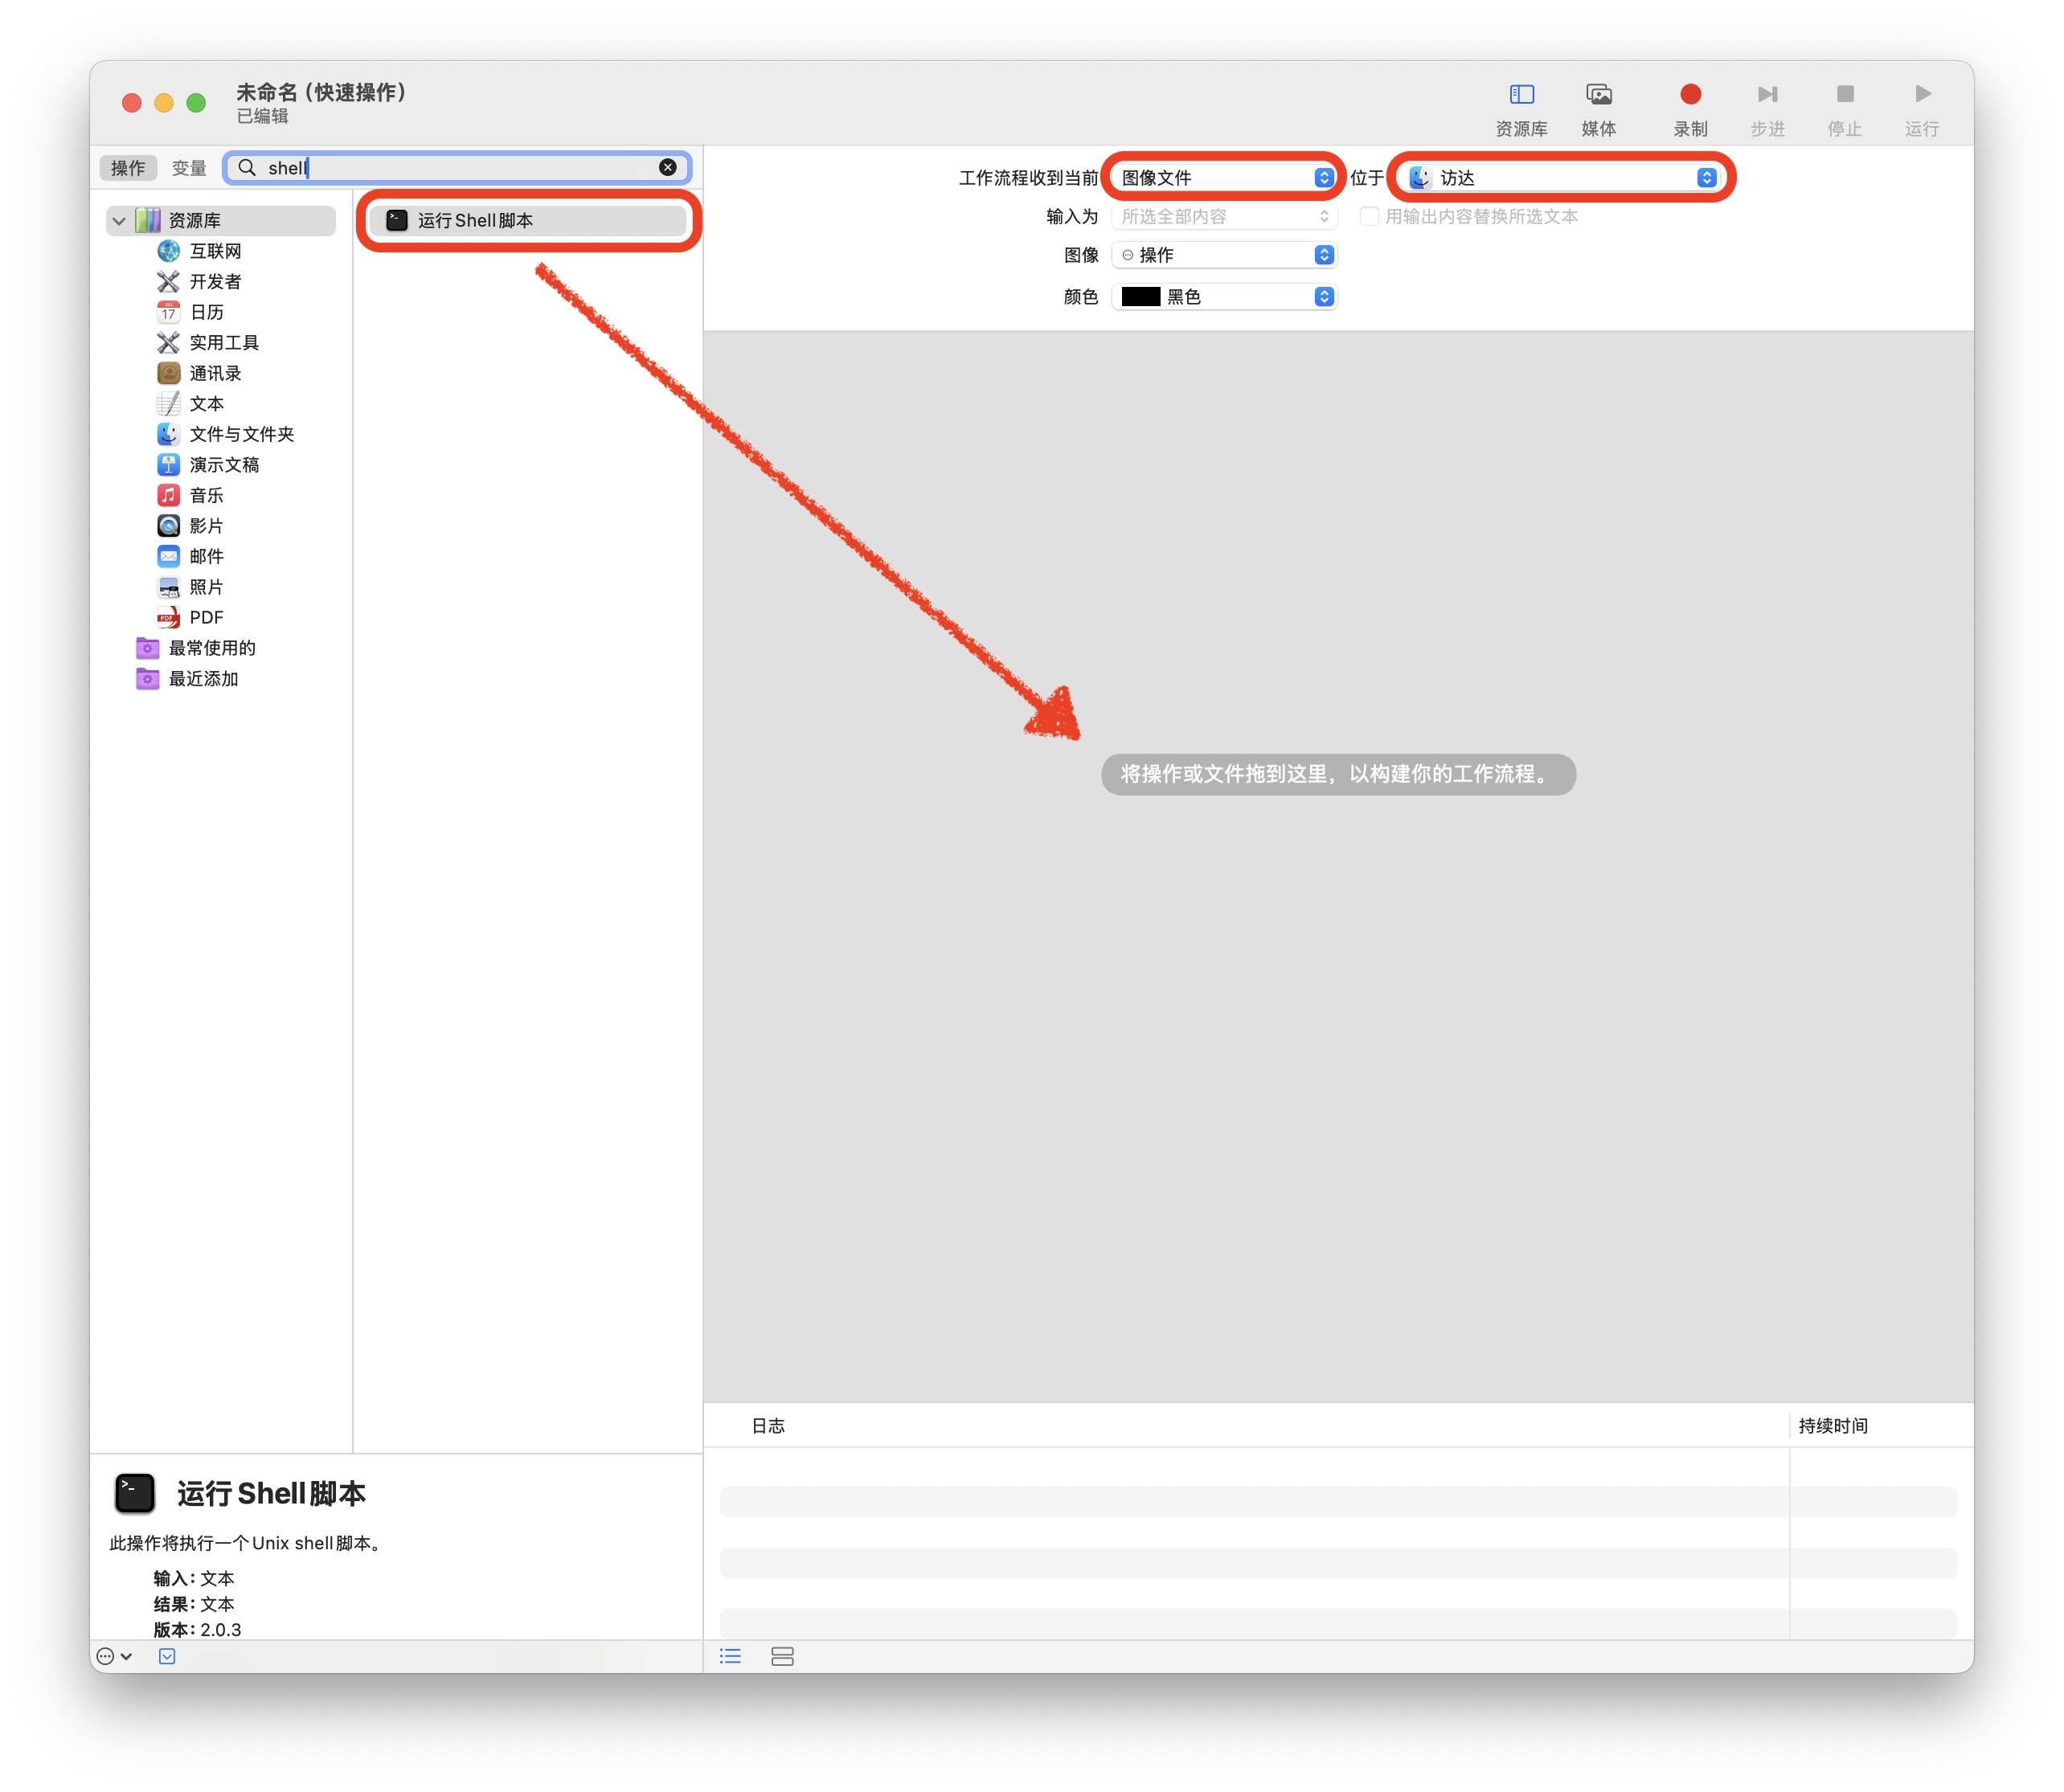
- 在左侧的库中,搜索并拖动 “运行 Shell 脚本” 到右侧的工作流程区域。
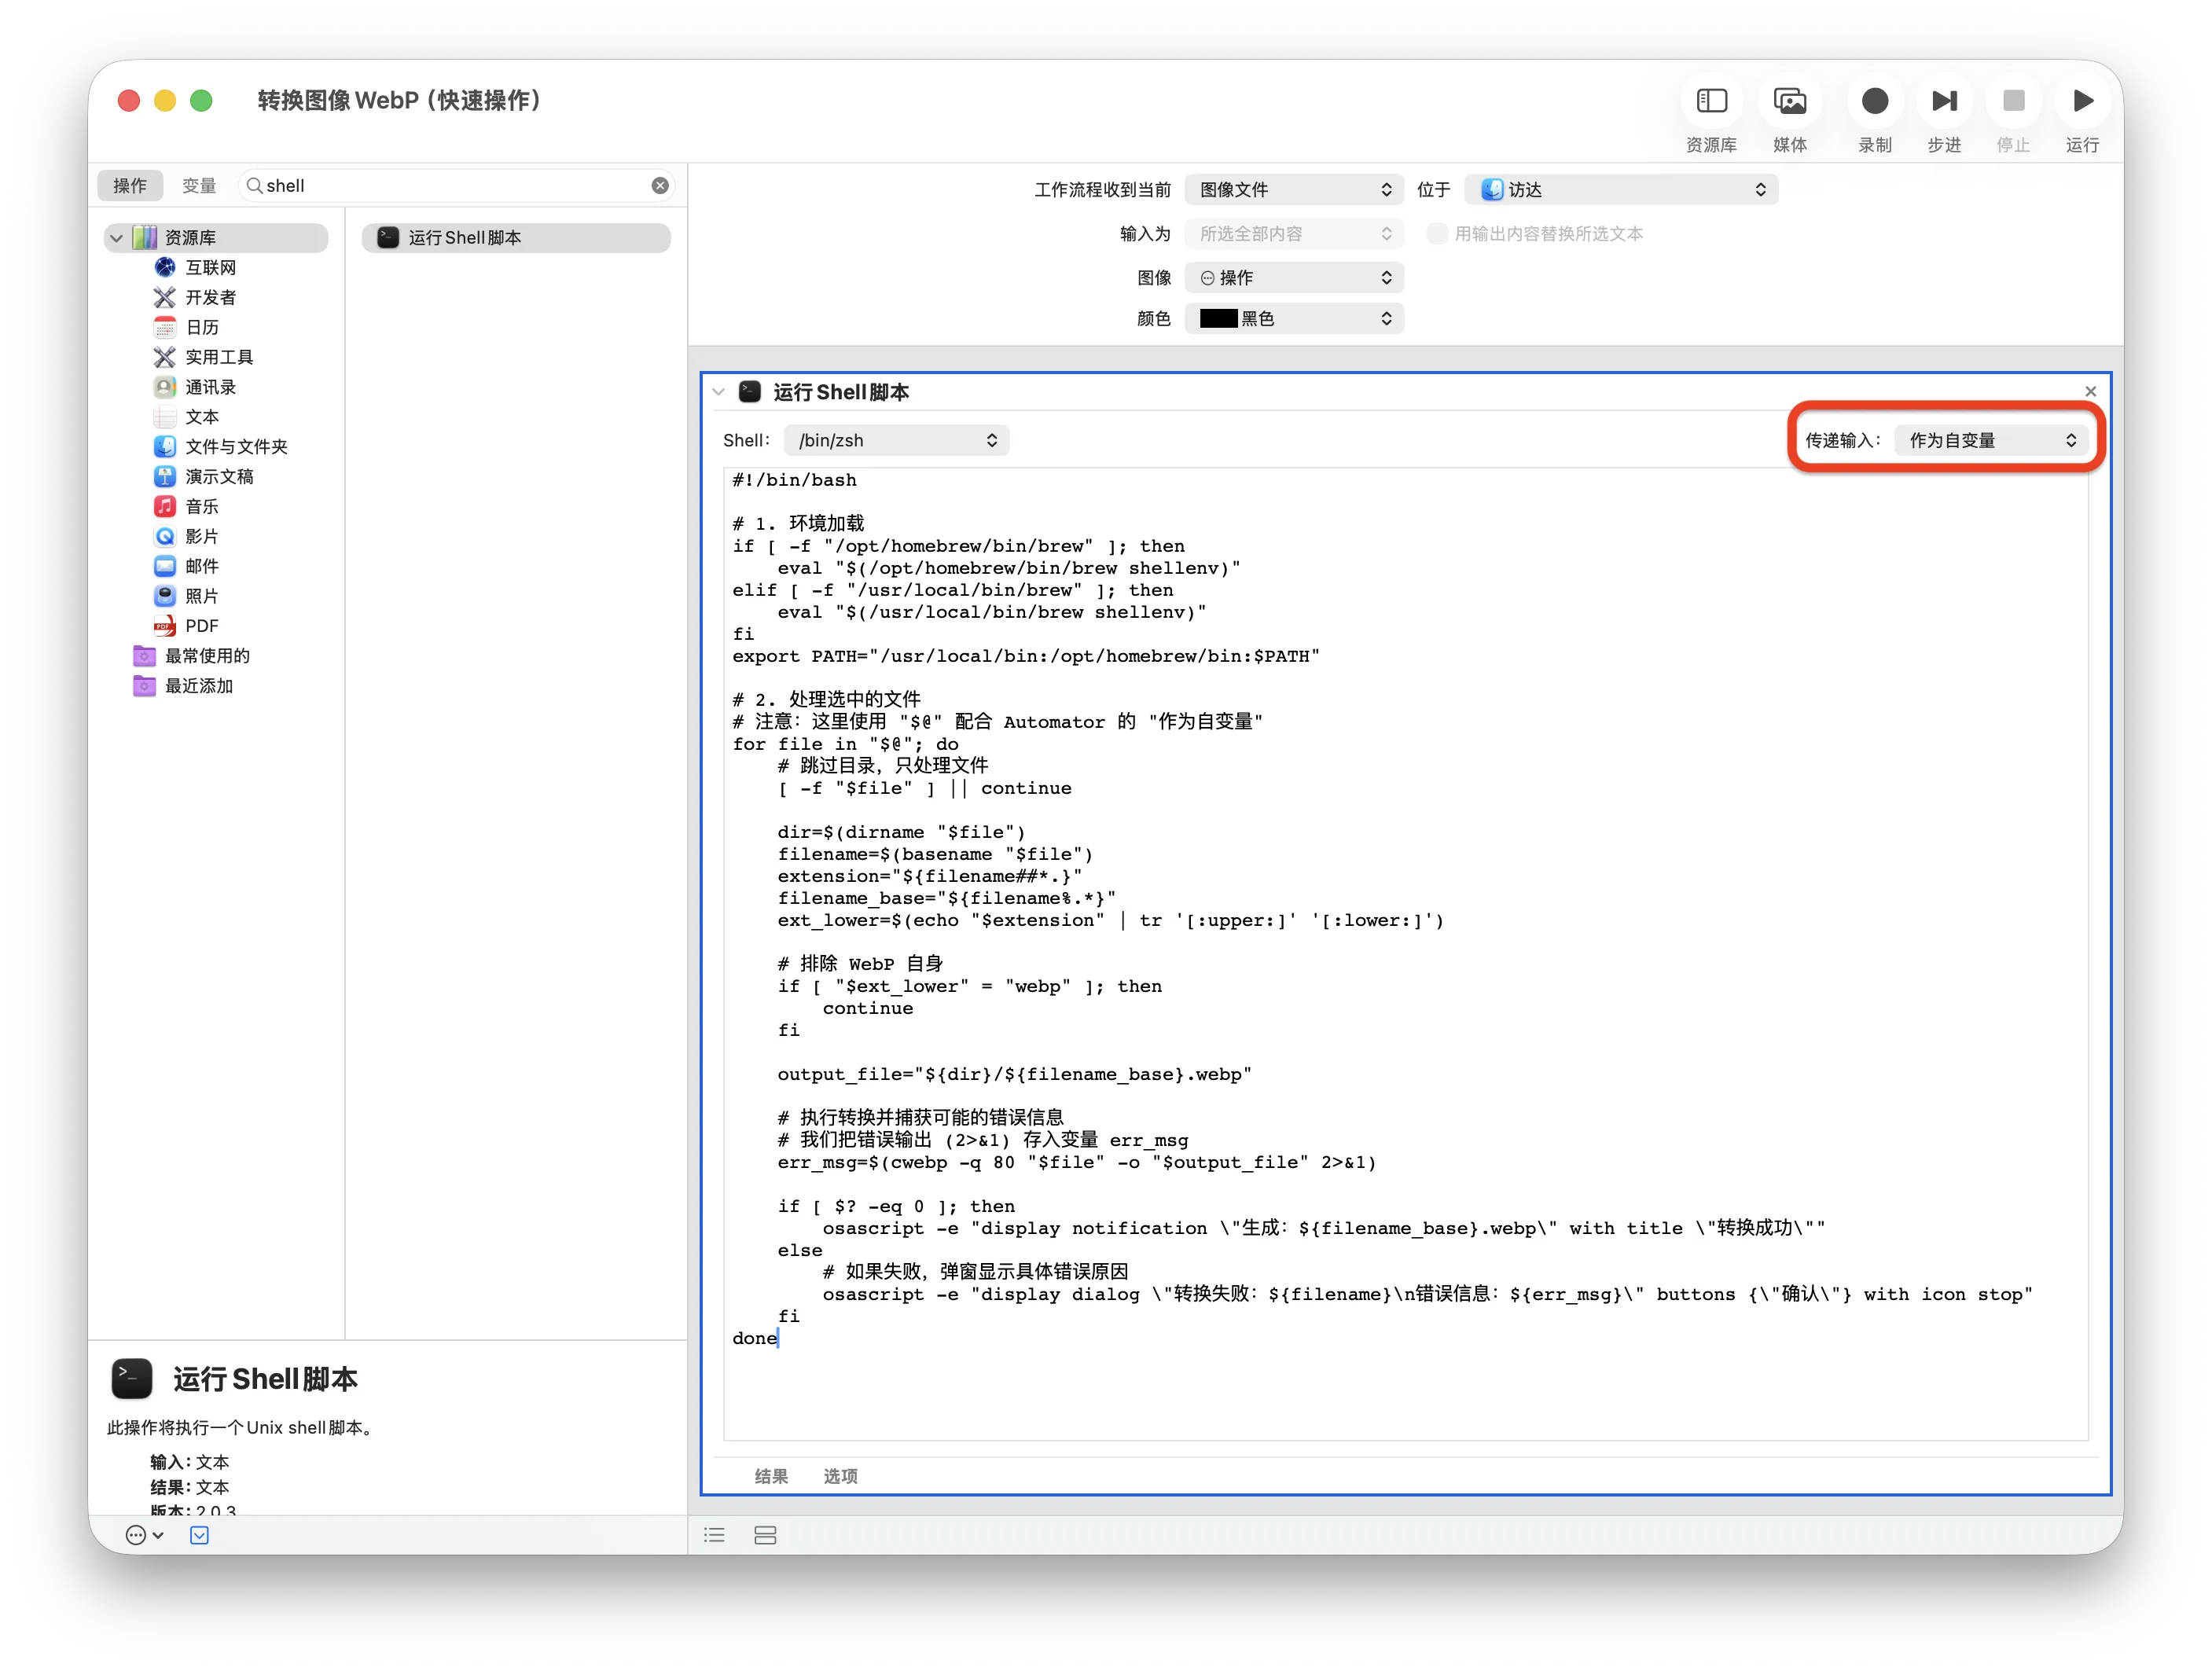
- 在“运行 Shell 脚本”模块中,将“传递输入”设置为 “作为自变量”。
- 将本工具的完整代码粘贴到“运行 Shell 脚本”的文本框中。
- 选择 “文件”>“存储”,为您的快速操作命名,例如“图像转换为 WebP”。
- 使用方法:
- 打开 Finder,导航到您要转换的图片所在的文件夹。
- 选中您希望转换的所有图片(请确保至少选择一张)。
- 右键点击选中的图片,或者点击 Finder 窗口顶部的“服务”菜单。
- 在上下文菜单中,找到并点击您刚才创建的“快速操作”名称,例如 “图像转换为 WebP”。
- 一个对话框会弹出,询问您希望转换为哪种格式。选择您的偏好。
- 工具将自动处理图片,并将转换后的新图片保存在您选中的图片所在的相同文件夹中。
- 设置“快速操作”: 您需要将提供的脚本保存为 Automator 工作流程的“快速操作”。
打开自动操作(Automator)
创建快速操作
配置工作流程
Shell 脚本
#!/bin/bash

# 1. 环境加载
if [ -f "/opt/homebrew/bin/brew" ]; then
    eval "$(/opt/homebrew/bin/brew shellenv)"
elif [ -f "/usr/local/bin/brew" ]; then
    eval "$(/usr/local/bin/brew shellenv)"
fi
export PATH="/usr/local/bin:/opt/homebrew/bin:$PATH"

# 2. 处理选中的文件
# 注意:这里使用 "$@" 配合 Automator 的 "作为自变量"
for file in "$@"; do
    # 跳过目录,只处理文件
    [ -f "$file" ] || continue

    dir=$(dirname "$file")
    filename=$(basename "$file")
    extension="${filename##*.}"
    filename_base="${filename%.*}"
    ext_lower=$(echo "$extension" | tr '[:upper:]' '[:lower:]')

    # 排除 WebP 自身
    if [ "$ext_lower" = "webp" ]; then
        continue
    fi

    output_file="${dir}/${filename_base}.webp"

    # 执行转换并捕获可能的错误信息
    # 我们把错误输出 (2>&1) 存入变量 err_msg
    err_msg=$(cwebp -q 80 "$file" -o "$output_file" 2>&1)

    if [ $? -eq 0 ]; then
        osascript -e "display notification \"生成:${filename_base}.webp\" with title \"转换成功\""
    else
        # 如果失败,弹窗显示具体错误原因
        osascript -e "display dialog \"转换失败:${filename}\n错误信息:${err_msg}\" buttons {\"确认\"} with icon stop"
    fi
done